Reports
Log-in to BI Hub Agilent platform as a Power user to manage and configure the report infrastructure. The My Organization > Reports section has the following features:
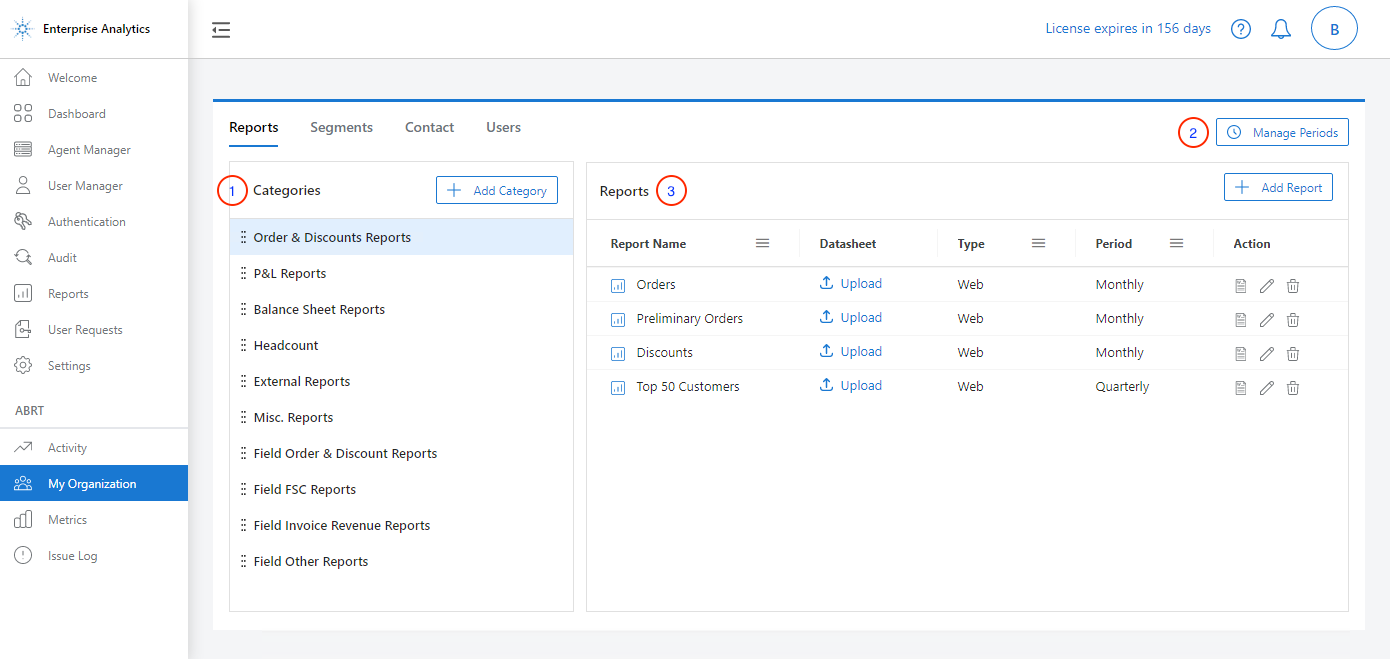
Reports Management
- Categories: Group and categorize similar reports as per functional/business needs.
- Manage Periods: Each report is traced based on the time-period.
- Reports Management: Report management (add/download/delete).
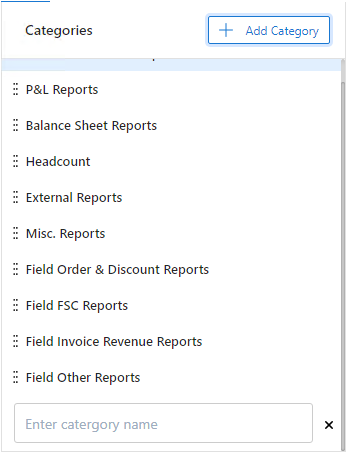
Categories#
To define a new category of reports, click Add Category, enter the category name in the box and hit Enter. Use the "Edit" ( ![]() ) icon to rename a category and "Delete" (
) icon to rename a category and "Delete" ( ![]() ) icon to remove a category from the list.
) icon to remove a category from the list.
Manage Categories
Admins can group similar reports based on the above-defined categories.
warning
If you delete a category all the associated reports and their instances will also be deleted. You can still download the deleted reports from the Download Reports Activity section.
Manage Periods#
Time-periods are managed under My Organization > Reports > Manage Periods section.
The periods are classified as "Monthly", "Quarterly", and "Yearly" labels. Click on the appropriate tab, and click Add Period to enter the Period title (Period name) and click Save.
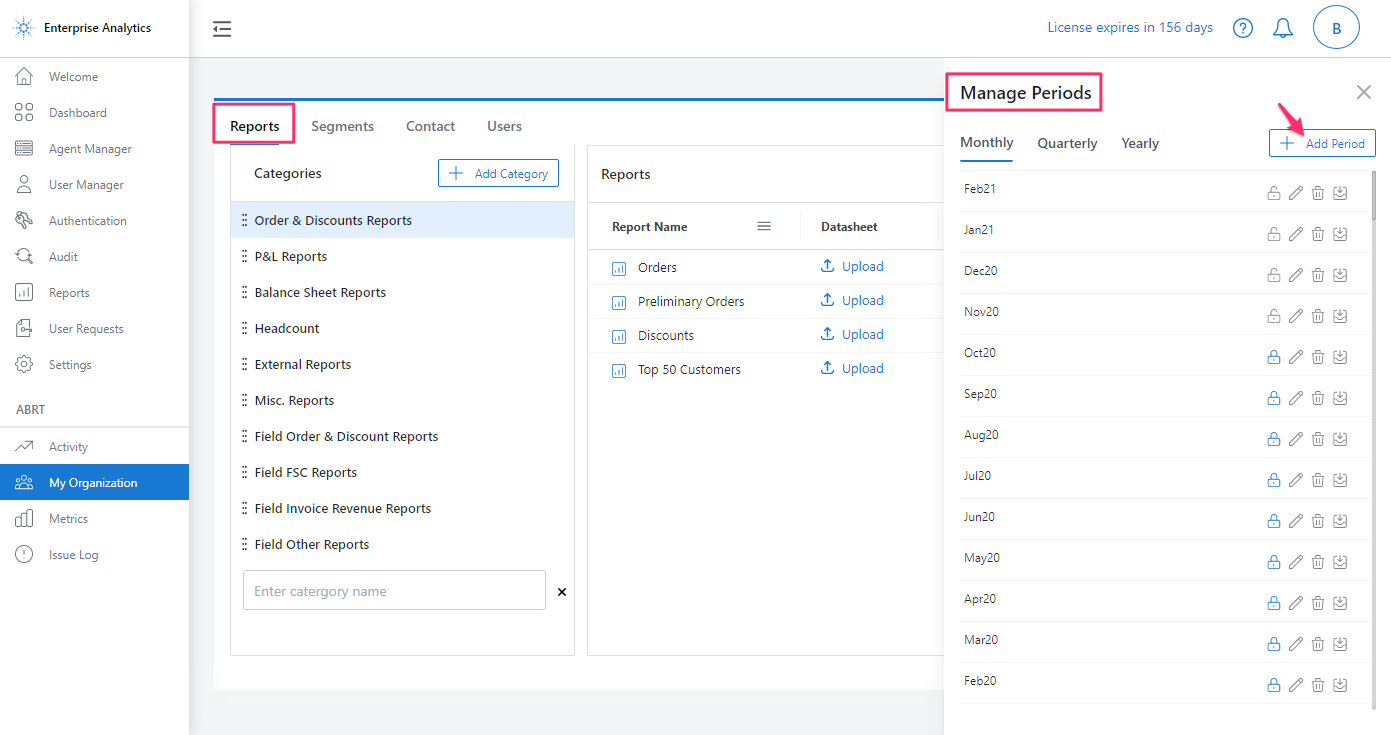
Manage Periods
Once the periods are defined for each label, an Admin can:
- Freeze (
 ): Freeze a period(s) to prevent report uploads for the frozen period. All the periods earlier than 'Nov20' are frozen in the above screenshot.
 - Edit (
 ): Edit the period's name. The reports uploaded to the edited periods are not affected.
 - Delete (
 ): Delete a period(s) permanently. The reports associated with the deleted period will be lost.
 - Archive (
 ): Archive a period(s) to restrict the download and uploading reports for the selected period(s).
Admins can now upload the reports to respective periods added in this section.
Reports Management#
The Reports section allows the Admins to create a basic centralized CMS-like infrastructure for the reports.
A snapshot instance of the report is created, managed, and organized across different segments and periods.
Admins must upload/delete the reports following the same combinations of report-segment-period.
There are 2 types of reports:
Web Reports
Admin uploads the reports following a
<Report Name>_<Segment Name>_<Period>matrix. Admin then grants access to the users to download the report(s).Mobile Reports
Users cannot download the mobile reports directly from Agilent web app. The users must explicitly subscribe to these reports. The users receive the subscribed mobile reports in the email.
Add Report#
Add a report and define the attributes(values).
- Select a Category to add and group similar reports.
- Click Add Report, and enter Report Name, Report Type (Web or Mobile), Period Type (Monthly, Quarterly, Yearly), and Start Period (no periods beyond the selected time-period).
1. Create a Web Report#
Select the Report Type as "Web" and enter all the field values.
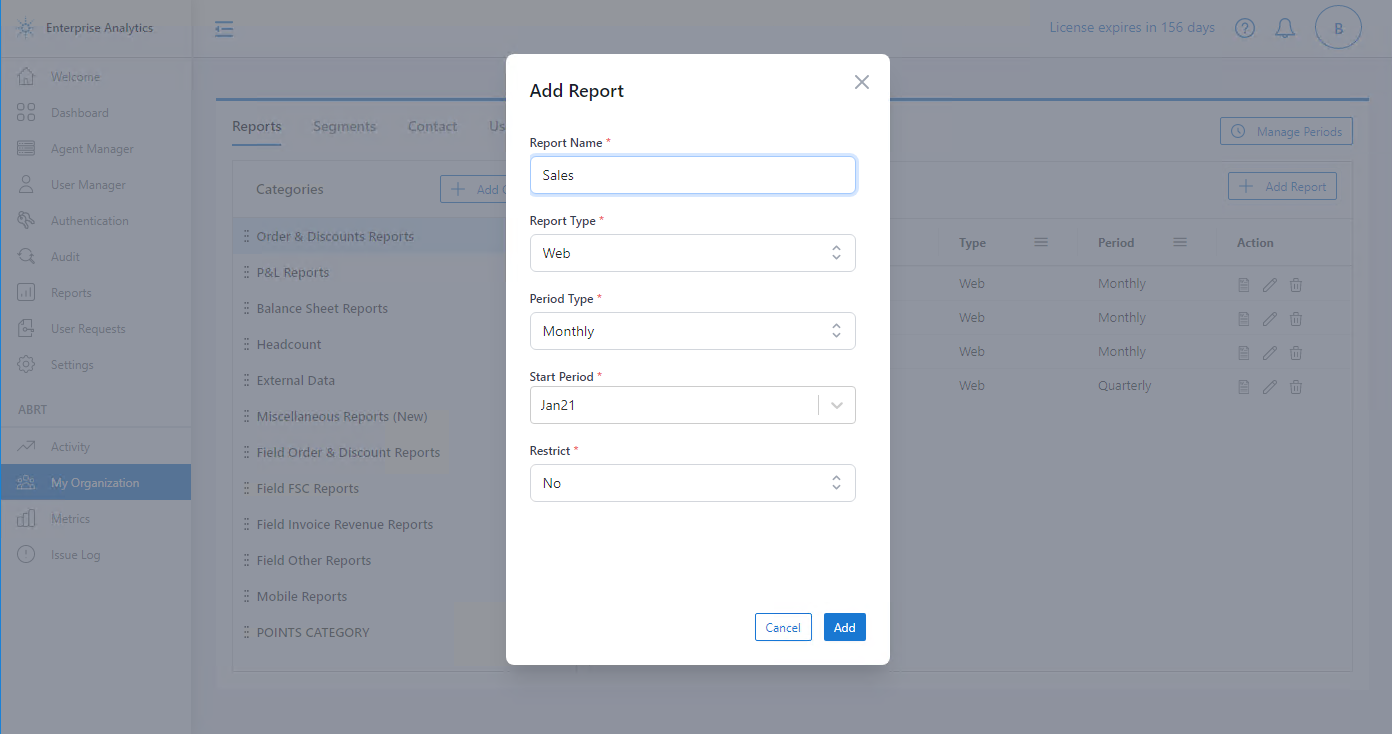
Create a Web report
A new web report named "Sales" is created in the "Order & Discounts Reports" category.
2. Create a Mobile Report#
Select the Report Type as "Mobile".
Parent Report Name is a mandatory field. Select an existing web report name as the parent.
Each mobile (child) report binds to its parent web report. You can have multiple mobile reports linked to a single web report.
Select Frequency: of the mobile upload.
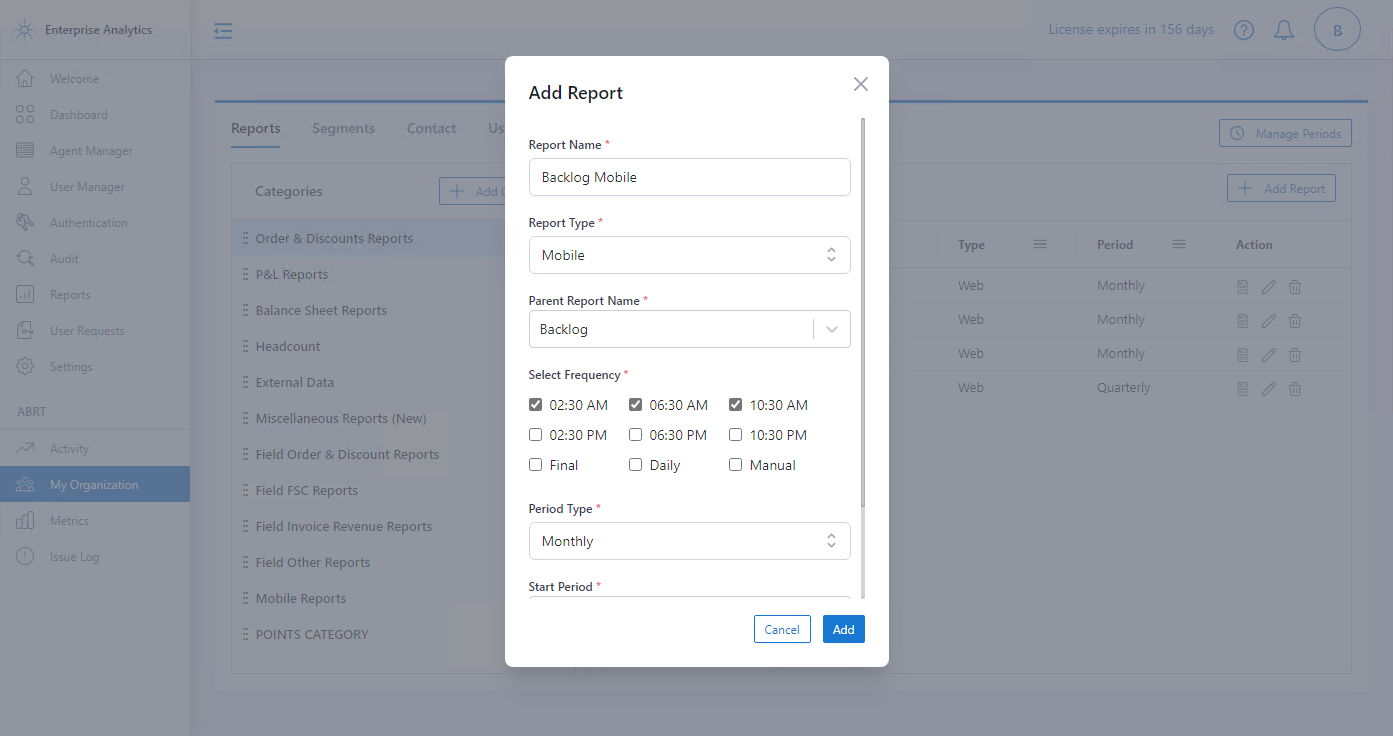
Create a Mobile report
Reports and their attributes#
Here is a list of Web and Mobile reports:
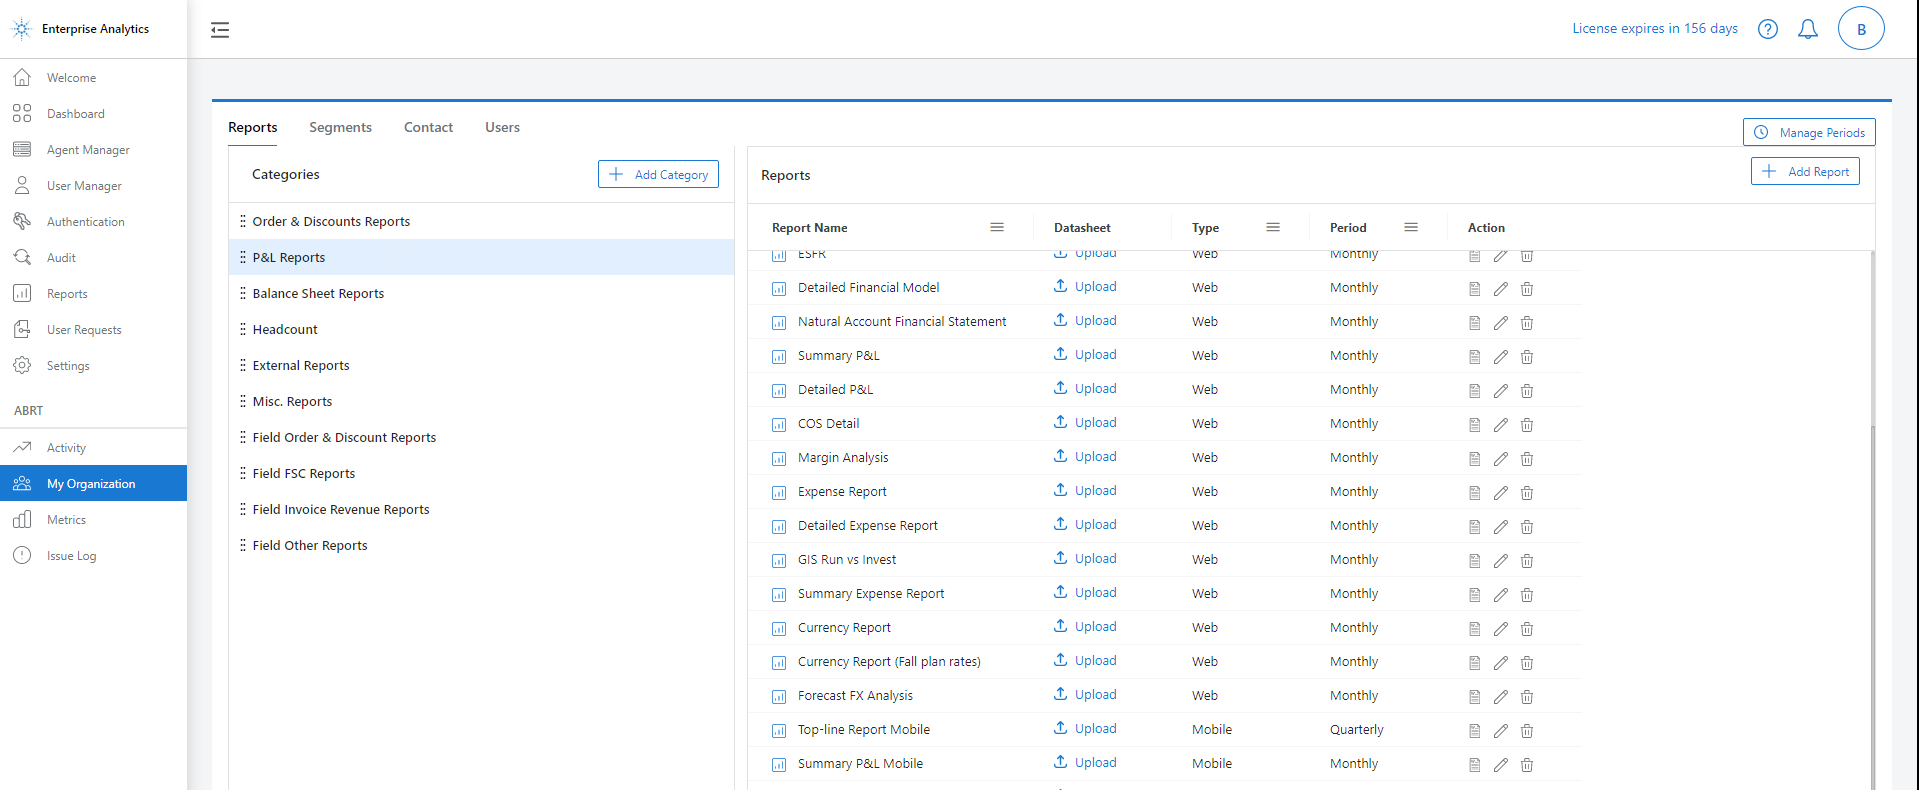
Web and Mobile reports created
| Field | Description |
|---|---|
| Report Name | Name of the report |
| Datasheet | Document framework explaining what the report should contain. Click Upload ( |
| Type | Web or Mobile |
| Period | Monthly/Quarterly/Yearly |
| Action |
|
warning
If you delete a web report that is linked (parent) to a mobile report(s), this will also delete the child mobile report(s).
Next Steps#
An Admin must grant access to reports in the respective segments after creating the reports.
Download Report#
To download any report, select Download Report in the My Organization > Reports section.
Select the correct mapping to locate the report file uniquely and select Download.
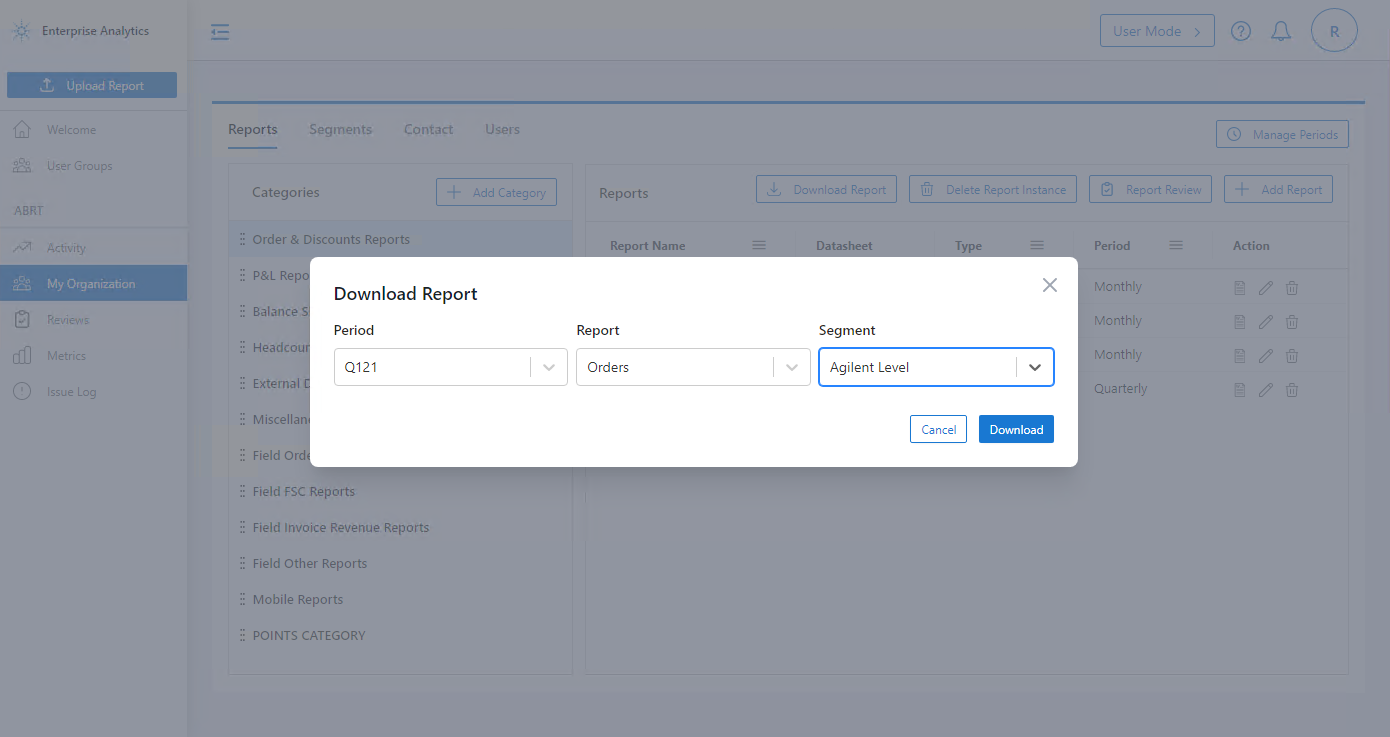
Download Report
The correct combination of Report Name, Segment, Period will fetch and download the desired report.

If the download fails with the below message, ensure you have entered the correct parameters.
In the download the ABRT reports section, view the periods for which the reports are available.

Delete Report Instance#
Deleting a report instance will only delete the chosen instance of the report from the selected segment and period. The same report name may still exist in other segments/periods.
Select My Organization from the left navigation pane, and select Reports.
Select Delete Report Instance.
In the pop-up window, select the right combination of the Period(s), Report, Segment and select Delete.
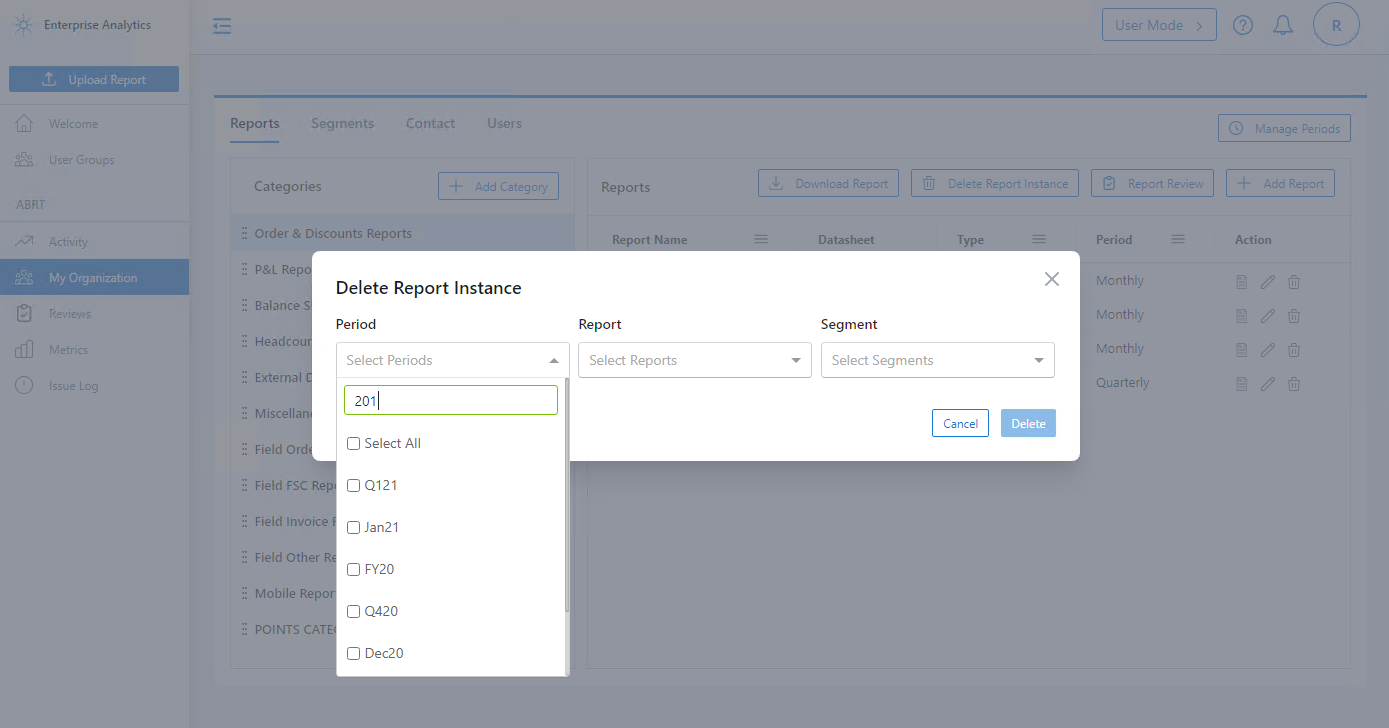
Delete Report Instance
You can select multiple Periods, reports, and segments. Only the reports common to all the segments and periods will be selected and deleted.
tip
To delete a Report from all the segments/periods - select the Report name, and select all Period/Segment.
warning
Do not select all the parameters, as you may lose crucial reports.
Troubleshoot#
An admin can recover a deleted report from the Activity section.