Agent Management
In the Agent Manager screen, an Admin can:
- Add Agent: Add new Agent(s) configured in BI platform.
- Edit Agent: Agent's Name, Server, and Port details.
- Delete Agent: Delete Agent(s) configured in BI platform.
- Sync Users: Synchronize Users between Agent and BI Hub.
- Sync Reports: Synchronize Reports with the BI Hub users
- Instance Manager: Manage(add/edit/delete) instances of an Agent.
Add Agent#
To add a new agent, admin must select Add Agent and assign Agent Name, Server URL, and Port number. [ refer the Add Agent section. ]
Edit Agent#
To change the installation Server url or the Port number:
Select the Agent name and select Edit.
You can edit the Agent details such as - Agent Name, Server URL, and the Agent Port number.
Select Save.

Edit Agent screen
Delete Agent#
Select the Agent name and click Delete. In the popup screen, click Delete to confirm.
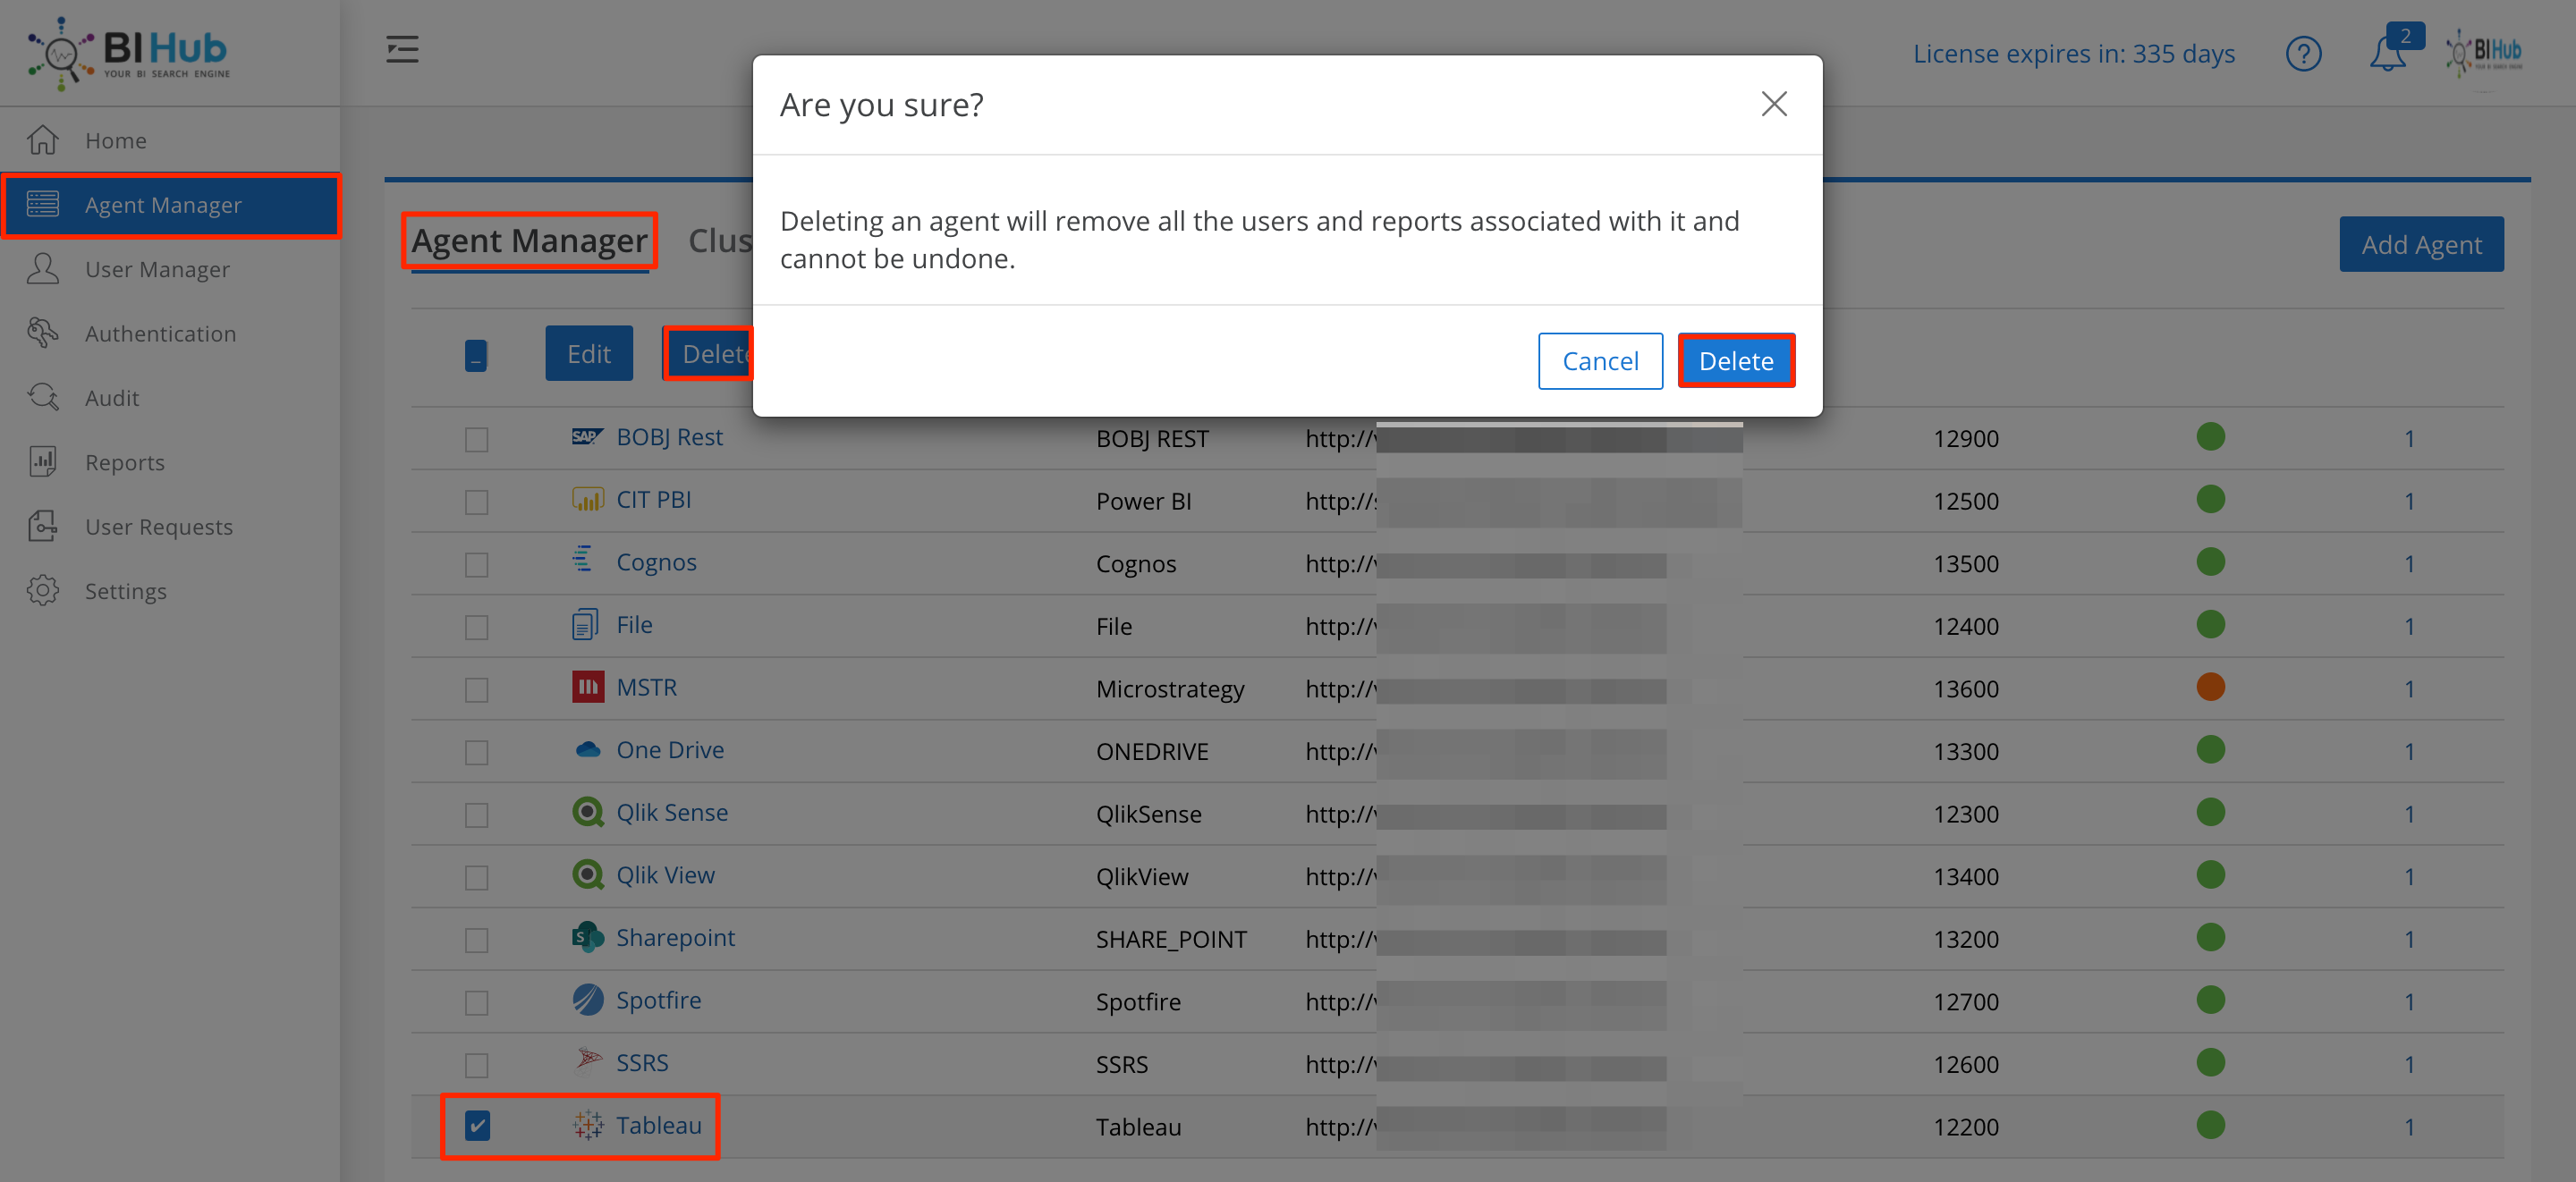
Delete Agent screen
Deleting an agent will remove all the users and reports associated with it and cannot be undone.
Sync Users between Agent and BI Hub#
This feature is used by an administrator to import users from the BI platform into the portal. It is only used in scenarios when the BI platform stores all the user information and users are authenticated using the BI platform and not a directory service like Microsoft AD/LDAP.
An Admin can either synchronize users for a single Agent or multiple Agents.
Sync Users for a single Agent: Select the Agent and click Sync Users.

Sync users for a single Agent
Sync users for multiple Agents: Select all the agents and then select Sync Users.
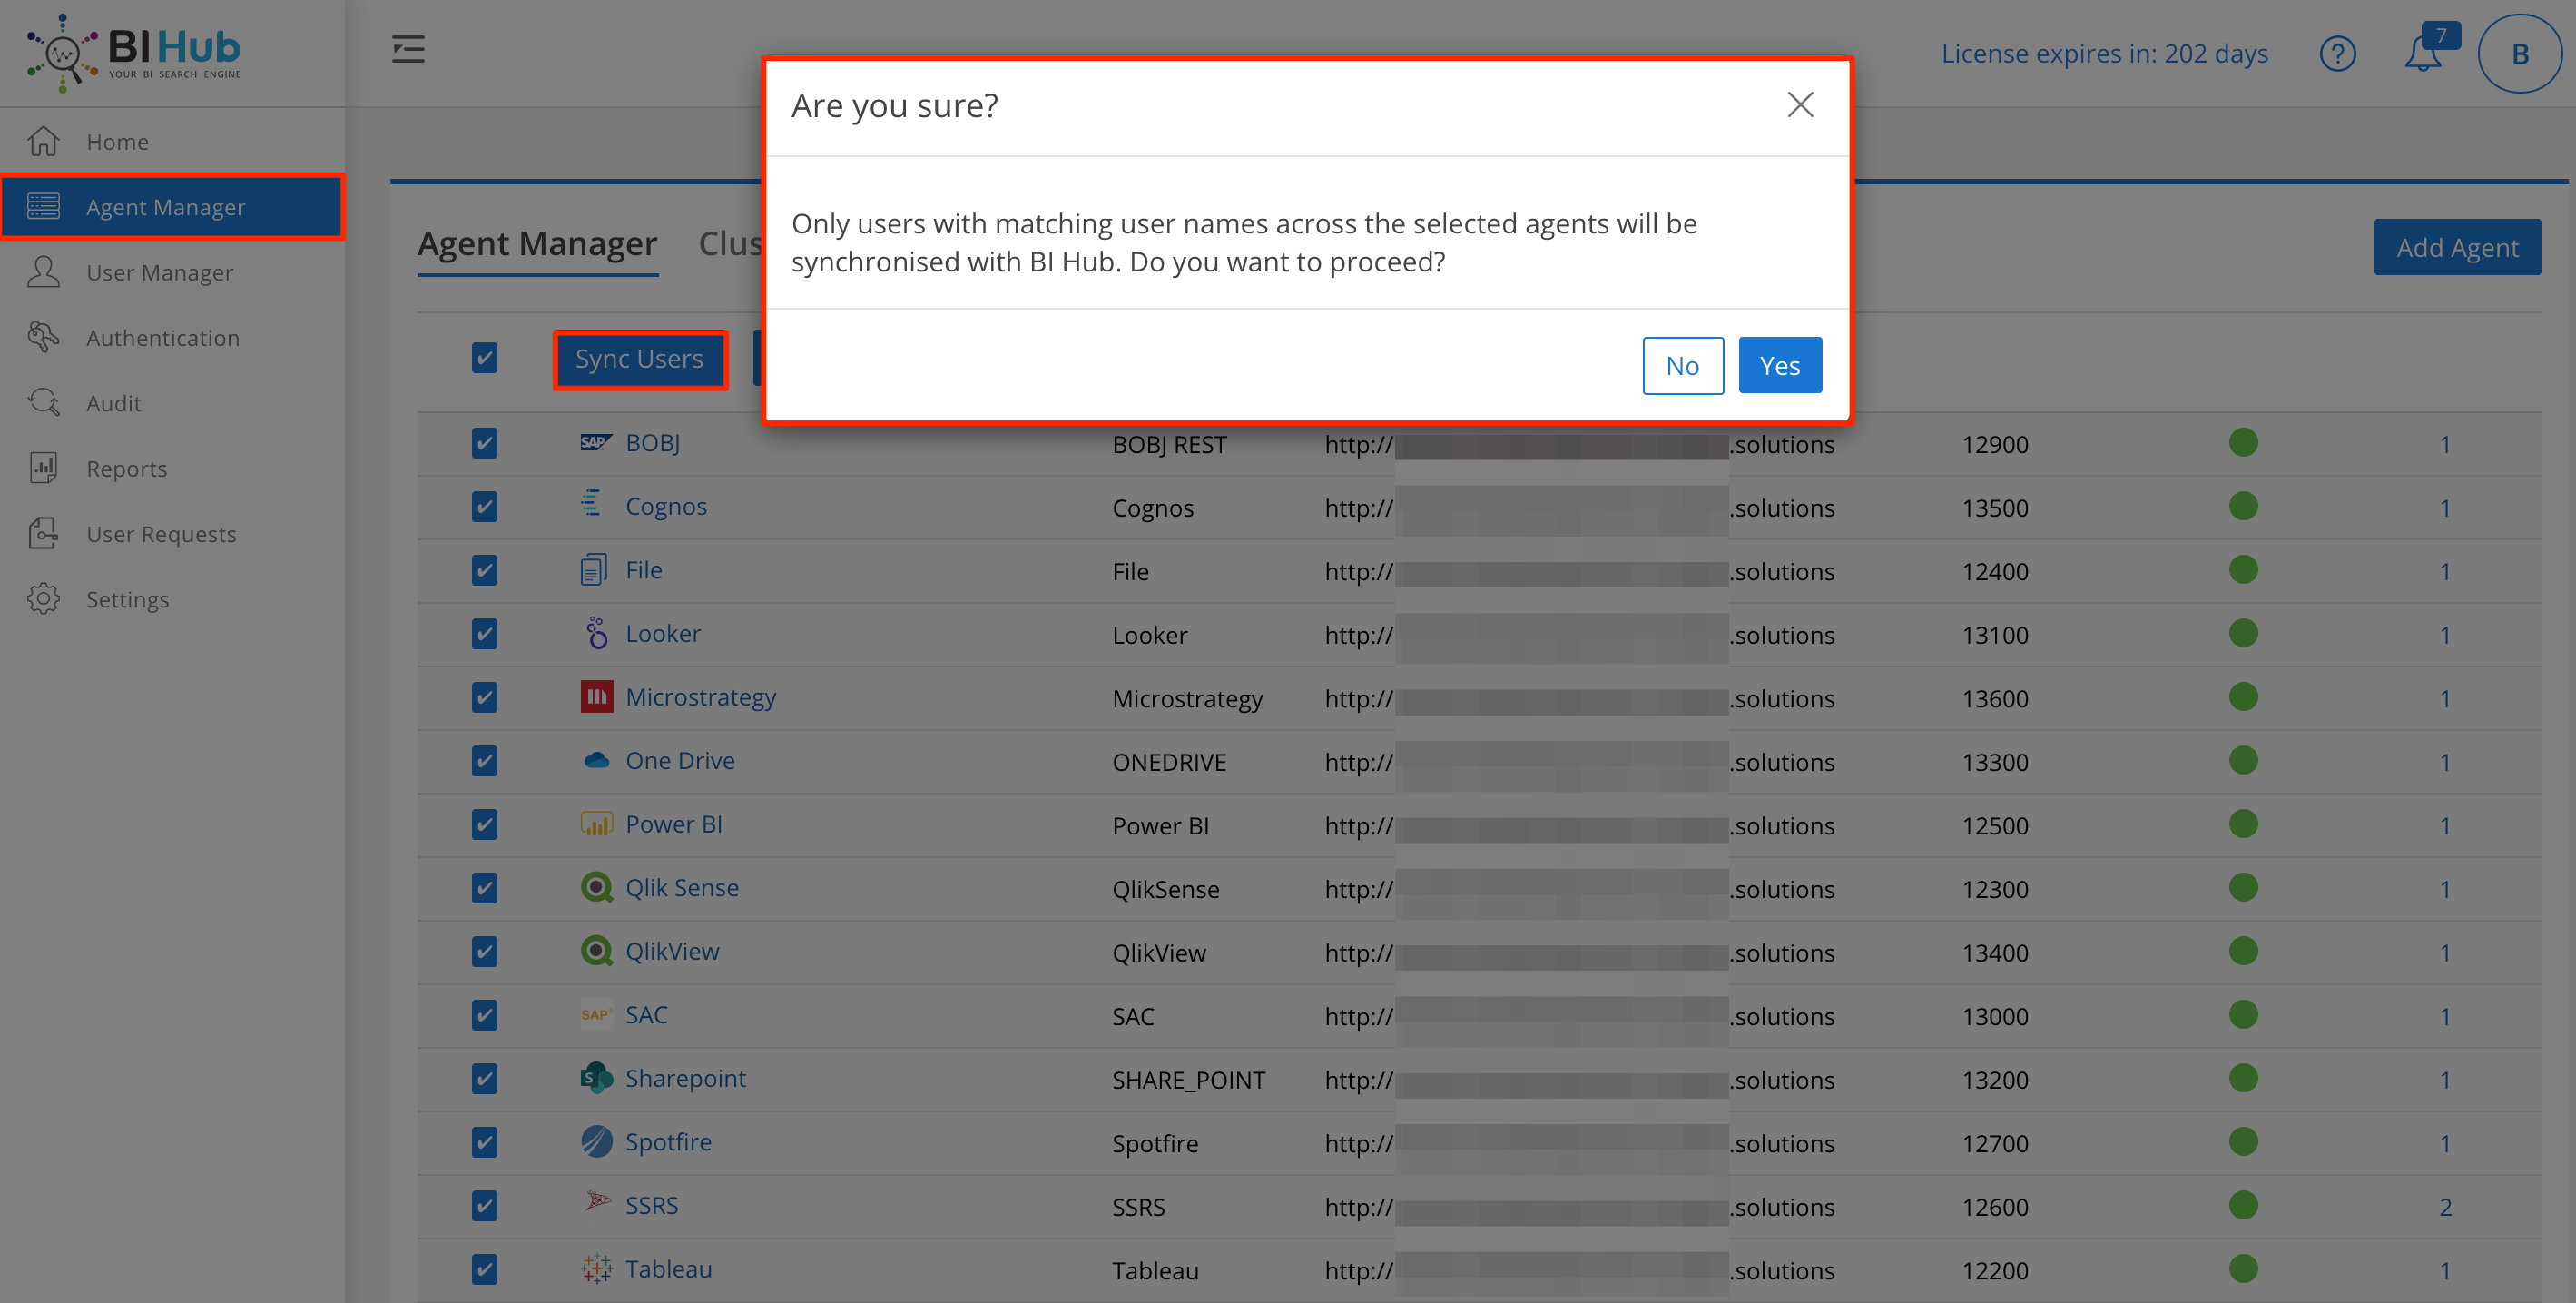
Sync users from multiple Agents
Verify Sync Users Info#
To view the the list of imported users from BI platforms into BI Hub, go to User Manager screen. You can filter the list with the Agent's name.
When users are added via the "Sync Users" feature, the default login password for the added users will be
<username@123>(e.g. adrian@123 for username 'adrian'). During the first login, the users will be asked to change to a new password.To view the detailed summary of the sync, go to Home > Synchronization Information and select Sync Users.
Next Steps#
- If the user names are different between BI platforms, to import users from the other BI platform(s), Click Save and proceed to Section Add Users from other BI Platforms (users having different user names across BI Platforms).
- If user names are identical across platforms then after syncing the users, synchronize Reports of Users as explained in the next section.
note
An Admin can also schedule an automatic users sync with the Agent Synchronization utility as explained in the Scheduled synchronization with AD/LDAP section.
Sync Reports#
Admin uses the Sync Reports feature to sync all the reports with the BI Hub users. To manually add reports to users, follow the Add reports to an existing user section.
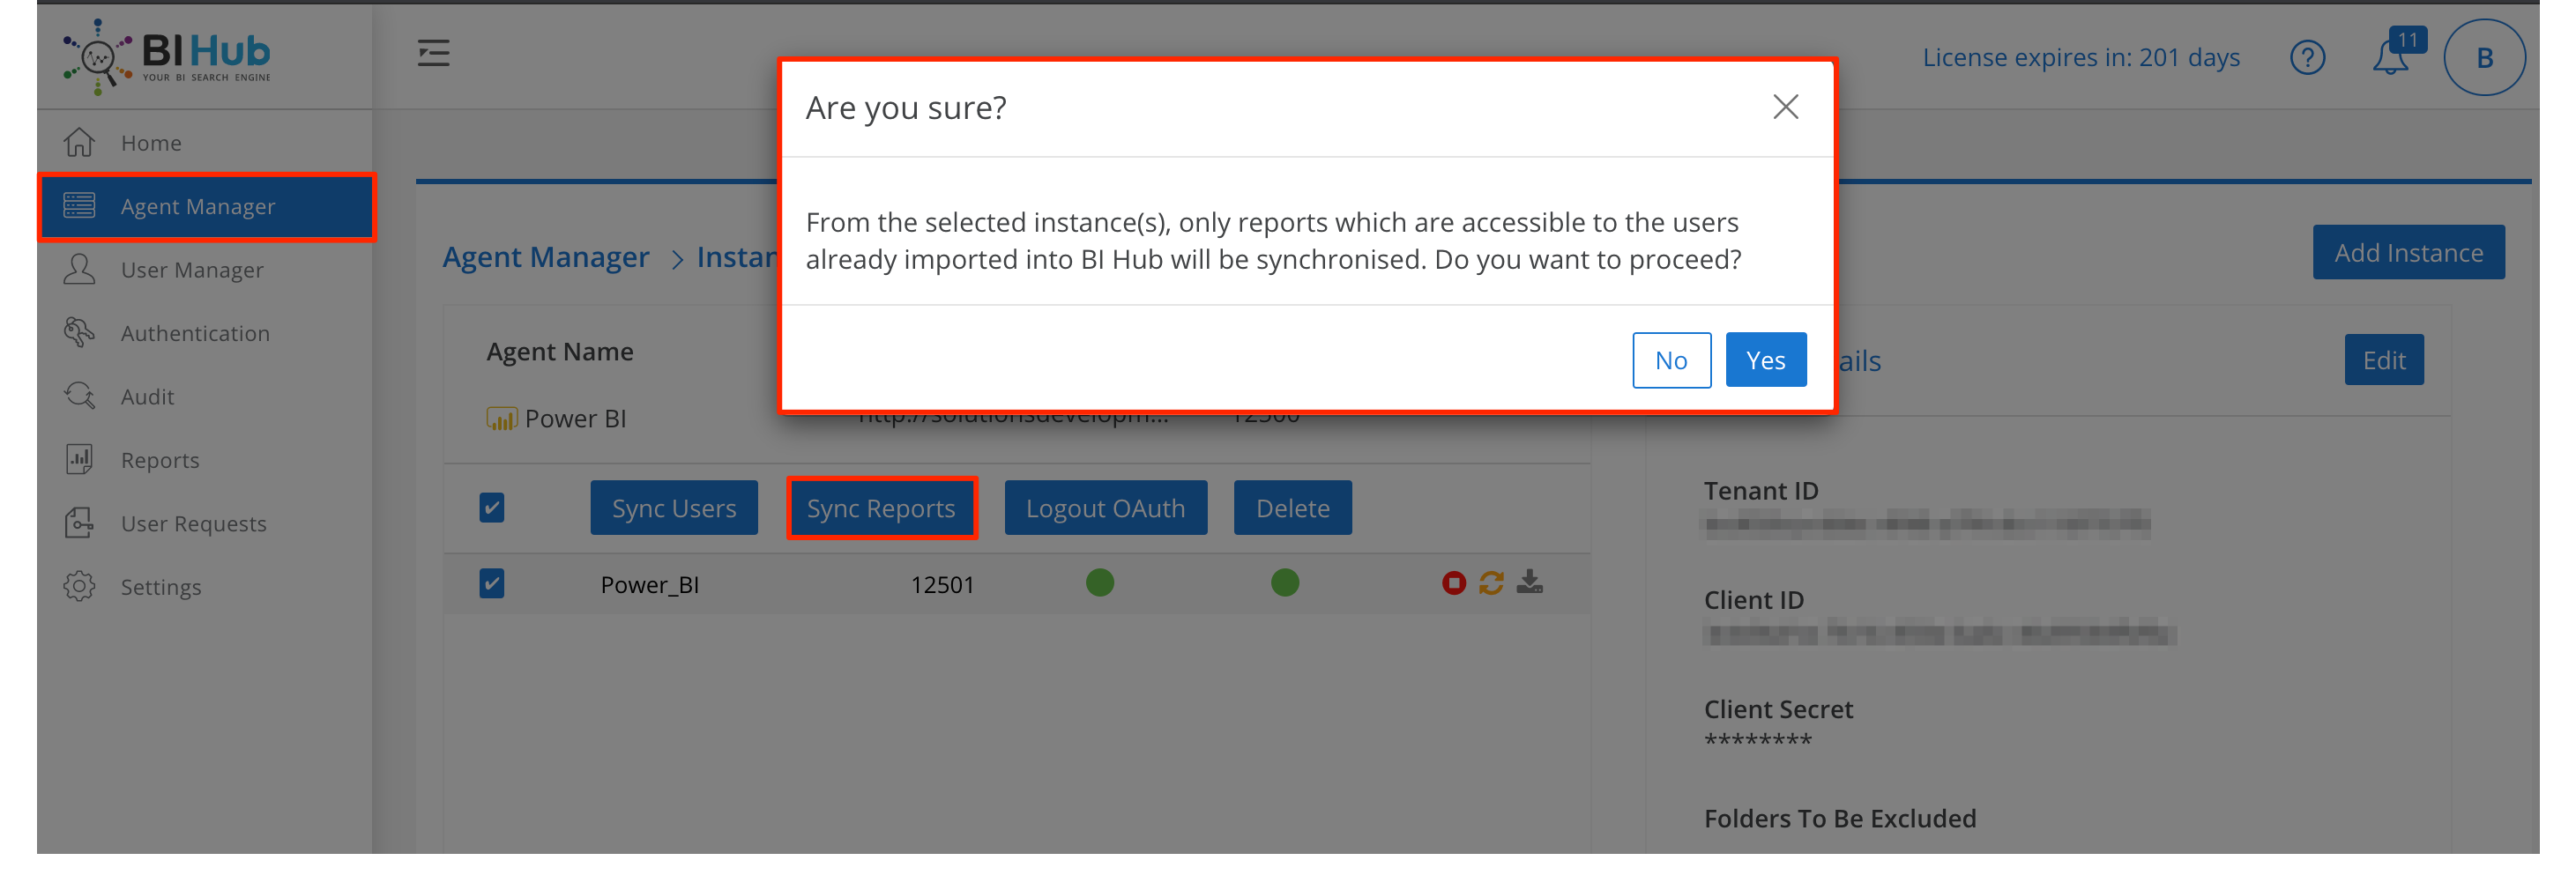
Select single/multiple Agents whose user’s reports are to be imported (synchronized) into BI Hub and click Sync Reports.
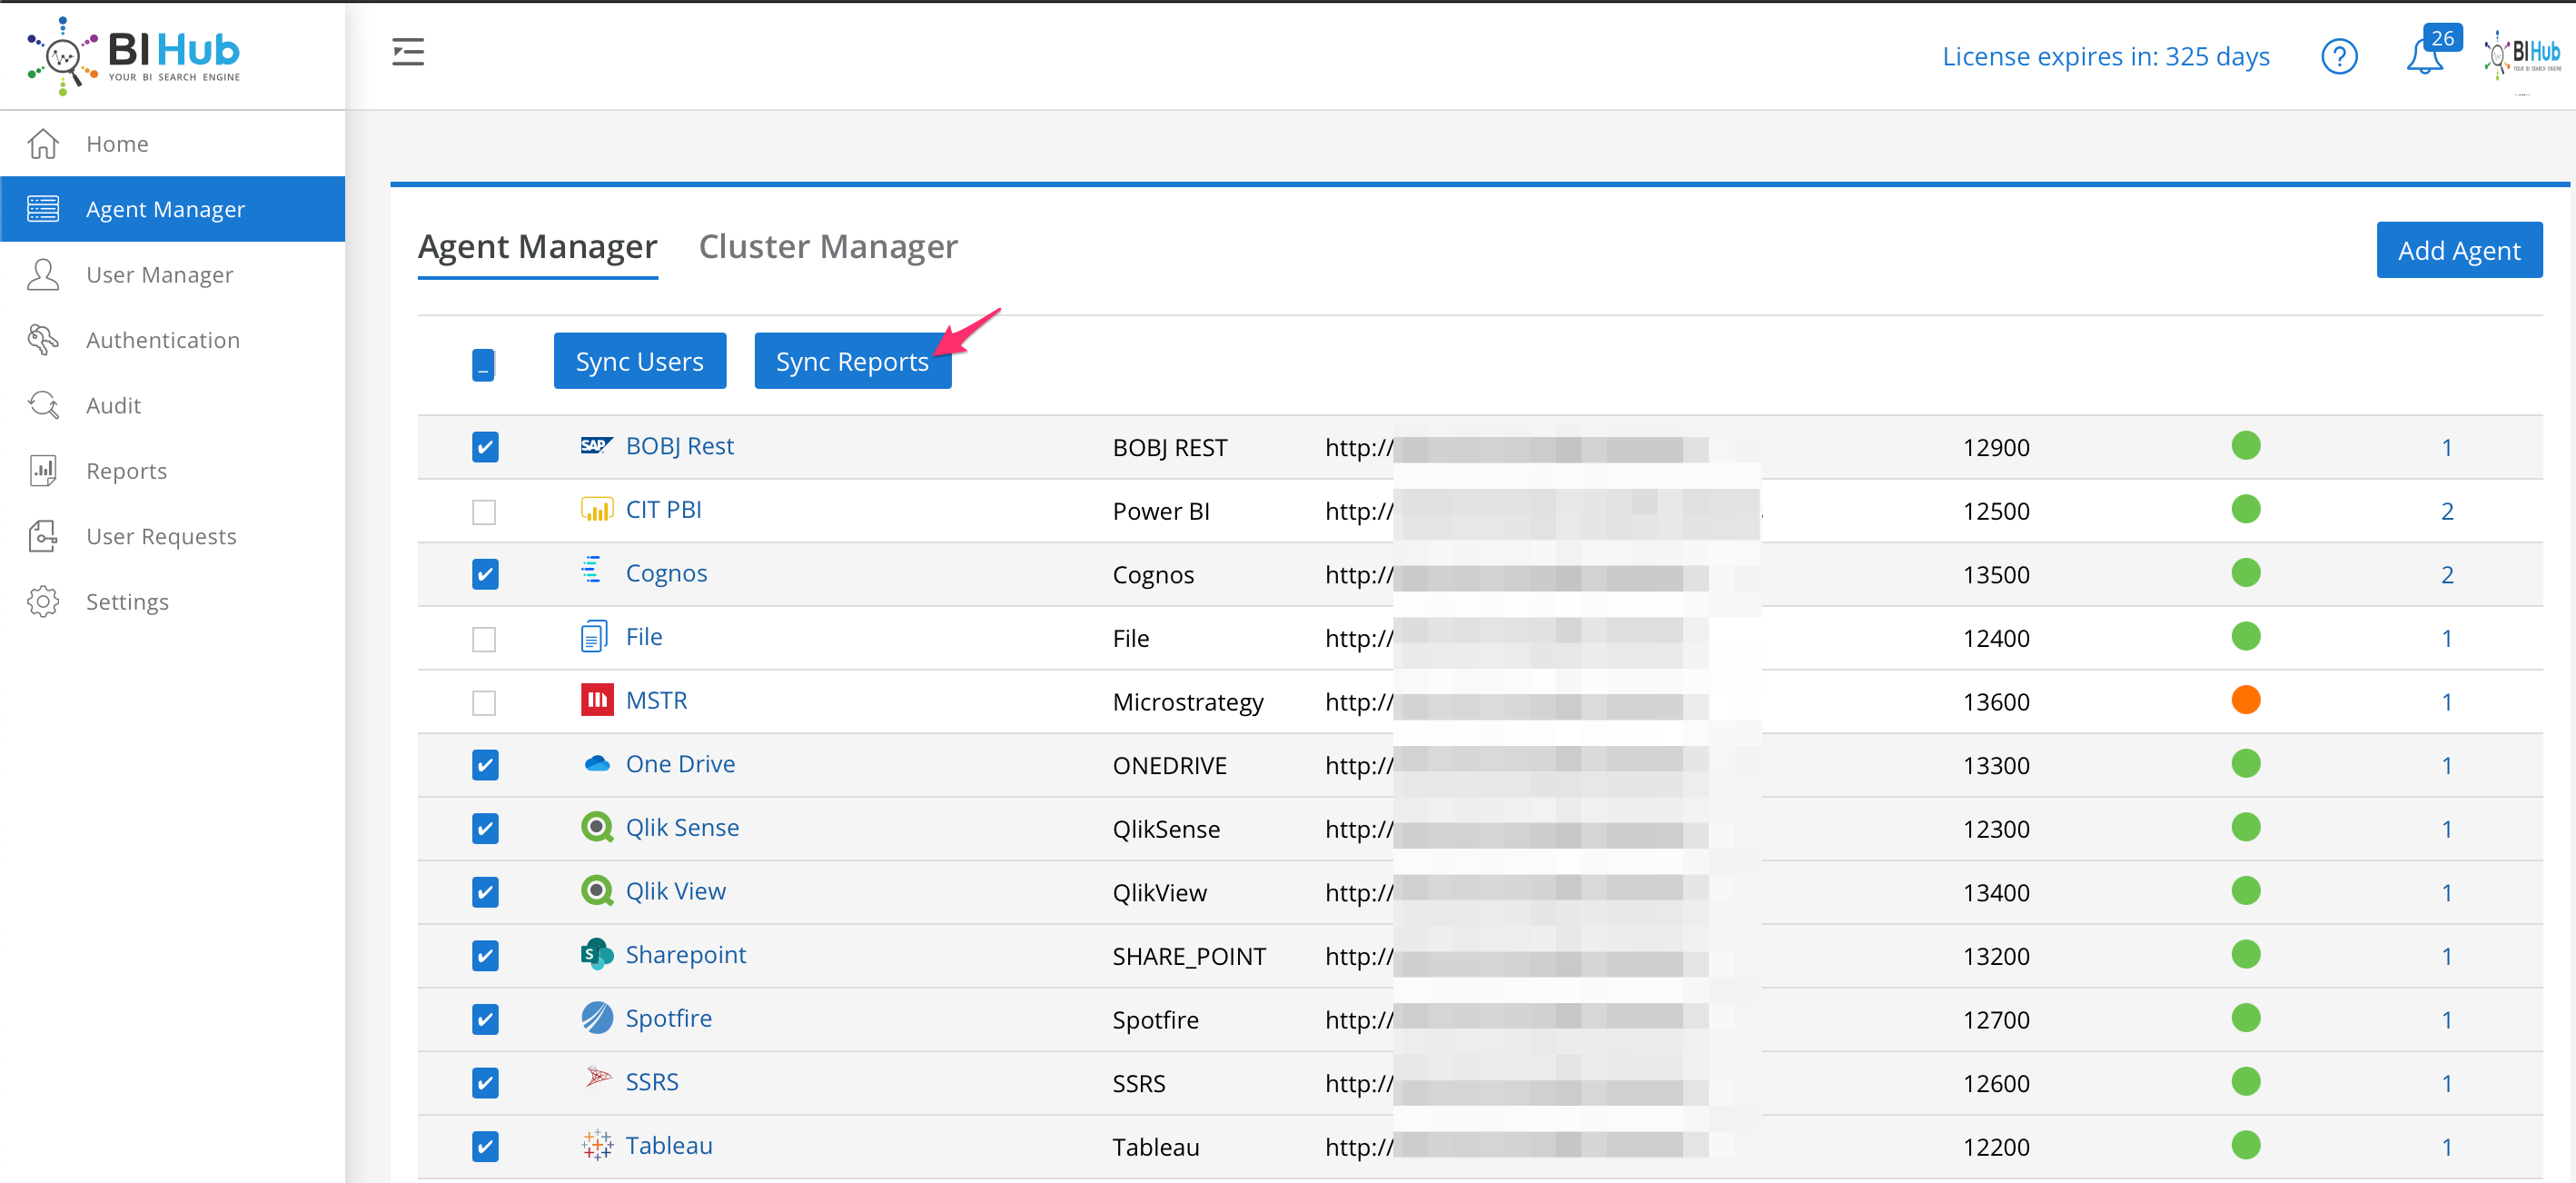
Sync Reports
Sync Reports Information
This synchronization only brings in reports of users that are present in the application (obtained by AD/LDAP sync or sync users).
important
The Sync Reports feature runs a partial indexing of the synched reports alone and do no re-build the index from the scratch. This makes the synchronization faster.
An admin may enable a full elastic search for all the reports from Settings > General section.
note
Admin can also schedule to run Sync Reports automatically using the Agent Synchronization utility as explained in the Scheduled Synchronization with BI platforms section.
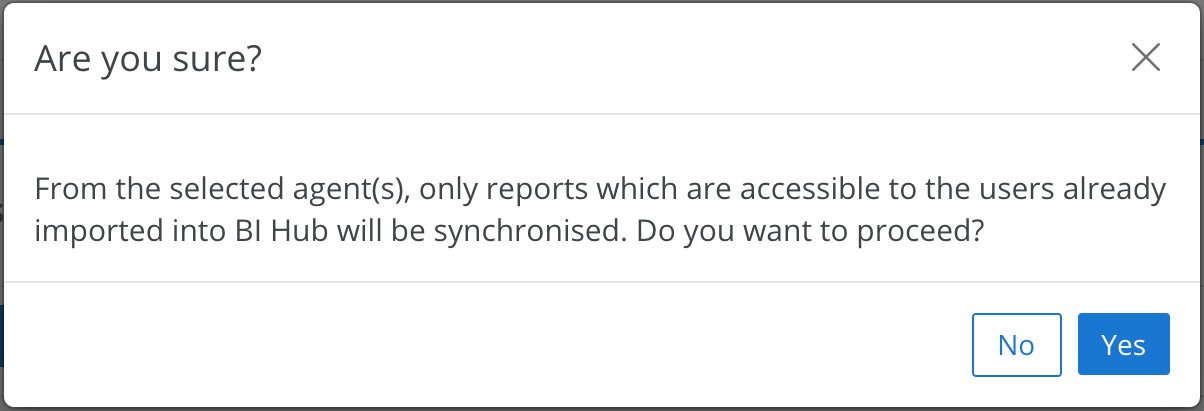
Pre sync Reports#
Admin can trigger reports pre synchronization for MSTR, Qlik View, and Cognos agents. By doing so just the reports which are accessible to the users already imported into BI Hub will be pre-synchronised.
Select any or all of the 3 above listed agents and select Presync Reports.
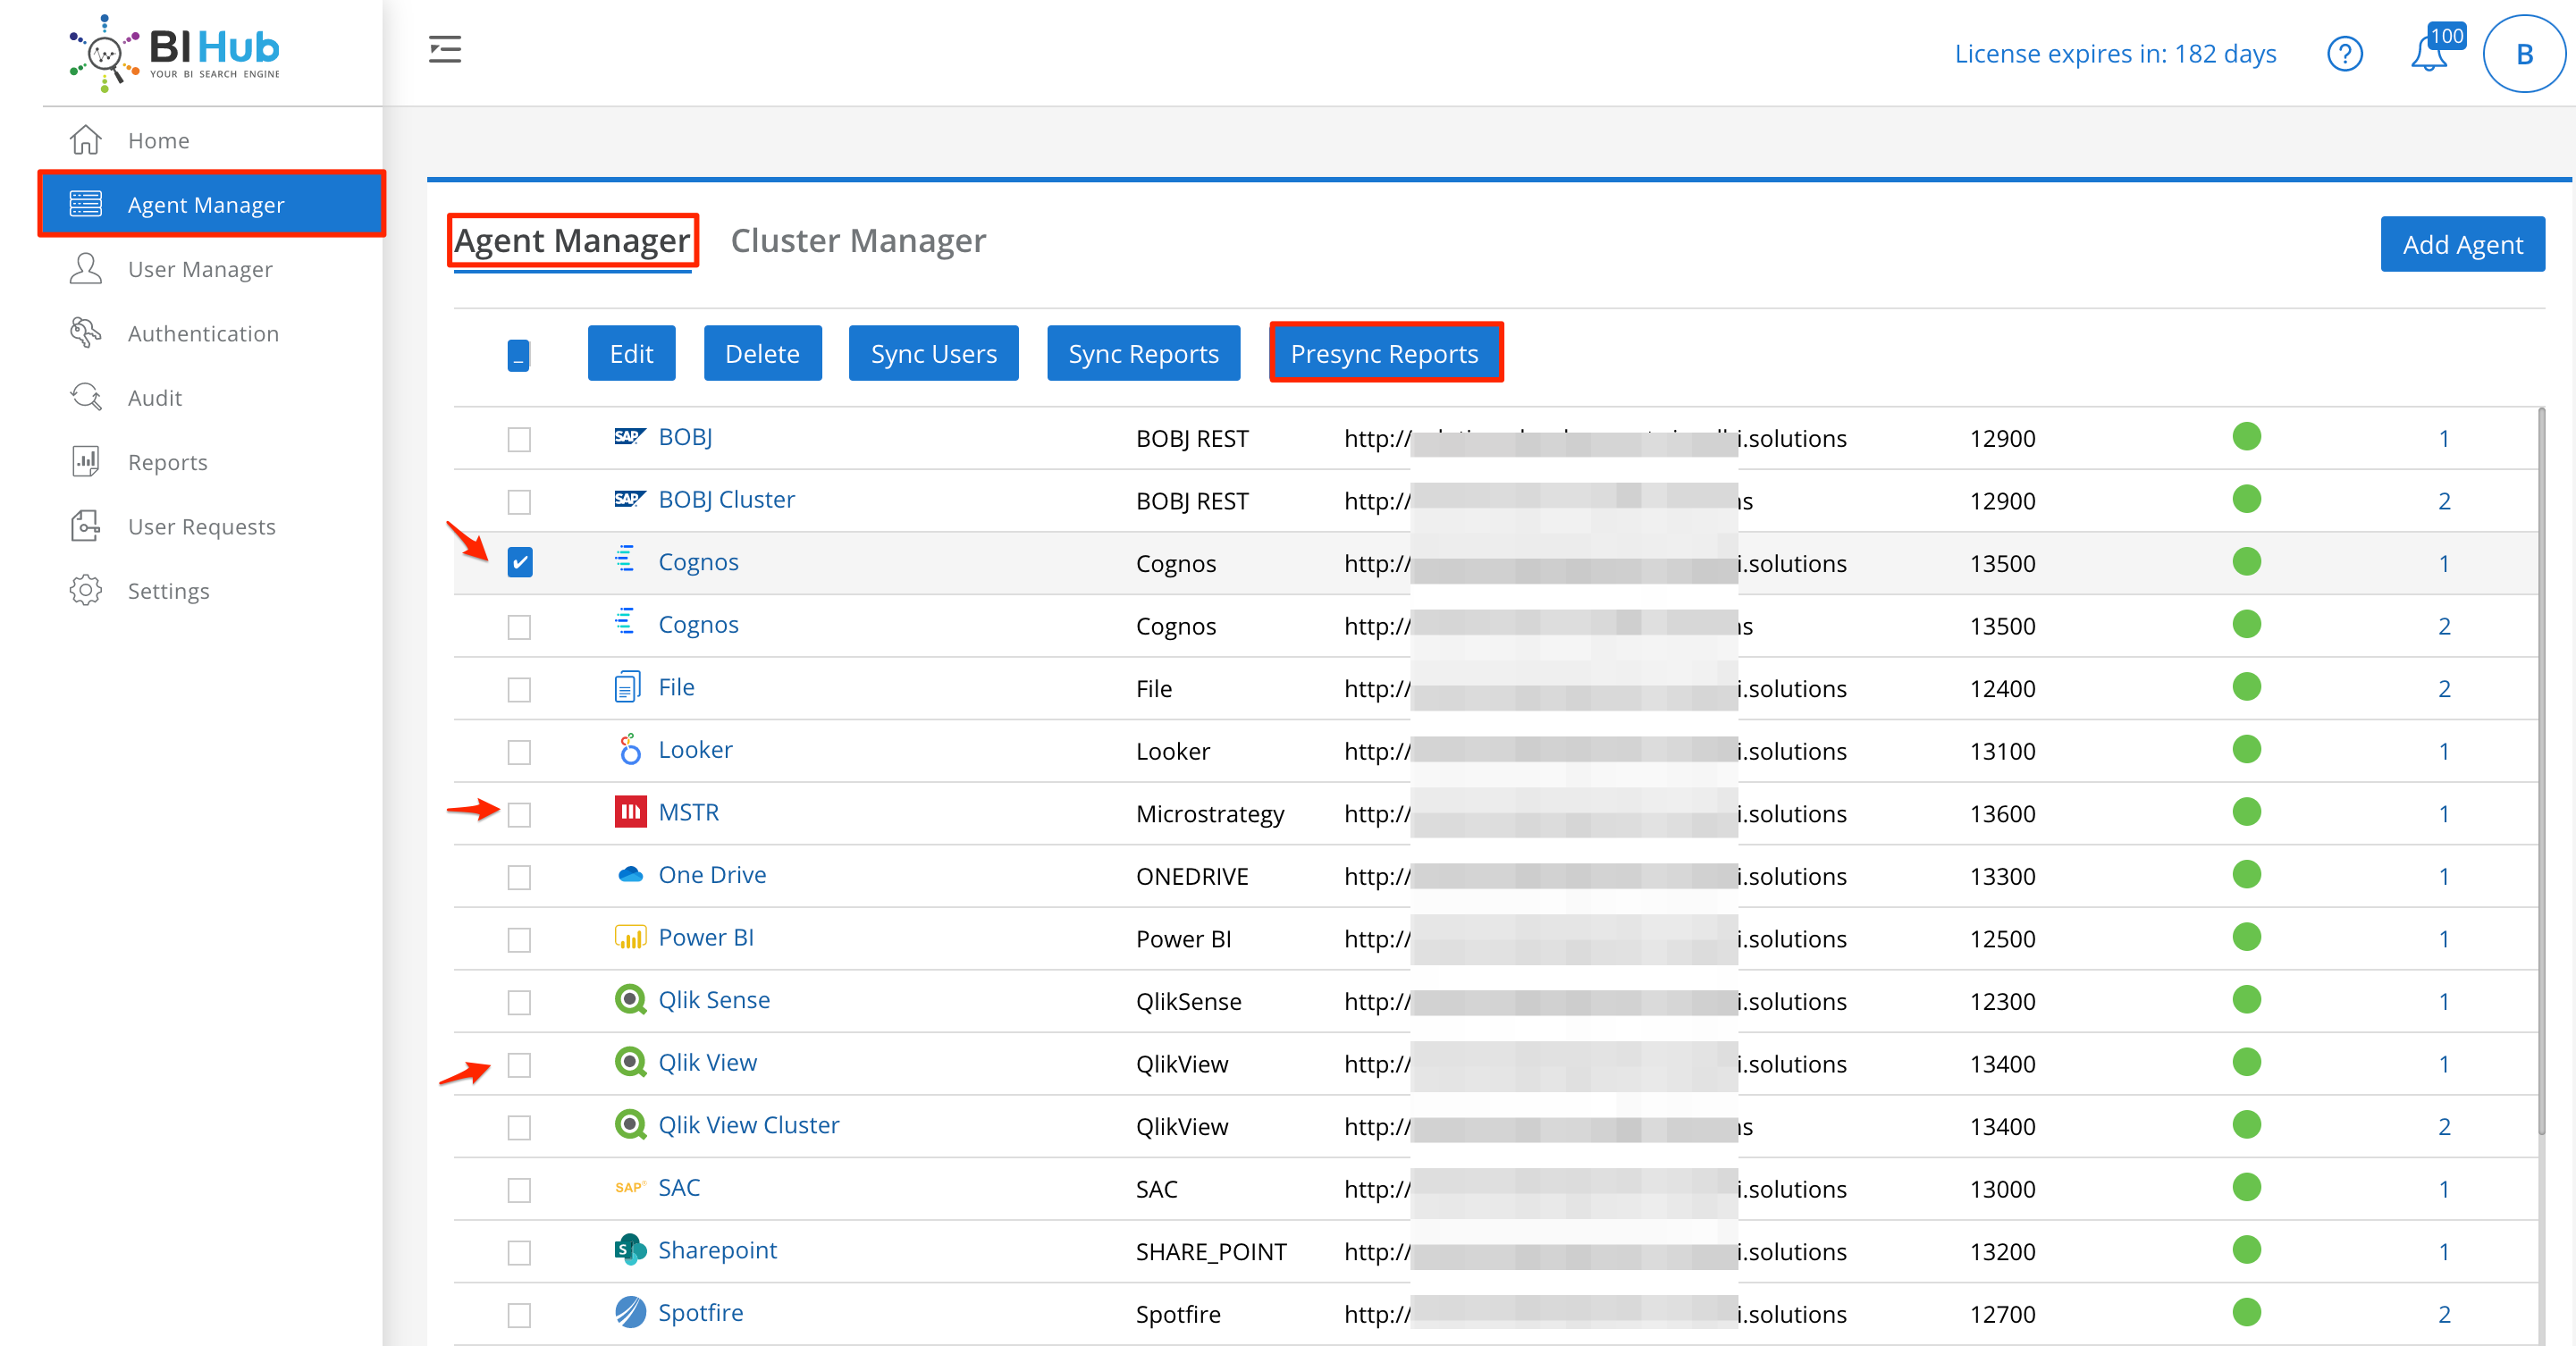
Presync Reports
note
To run/schedule the same utility from the server, refer the PreSync Reports section.
Verify Sync Reports Info#
To view the detailed summary of the sync, go to Home > Synchronization Information and select Sync Reports.
The users can now login into BI Hub and view the reports they have access to.
Sync Failure Mail Notification#
If the sync(Report/Users) jobs fail, the admin receives an email notification with the failure message.
Sync Failure Notification
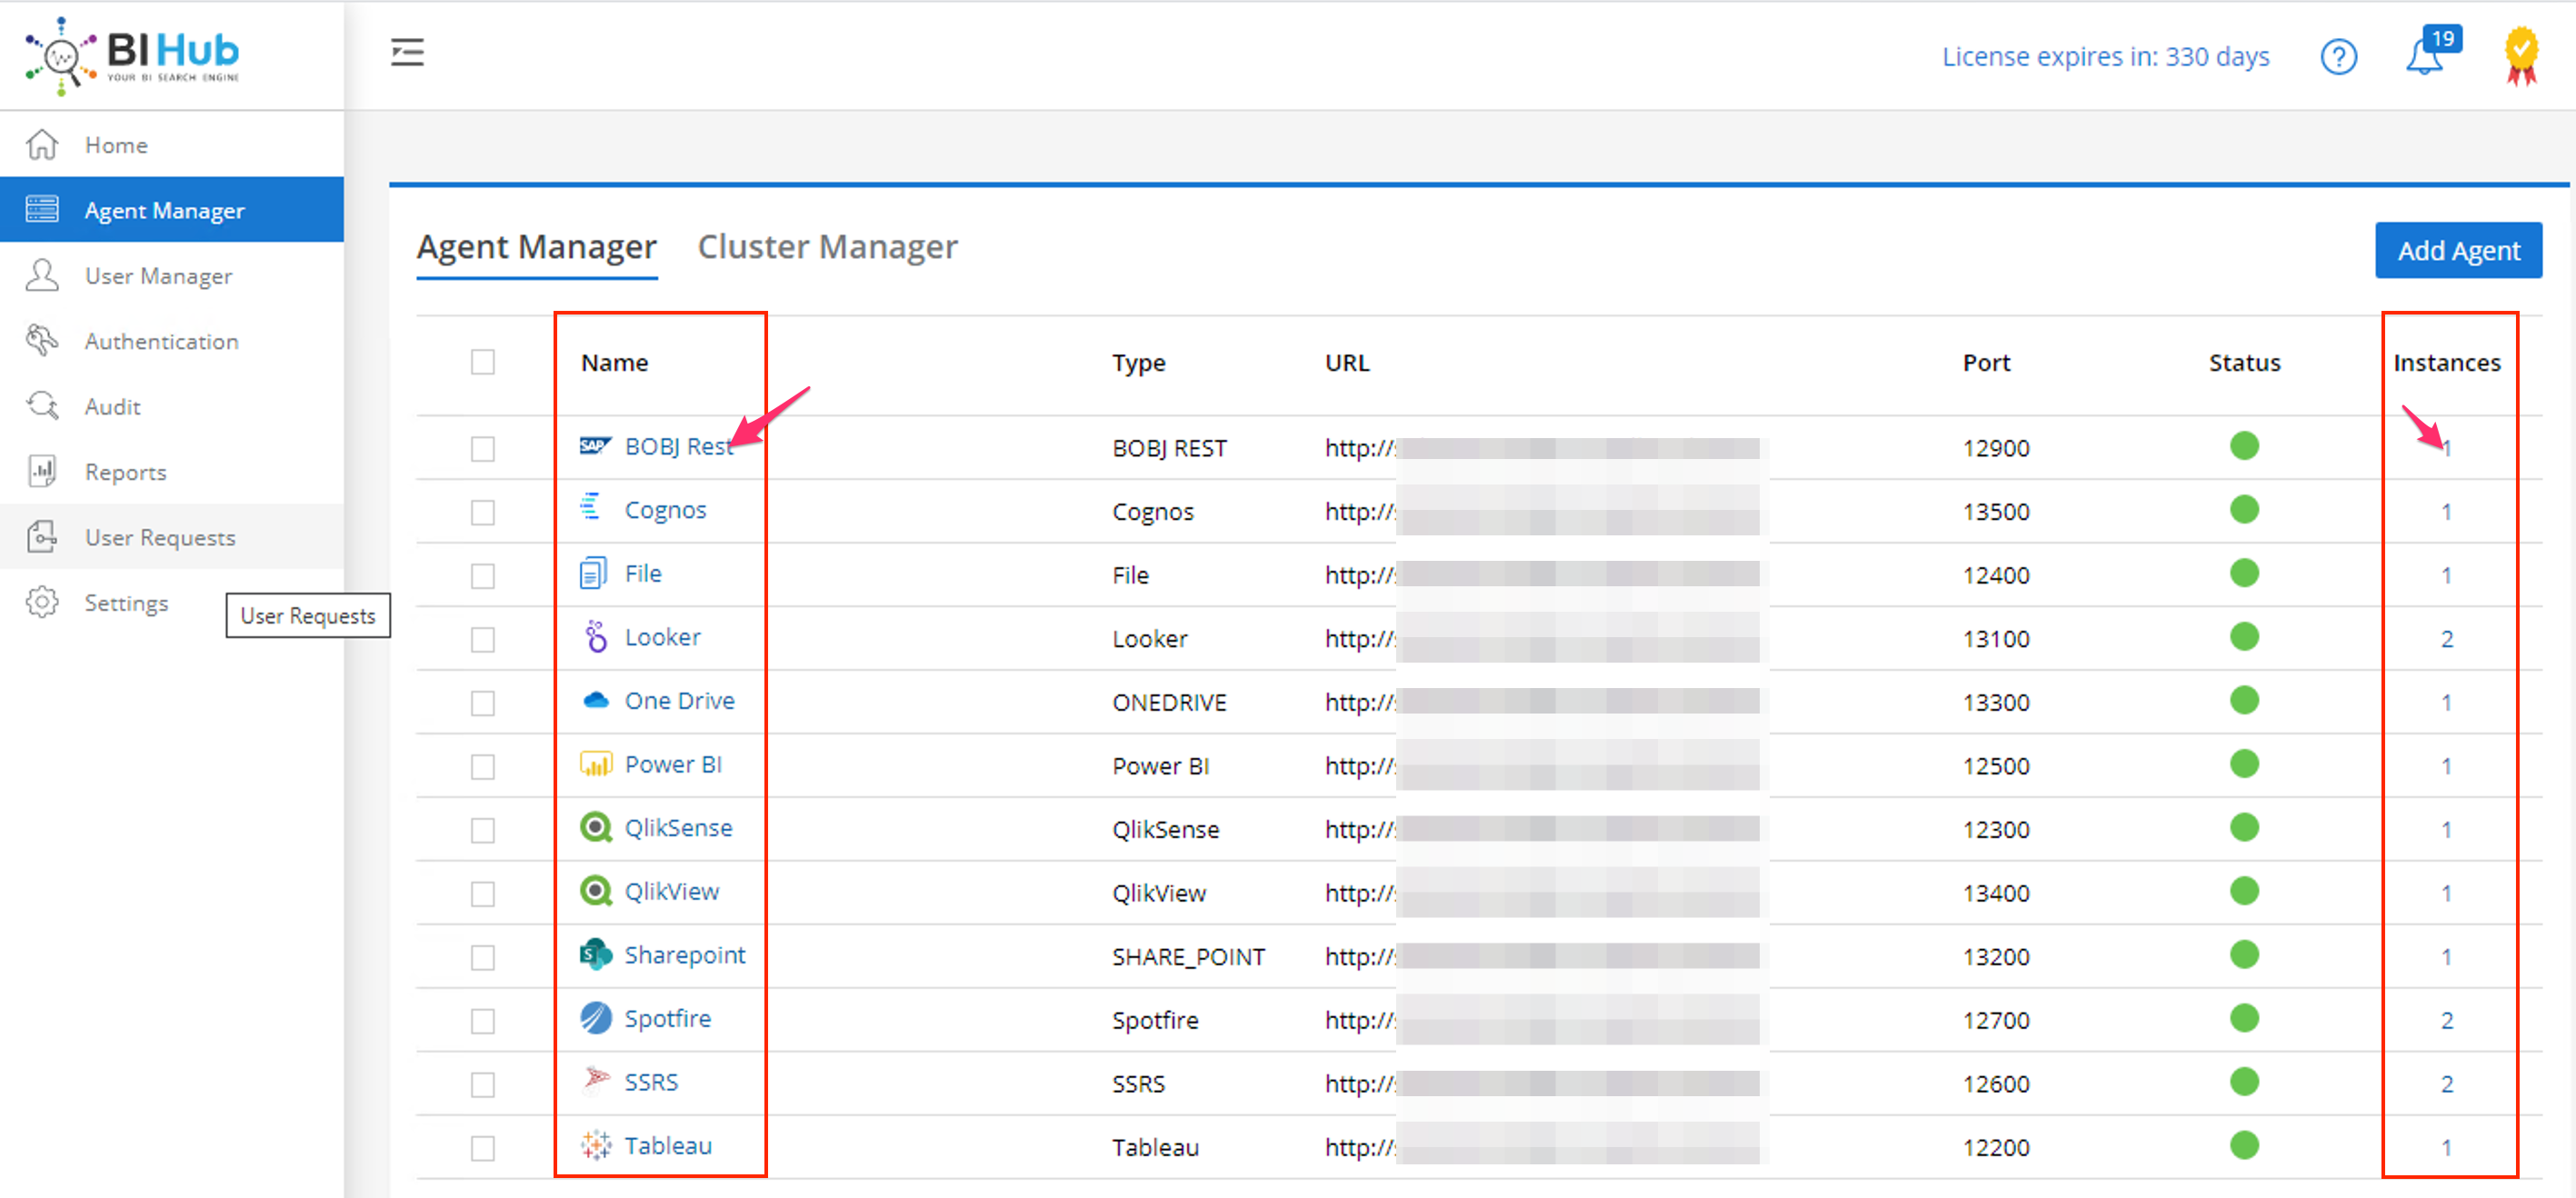
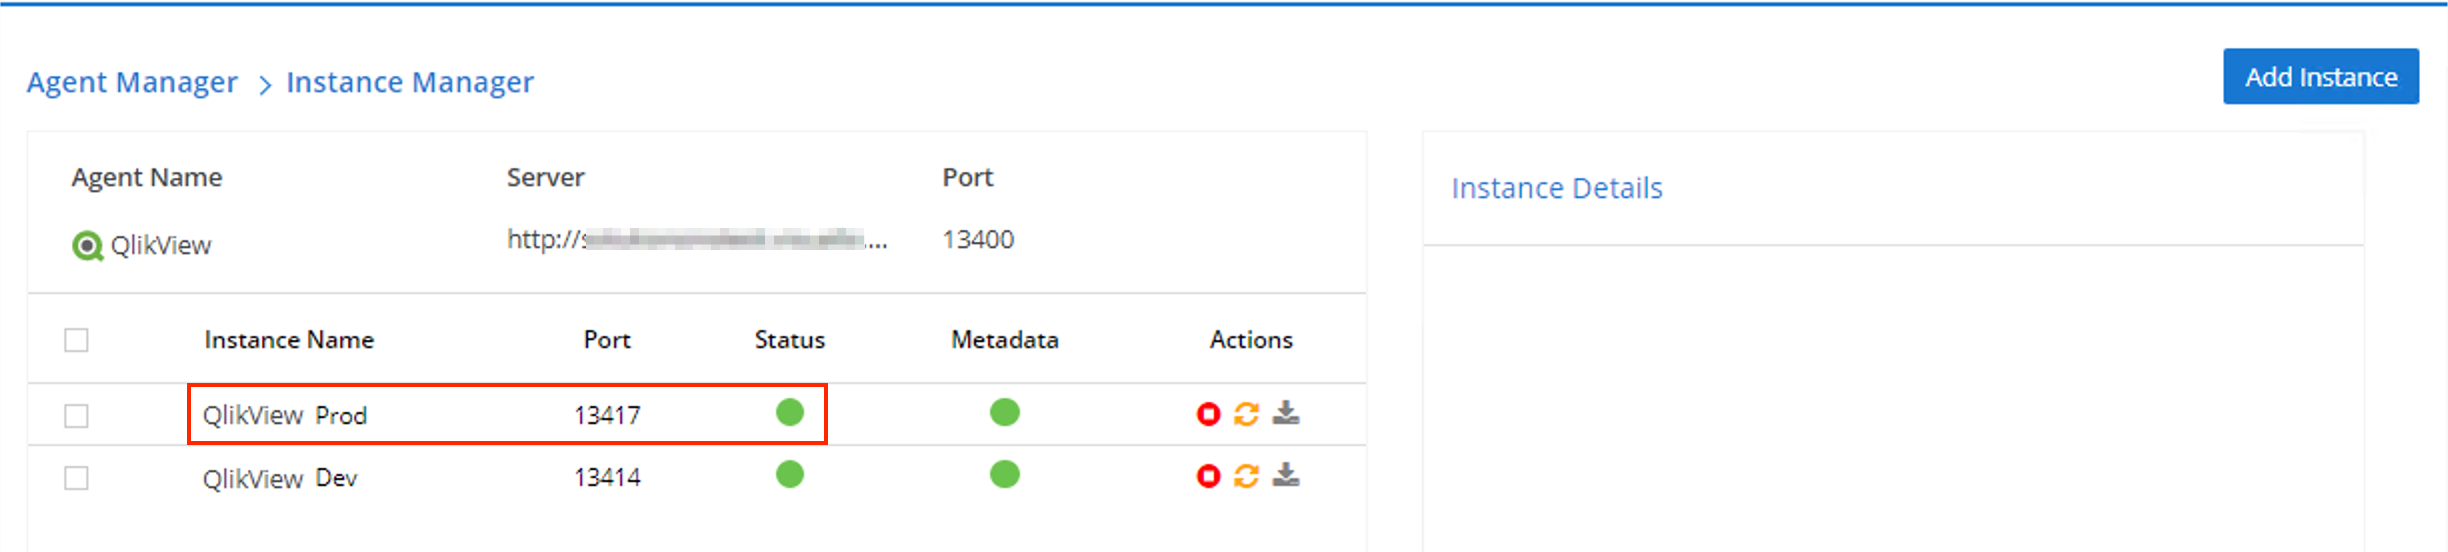
Instance Manager#
To edit Instances configured with an Agent, an Admin can either click on the Agent Name or click on the count that shows the number of Instances.
Select Agent Instance
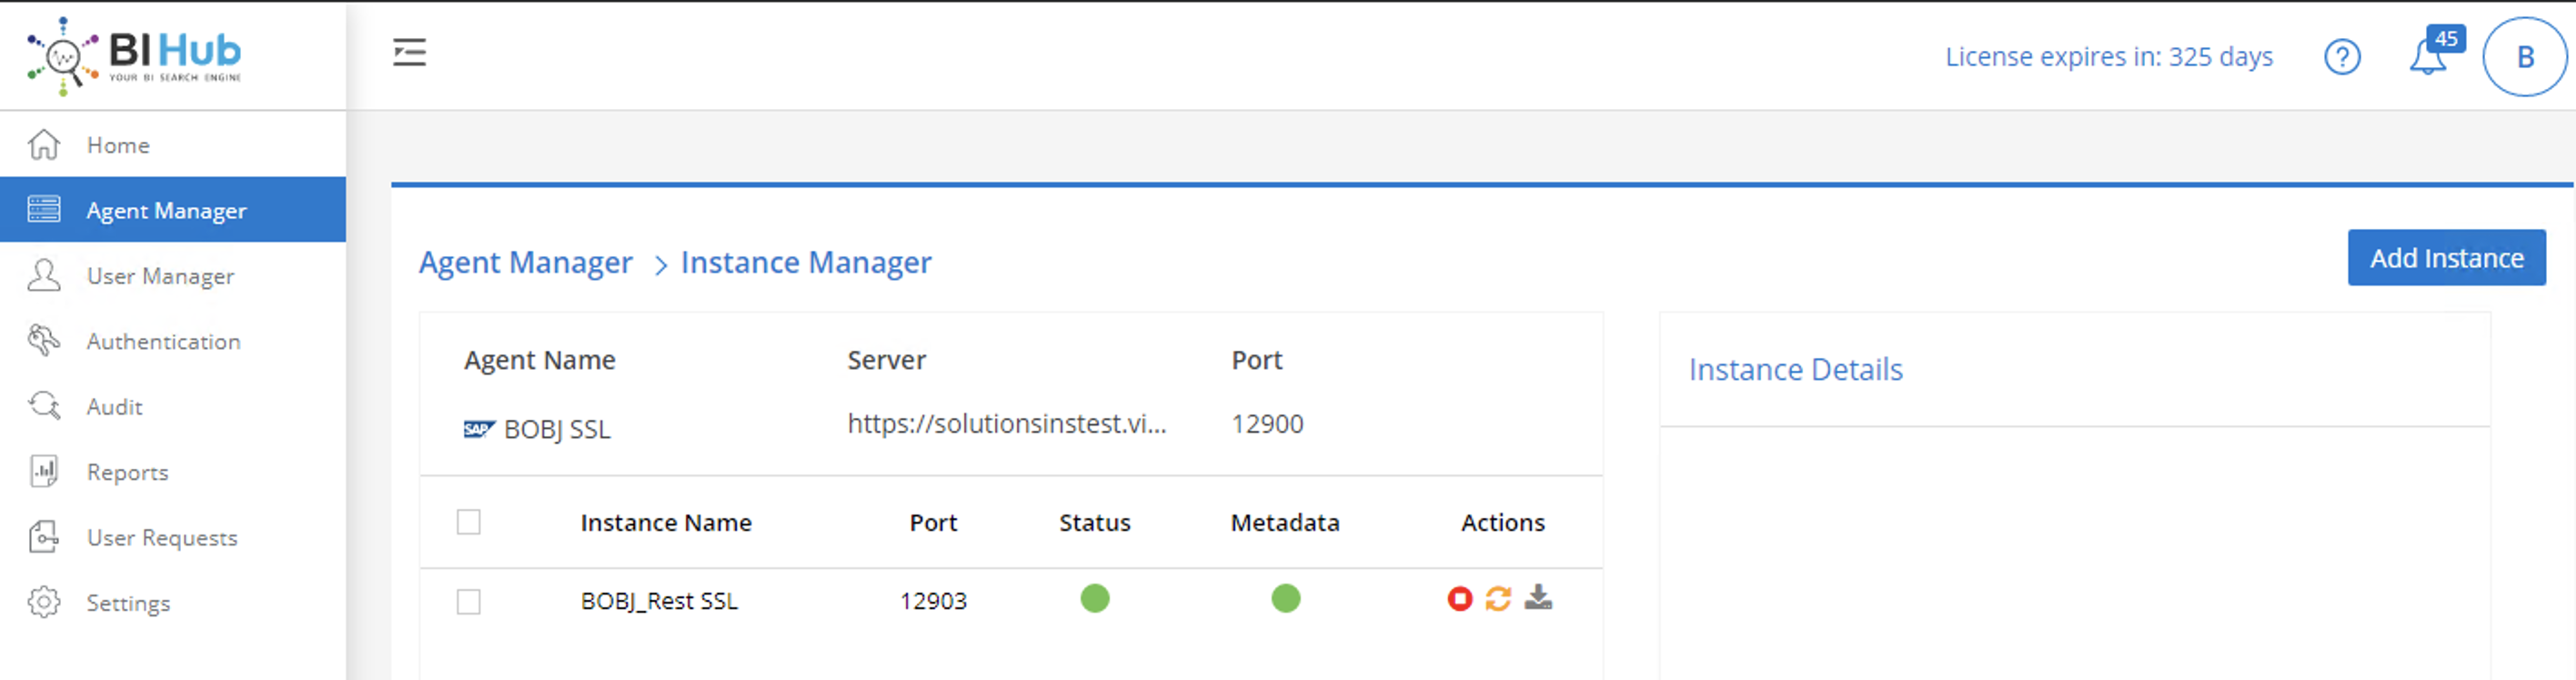
The Agent Manager > Instance Manager screen displays the Instance(s) configured for the selected Agent.
Instance Details
You can view the Instance Name, Port number, Status, and Metadata.
Admin can perform the following actions:
Add Instance#
An Instance is a running state of an Agent. You can have multiple instances of a single Agent, all pointing to the same Agent in the BI Platform.
Click on an Agent and then click Add Instance at the top right corner.

New Instance fields
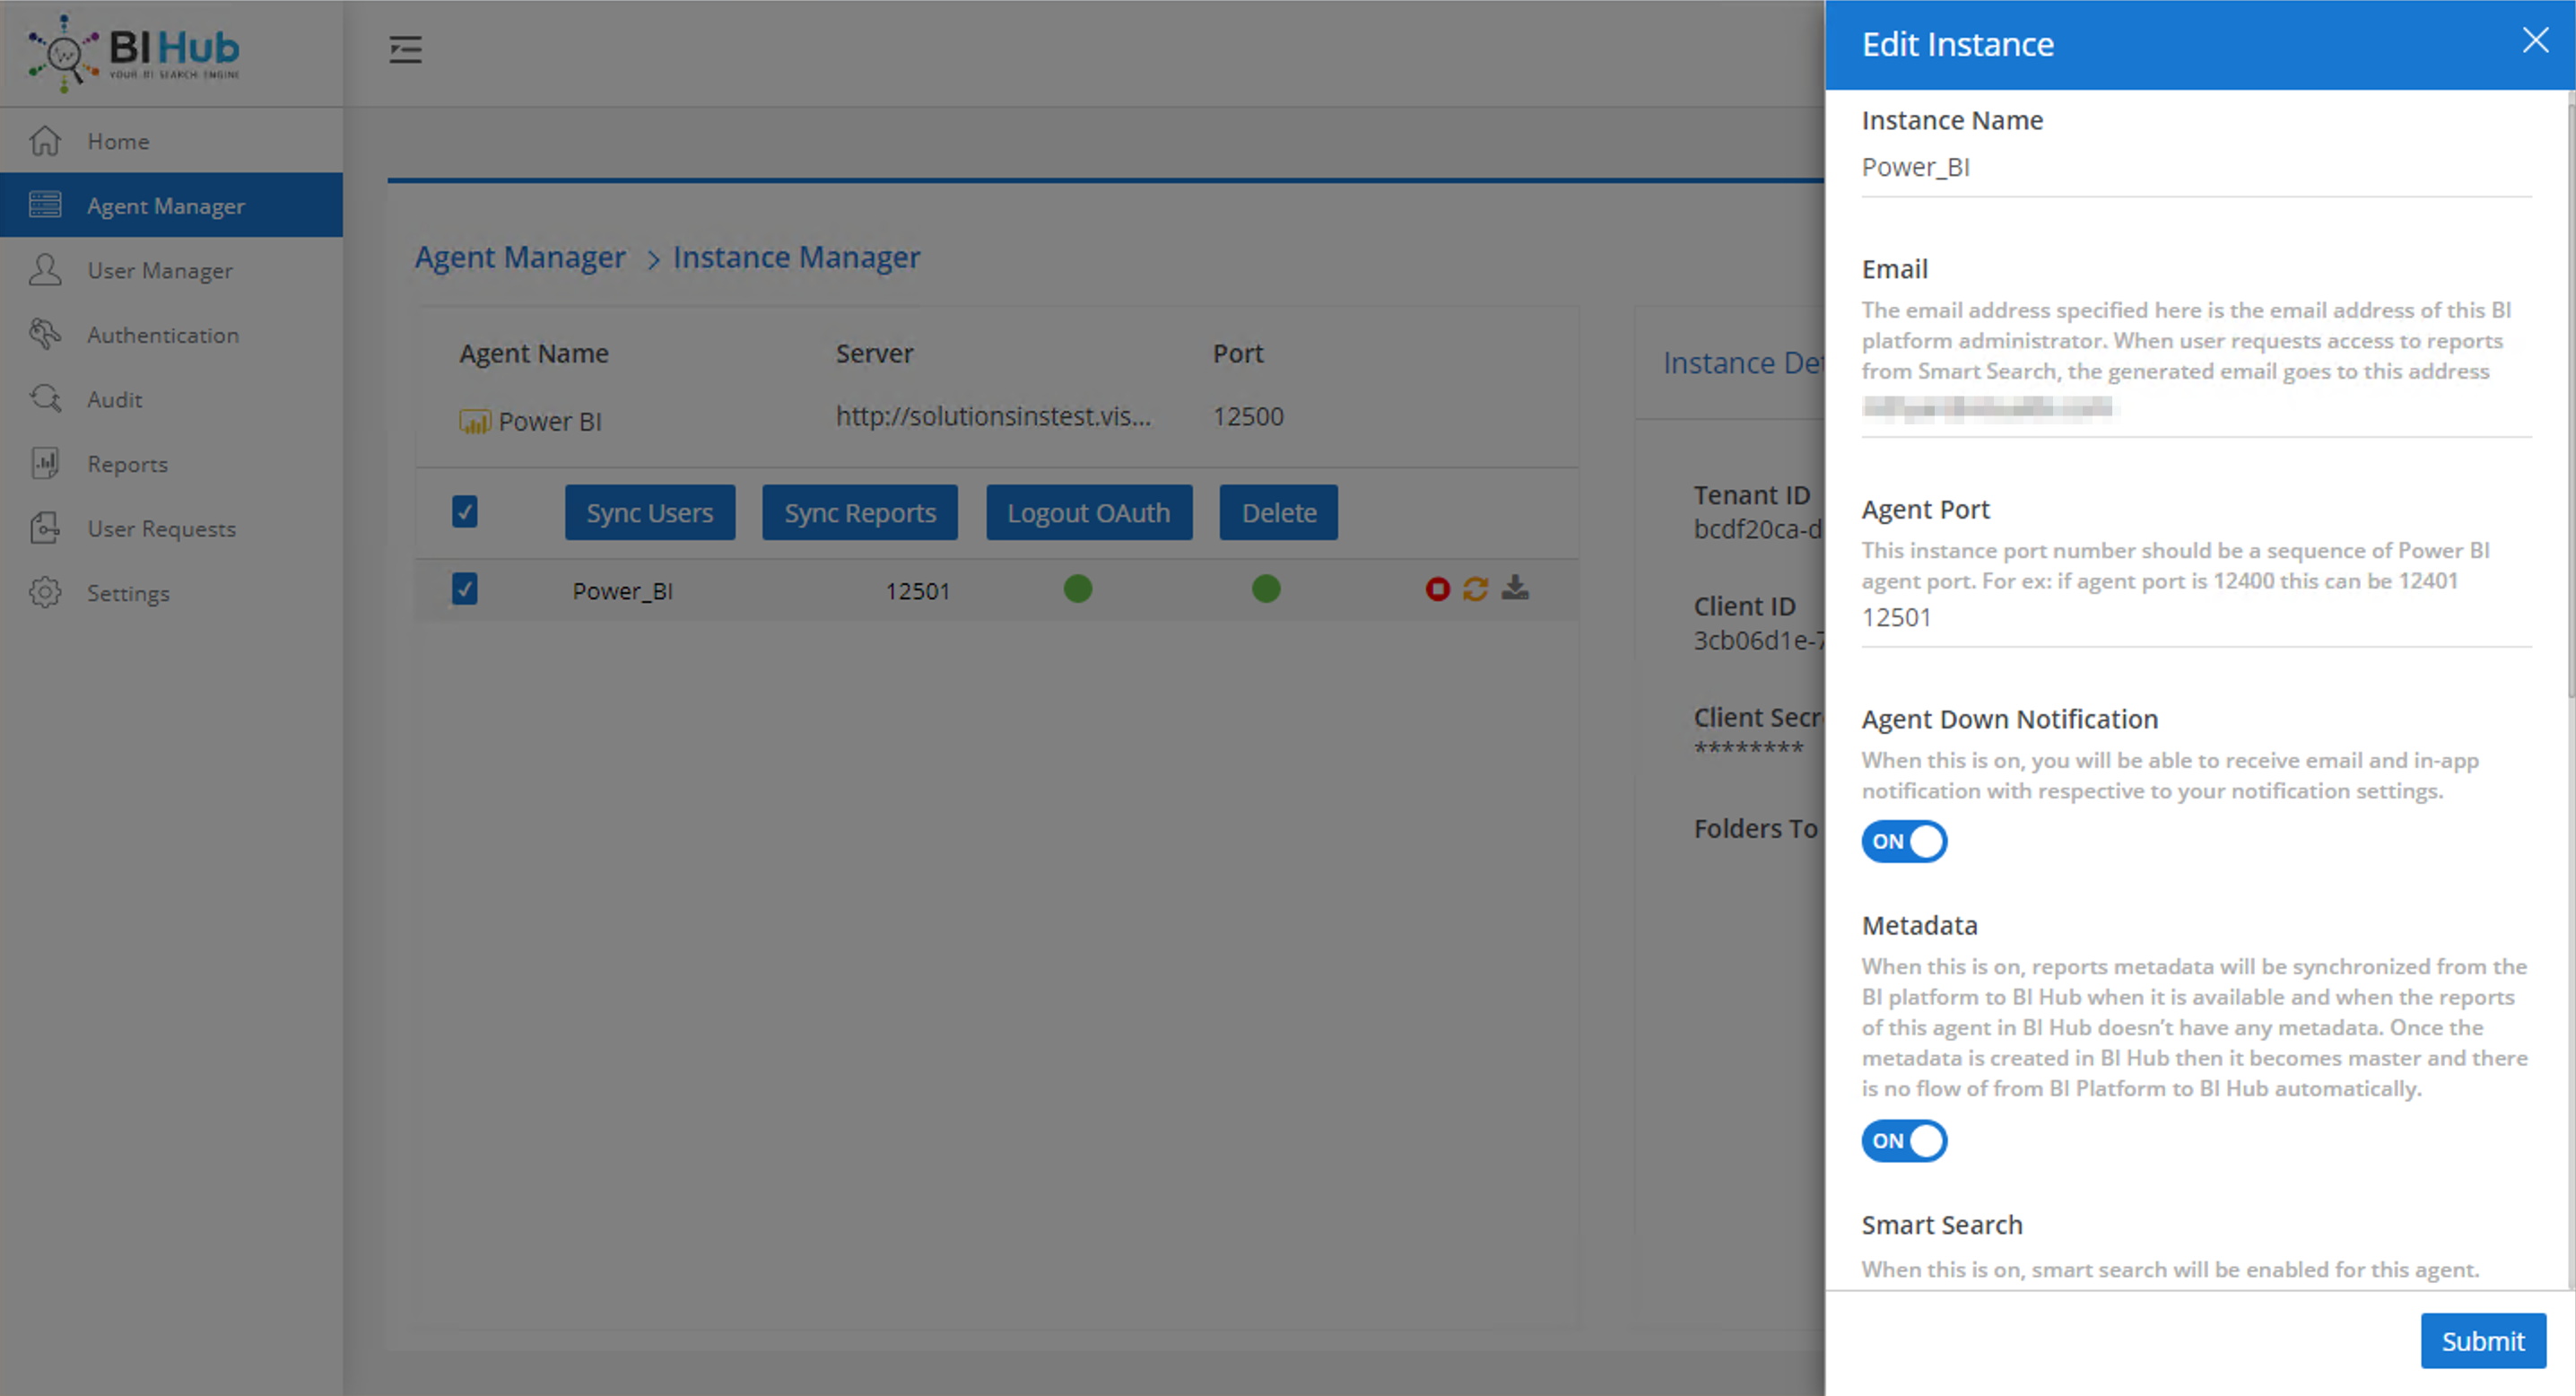
Enter the Instance Name, Email, and Agent Port. The Agent Down Notification, Metadata, and Smart Search toggles are ON by default and can be disabled. Enter the remaining Agent specific fields and click Submit.
Each field provides the necessary message needed to fill the value.
New Instance in running state
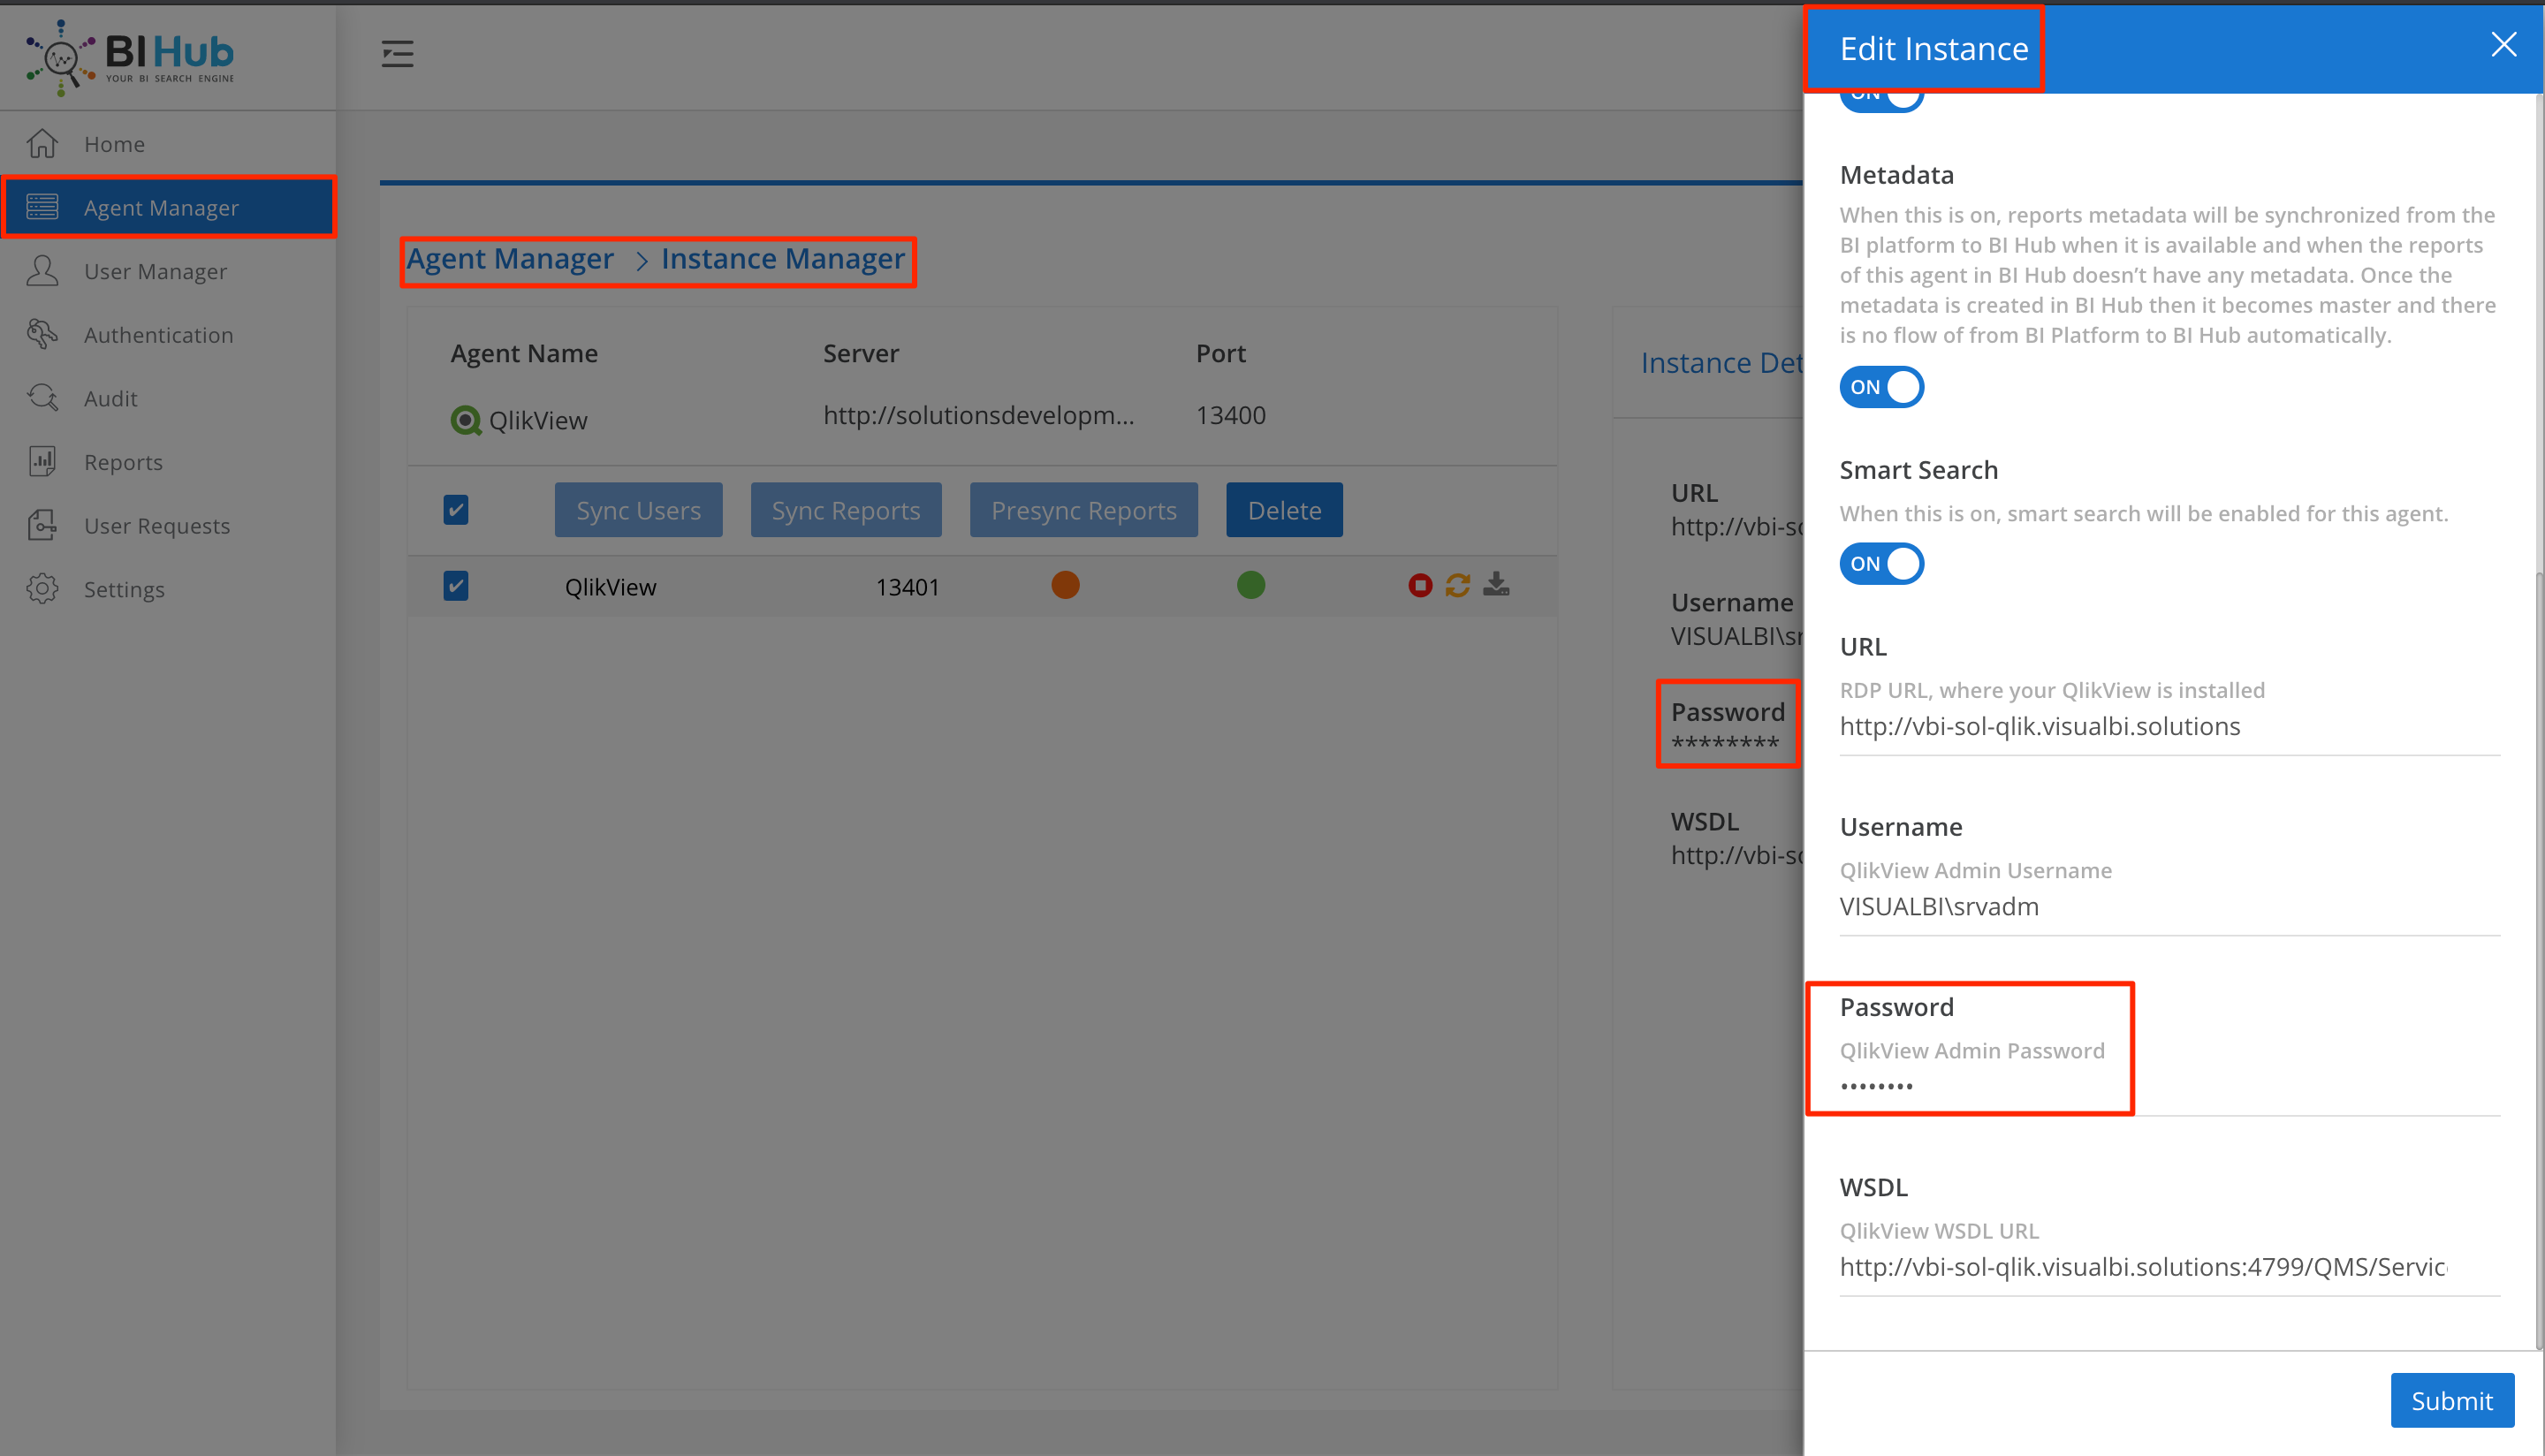
Edit Instance#
Select an Agent and select the Instance. Click Edit below the Add Instance button. Once you finish updating the instance properties, click Submit to save the changes.
Edit Instance
Encrypted Password#
For security reasons, the password value is encrypted for the agents in the Edit Instance screen.
Encrypted Password
Configure Smart Search#
Smart Search is a feature by which the users can see a set of reports that are not accessible to them but accessible to other users and can request access for the reports. This can be configured at the agent level.
The Smart Search toggle in the Instance Manager > Edit Instance is enabled by default which allows all users to utilize the "Not Accessible" Reports.
An administrator can turn off this toggle for an agent and that will prevent all users of BI Hub from seeing a list of not accessible reports for that agent.
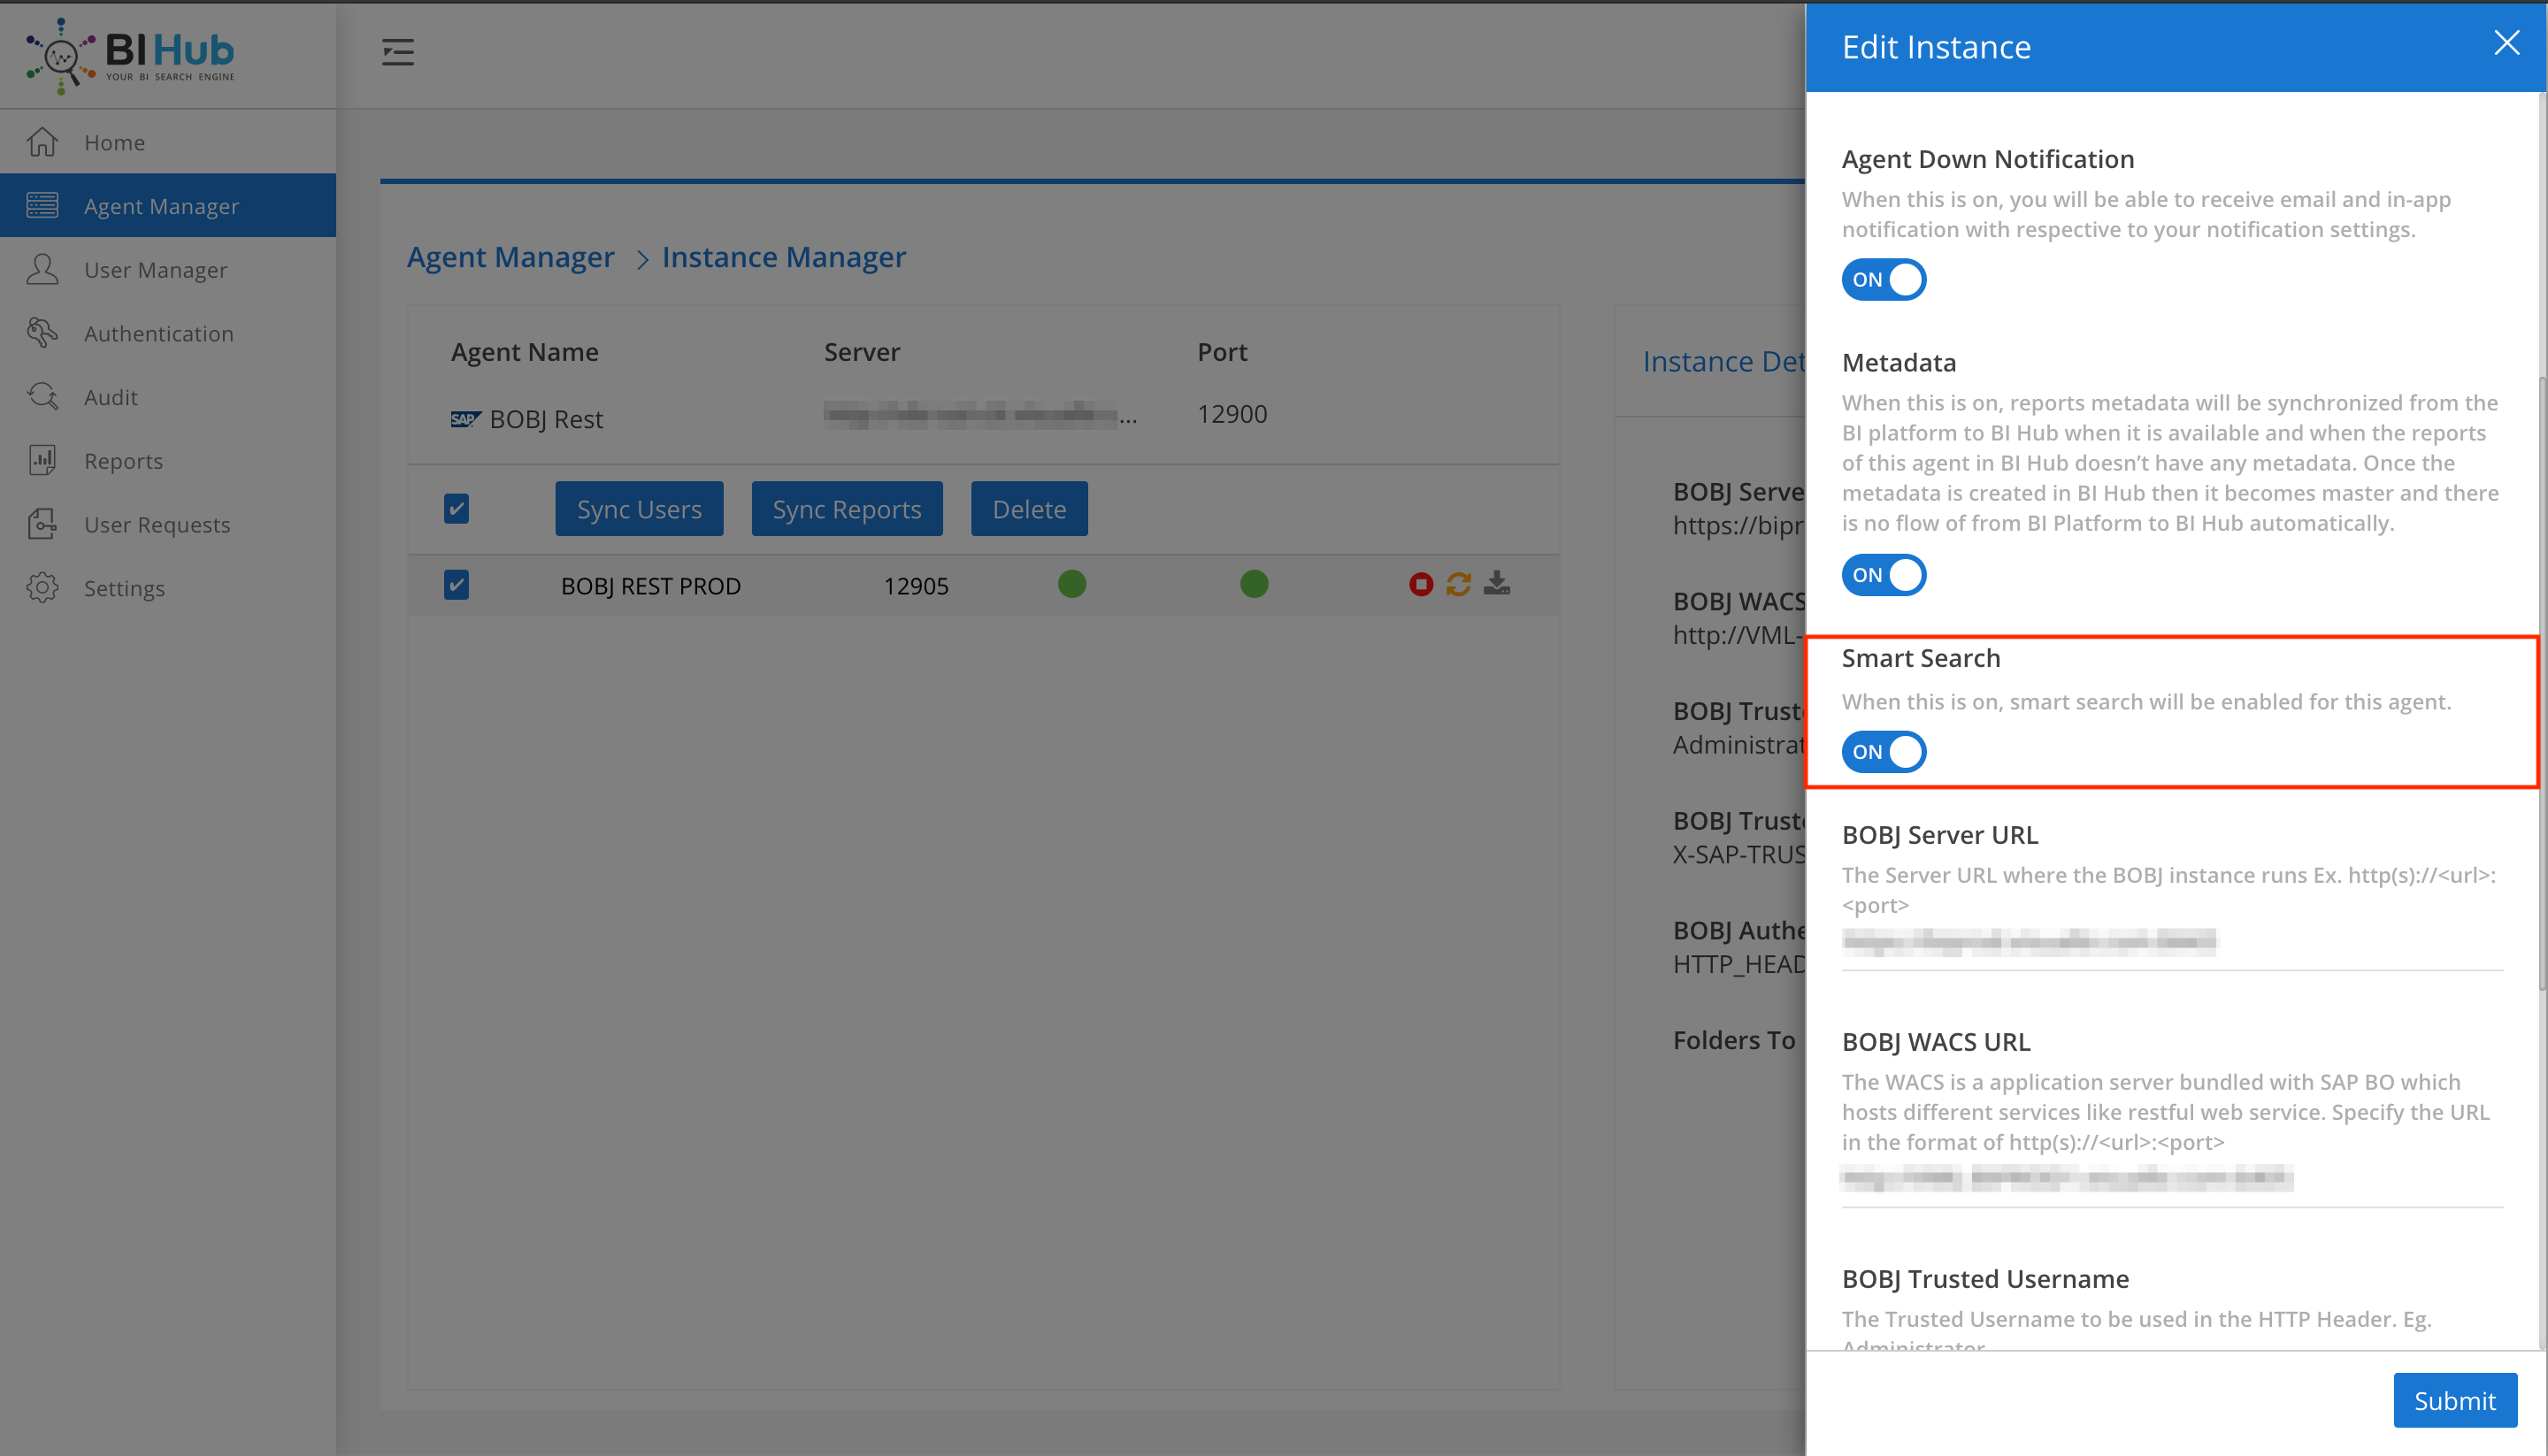
Smart Search toggle in Instance Manager
Delete Instance#
Deleting an agent instance will remove all the users and reports associated(mapped) with the instance and cannot be undone.
Click on an Agent name, select the Instance, and click Delete.
Delete Instance
If there is another instance configured for the same agent, the users and reports will be accessible on that running instance.
Stop the Instance#
When an instance is stopped, the features like Sync Users, and Sync Reports are also disabled for that instance. Admin is notified in the Home Page > Instances Configured section about the stop instance.
To stop an instance, select the instance and click the stop( ![]() ) icon.
) icon.

Stop Instance
Users cannot access the reports for the Agent whose instance is stopped.
Start the Instance#
Admin can start the Agent's instance to make the Reports accessible to the users by clicking on the start icon.
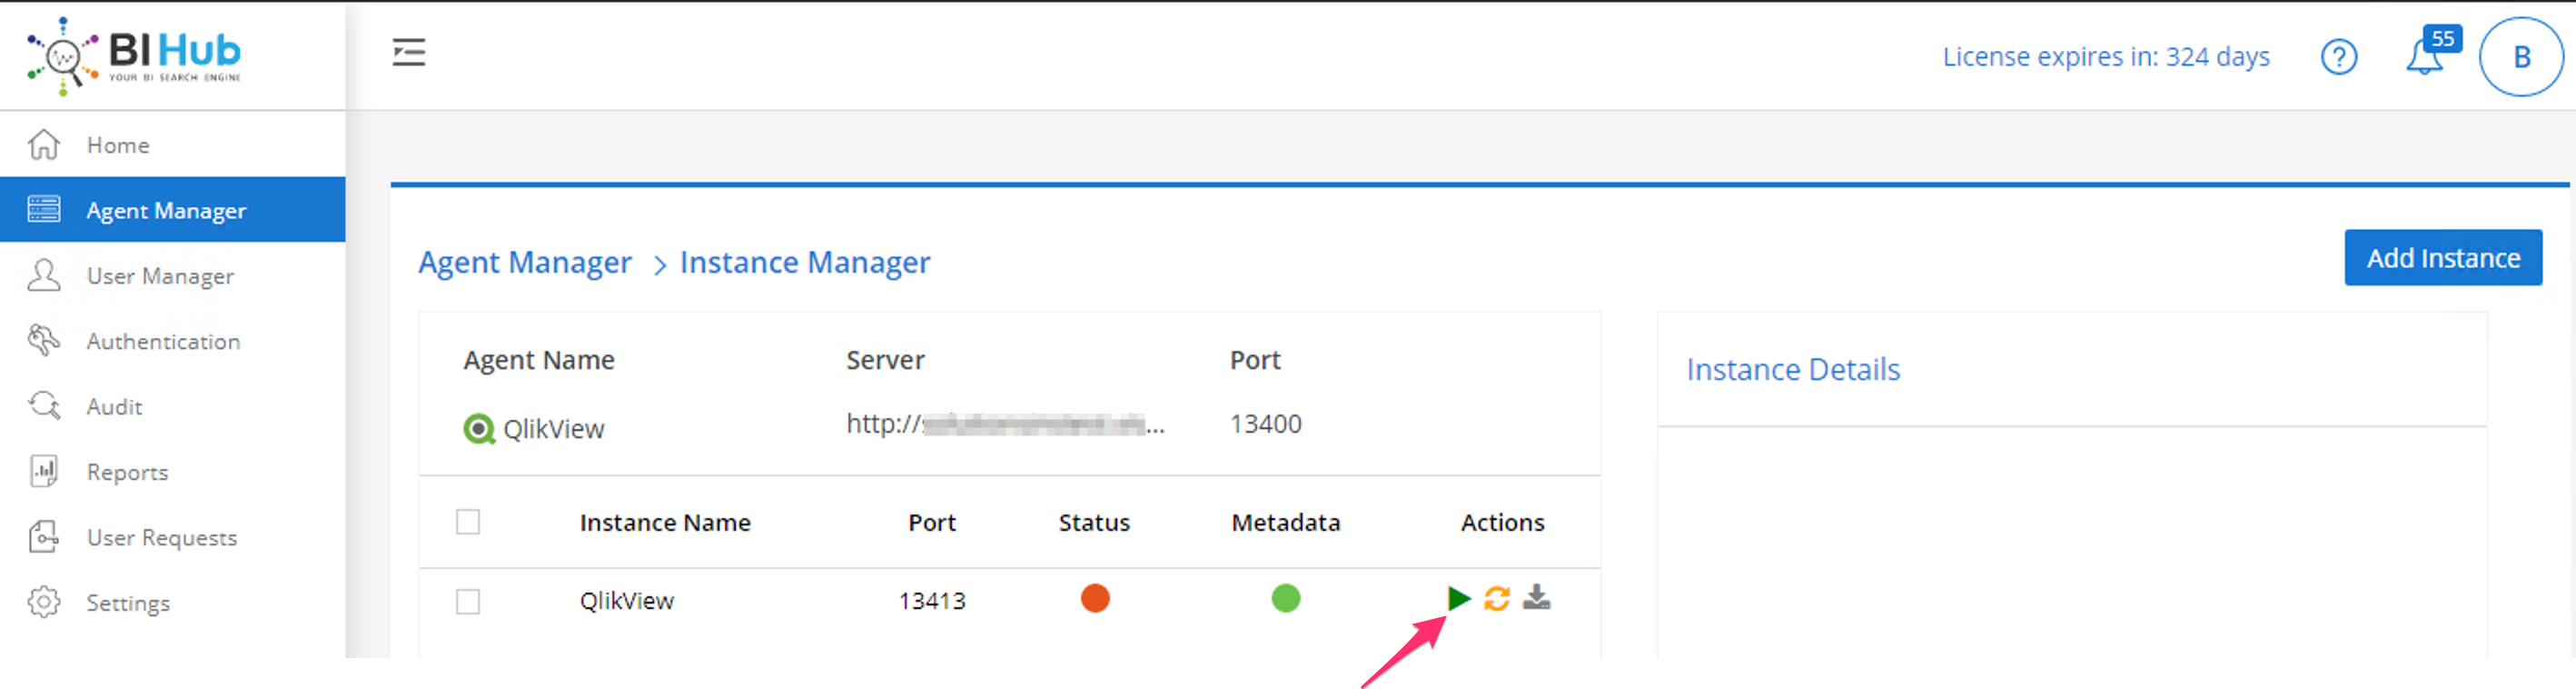
Start Instance
Restart Instance Service when BI Platform not reachable#
An Orange status indicates, that Instance is unable to reach the platform:
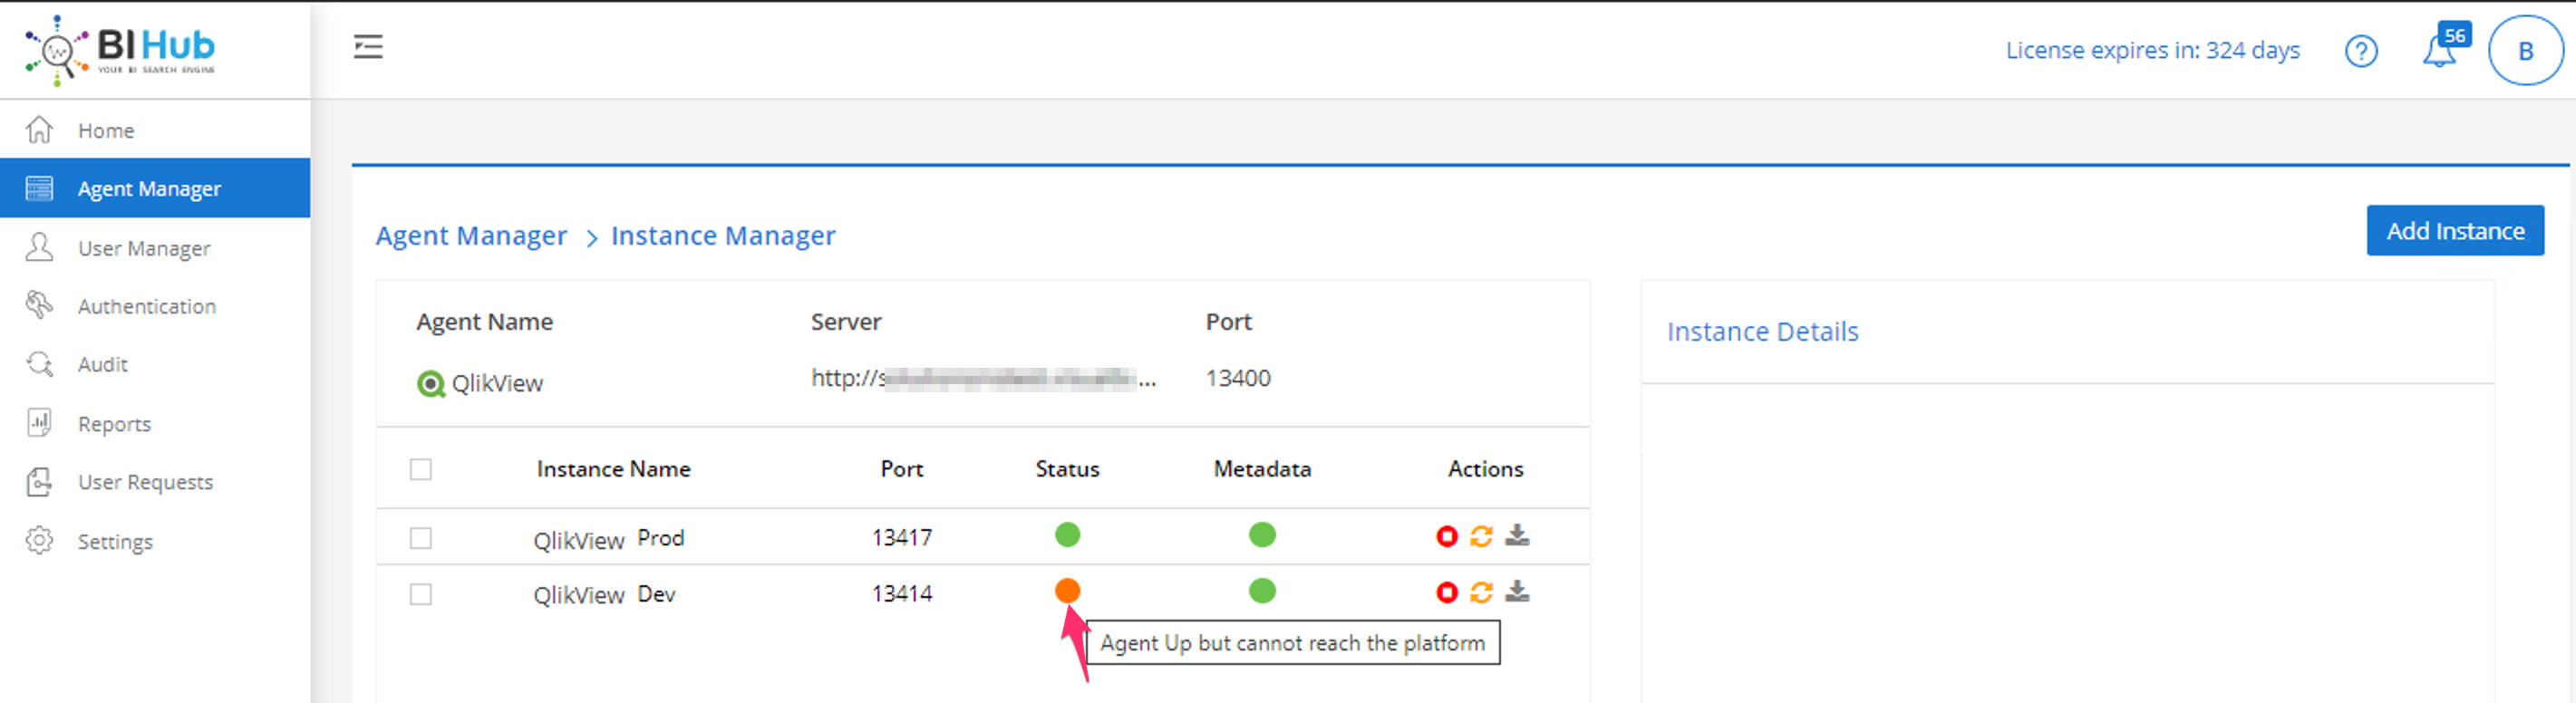
New Instance added, but not started
You must restart the respective Agent's Instance Service from the backend Server.
Go to Start > run > services.msc and Restart the VBIQlikViewAgent_QlikView_Dev ( VBI<agent-name>Agent_<instance-name> ) service.
The Instance will now be in the running state:
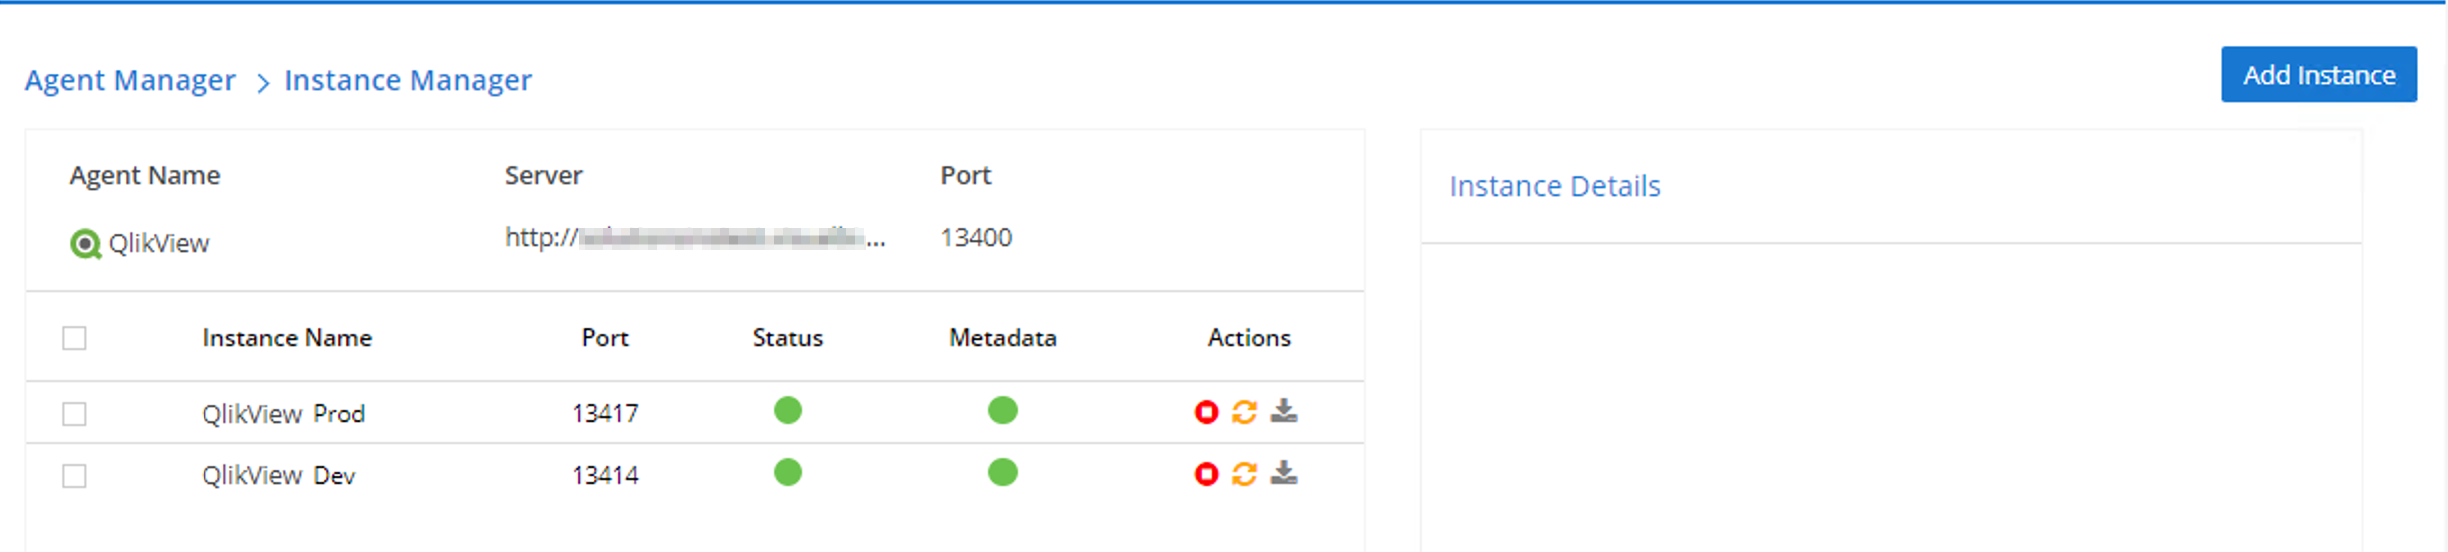
Instance started
Troubleshooting#
If the status is still in 'Orange'; then verify if all the configurations are correct and check the logs for any errors. Contact the platform administrator for further assistance in resolving the issue.
If you still find an 'Orange' status for the instance, kindly contact the BI Hub Support Team by raising a ticket in the support portal or by sending an email to support@bihub.com.
Restart Instance#
Select an Instance and click restart ( ![]() ) icon.
) icon.
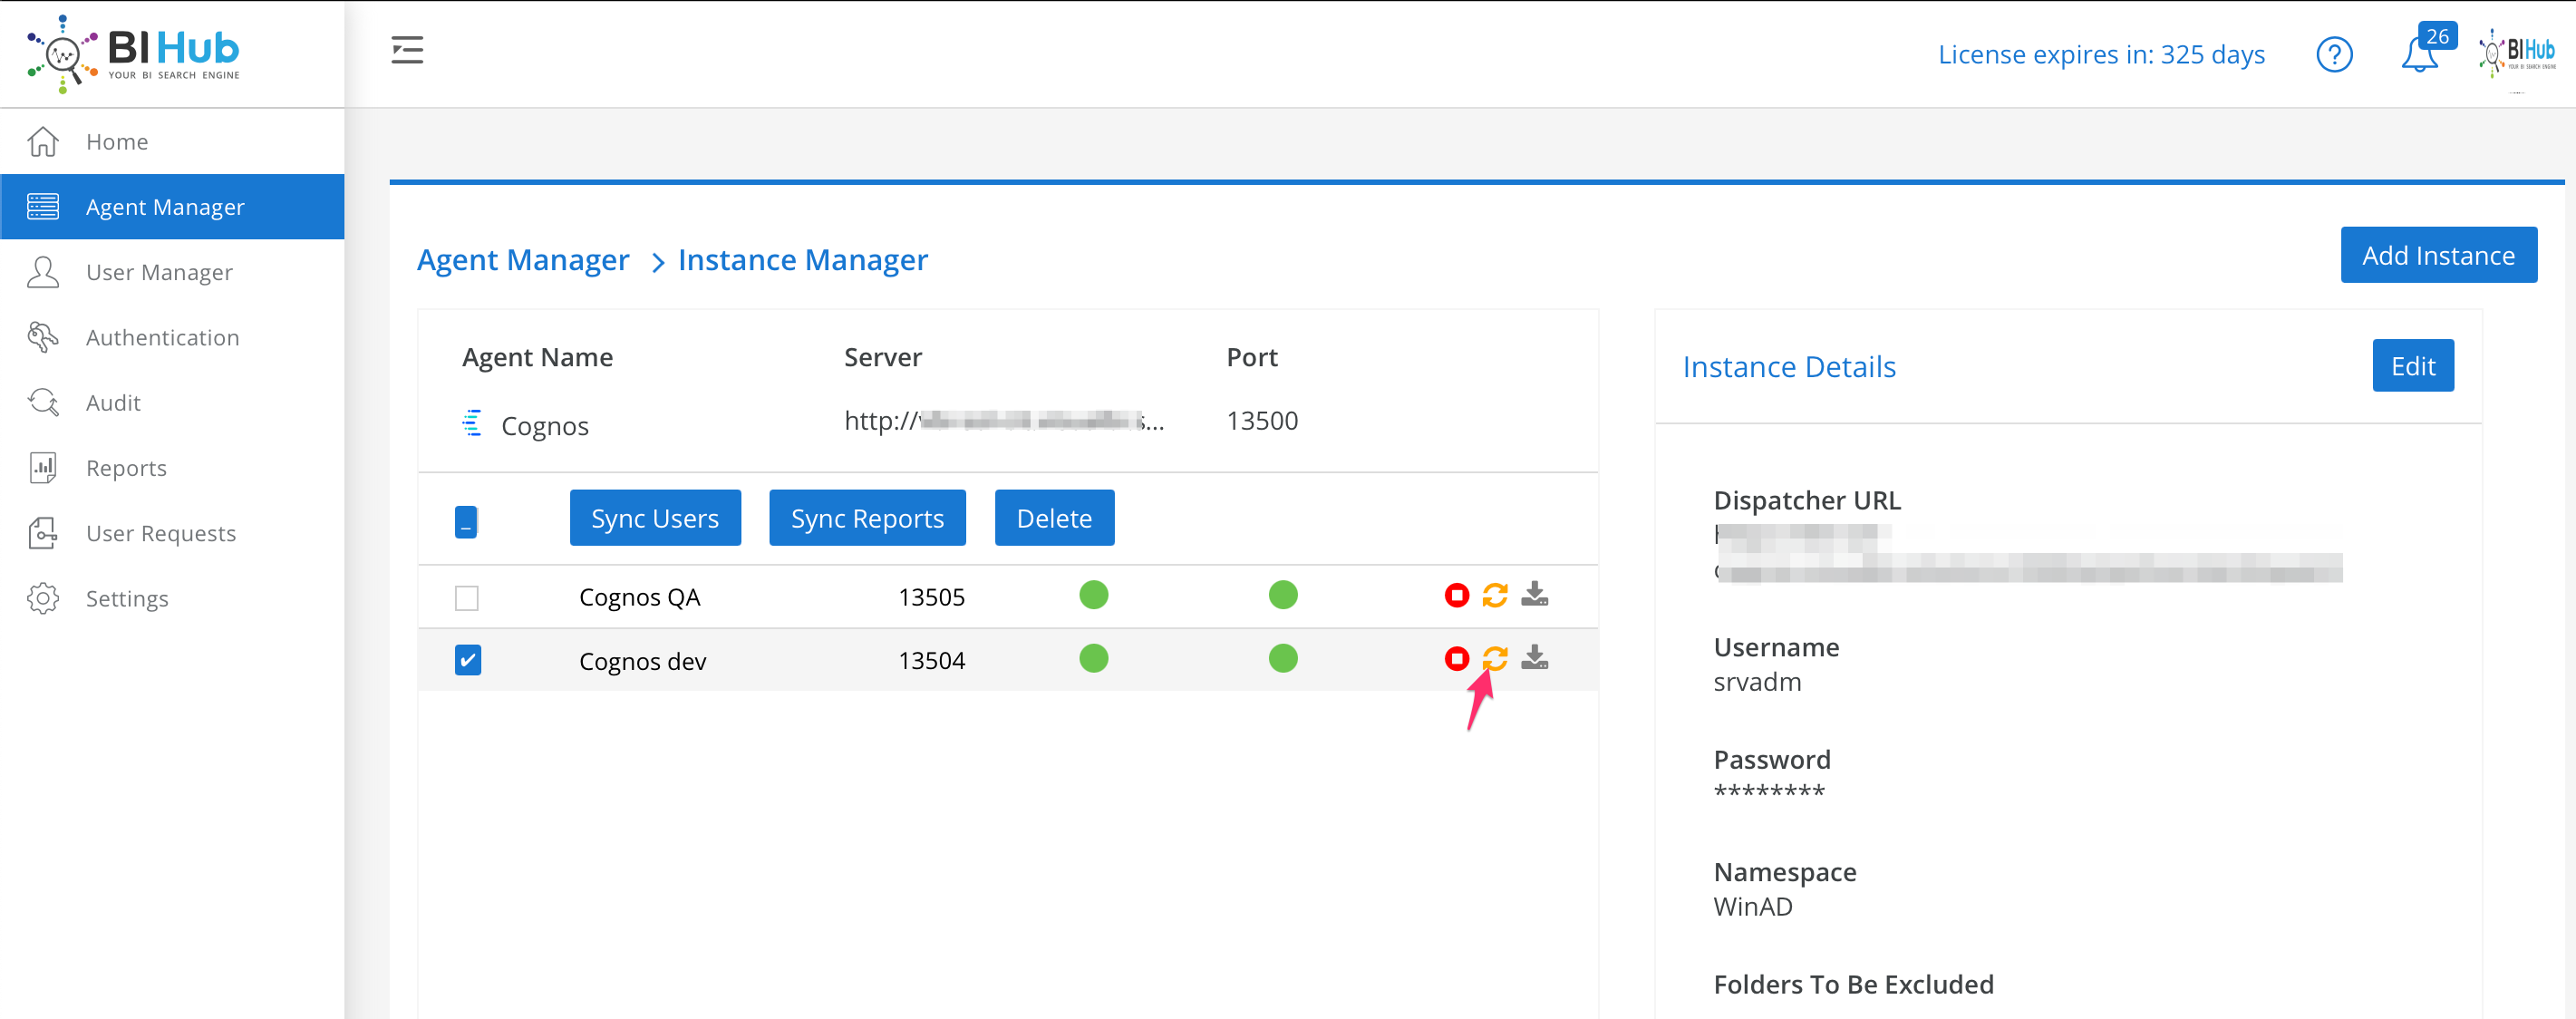
Restart Instance
Download Logs for Agent Instance#
Select an Agent and click the Download Logs icon next to an instance.

Download Instance Logs
This downloads the Service Manager logs, the instance, and backend logs for the Agent.
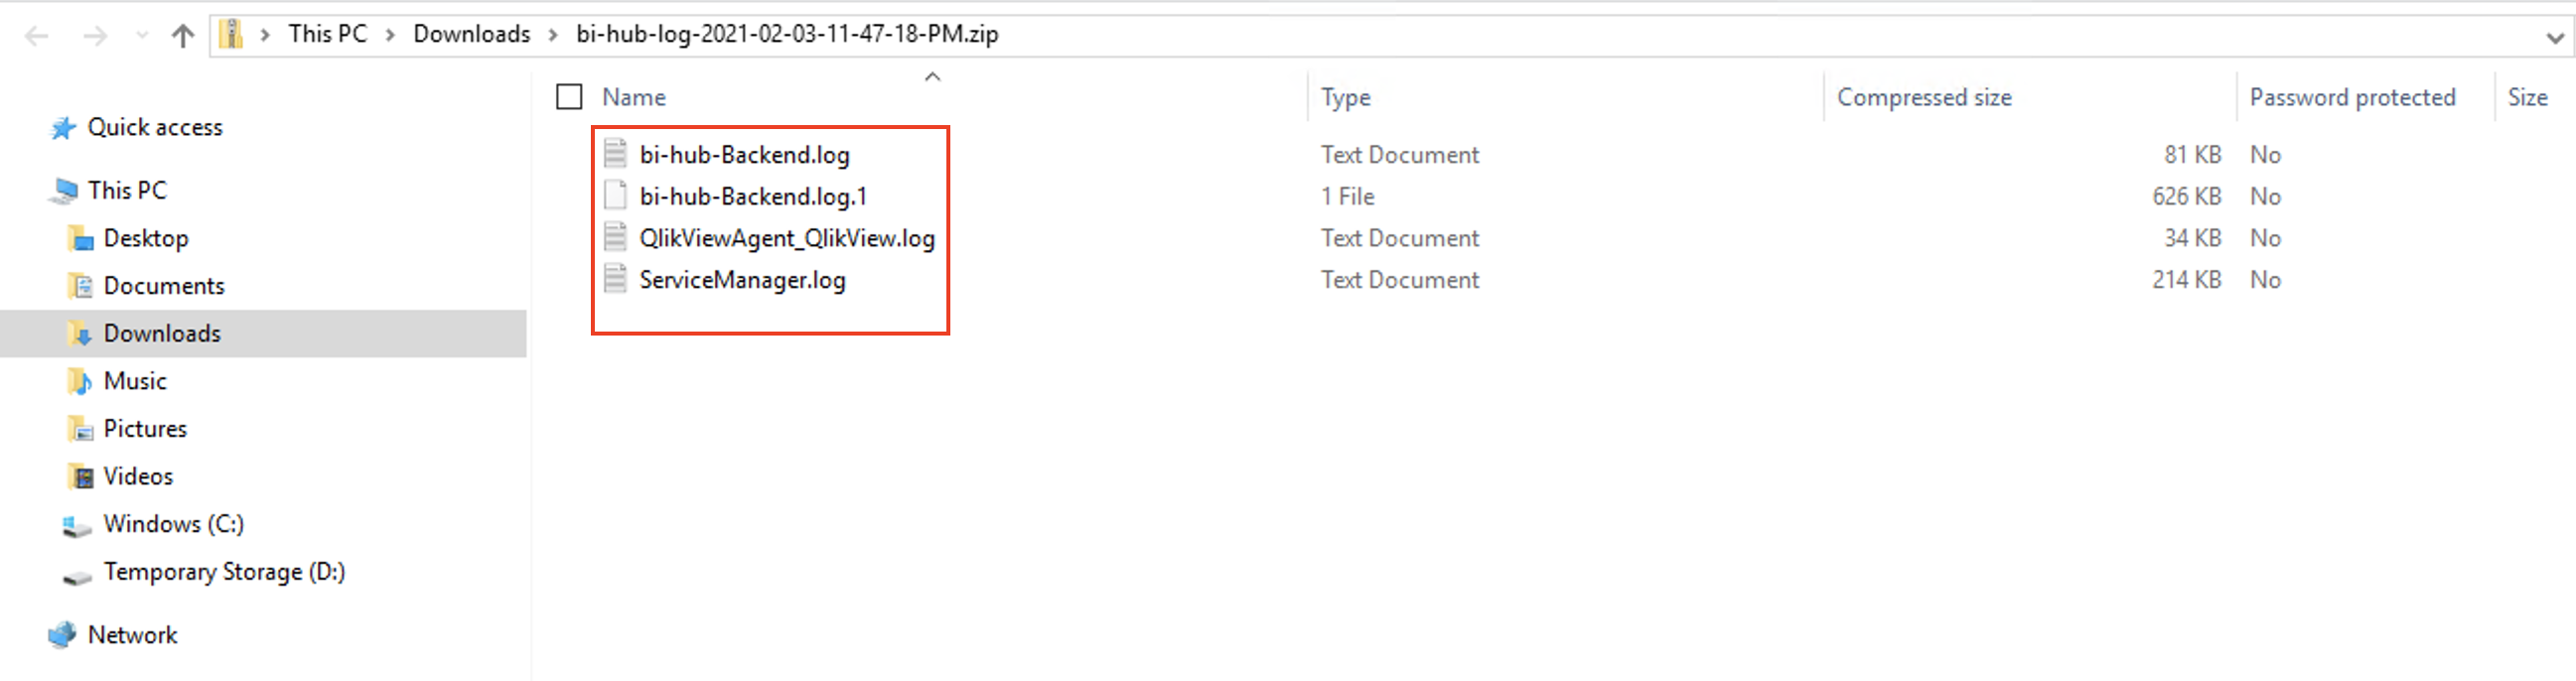
Instance Logs
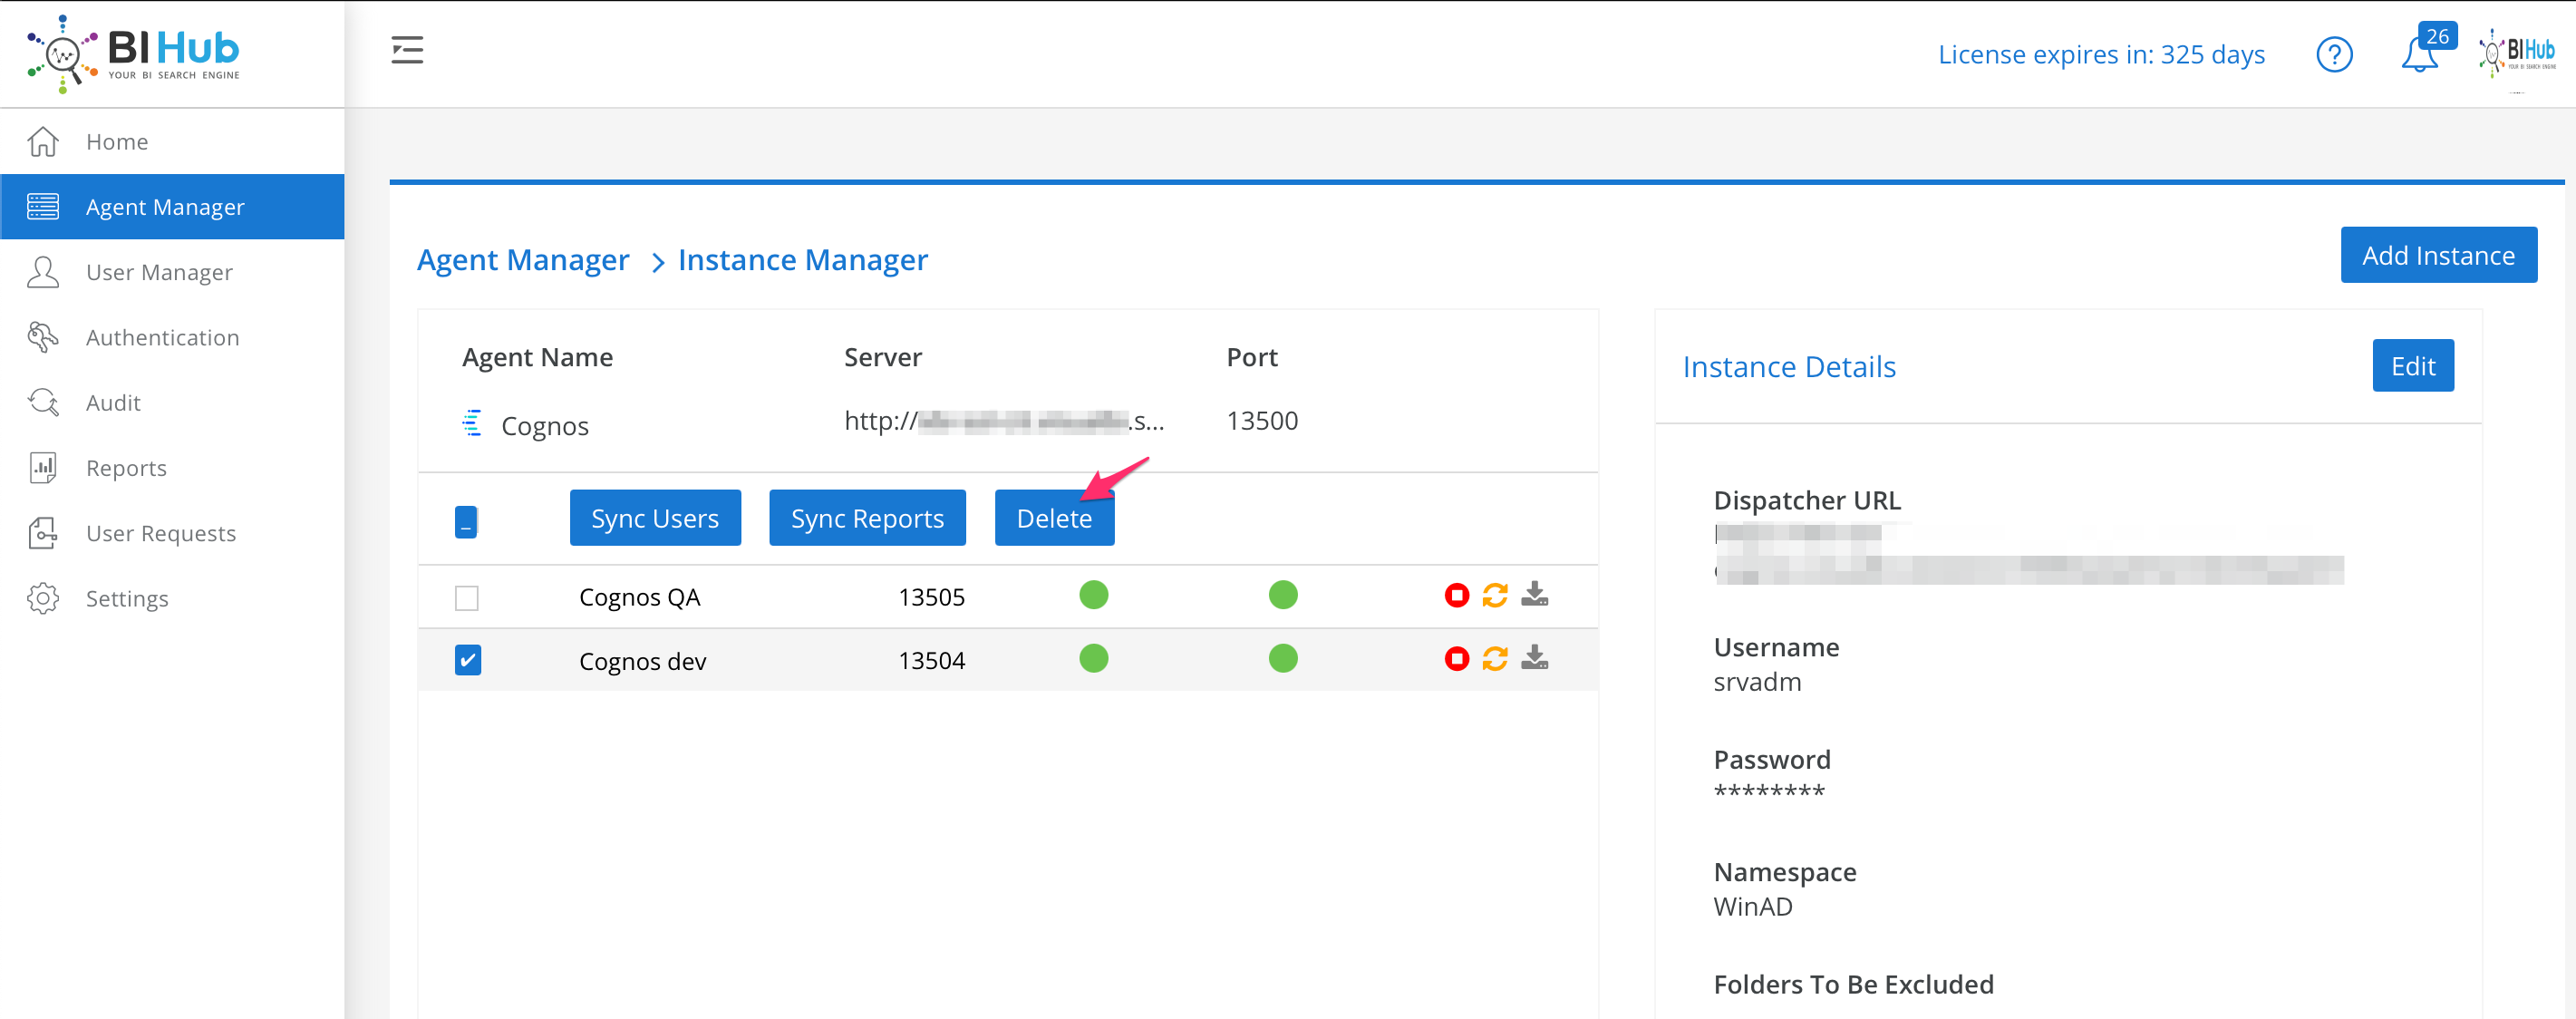
Sync Instance Users#
To synchronize all users with BI Hub from the selected instance:
In the Agent Manager screen, select an instance.
In the Instance Manage screen, select Sync Users.

Sync Instance Users
See the Sync Users section for summary of the sync.
Sync Instance Reports#
To sync the reports already accessible to the users from the selected instances(s).
In the Agent Manager screen, select an instance.
In the Instance Manage screen, select Sync Reports.
Sync Instance Reports
See the Sync Reports section for summary of the sync.