Power BI Service Principal Configuration
This Service Principal is used to provide administration authentication for Power BI agents without admin oAuth credentials.
System Admin must configure this Service in the platform. Once configured, the bihubadmin adds the service principal in the bi hub application (Refer the Service Principal Authentication section).
Configuring service principal involves the following steps:
- Set up the application in Azure
- Create the application secret
- Add application to a security group
- Enable service principal authentication in Power BI
- Configure Permissions for the Application
Step 1: Set up the Application in Azure#
Open the Azure portal > https://portal.azure.com
Go to Azure Active Directory > App registrations > New registration.
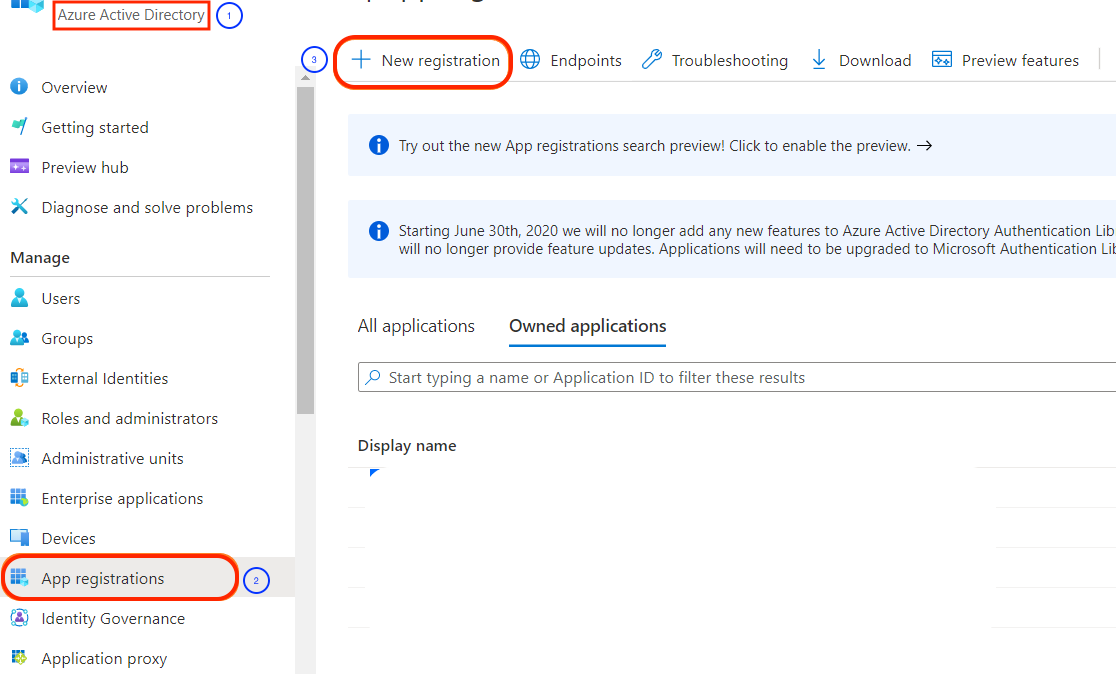
Azure new application registration
Enter the following field values for the application:
- Name: The display name for service principal.
- Supported account types as Accounts in this organizational directory only (Default Directory only - Single tenant).
- Redirect URI of the application. The port number that you enter here must be the same as the backend port for Power BI agent.
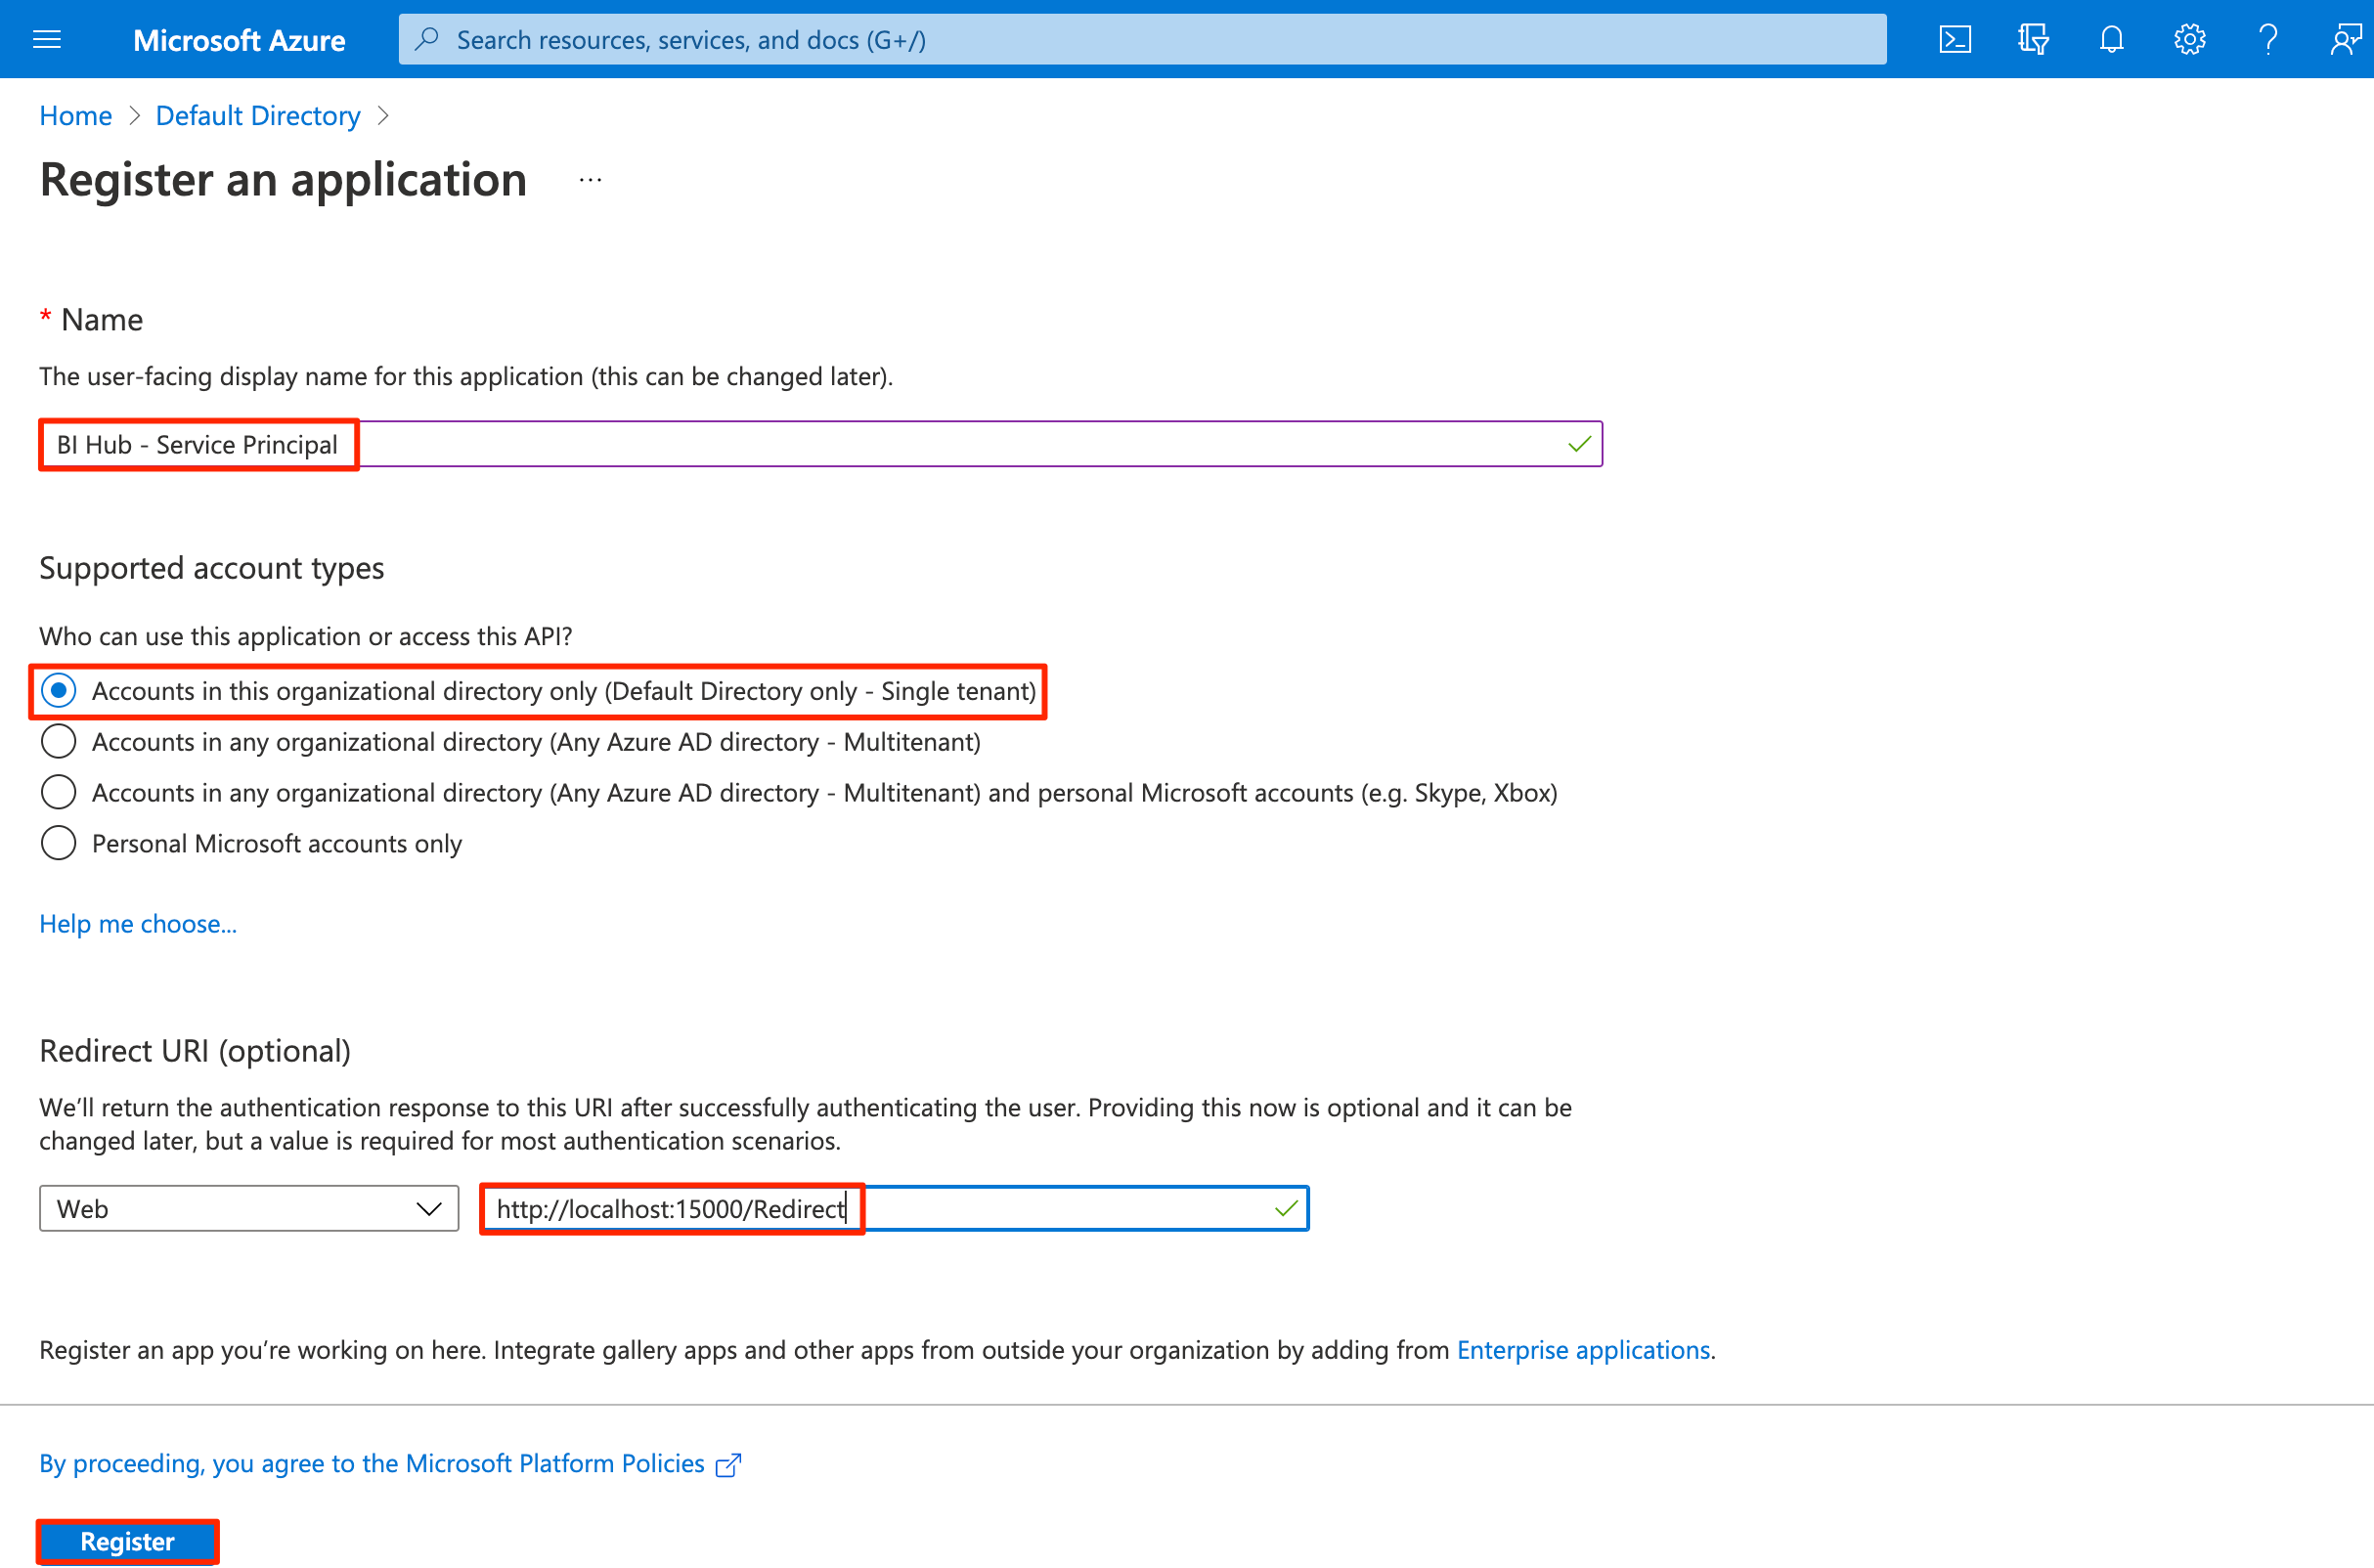
Application Registration
Select Register.
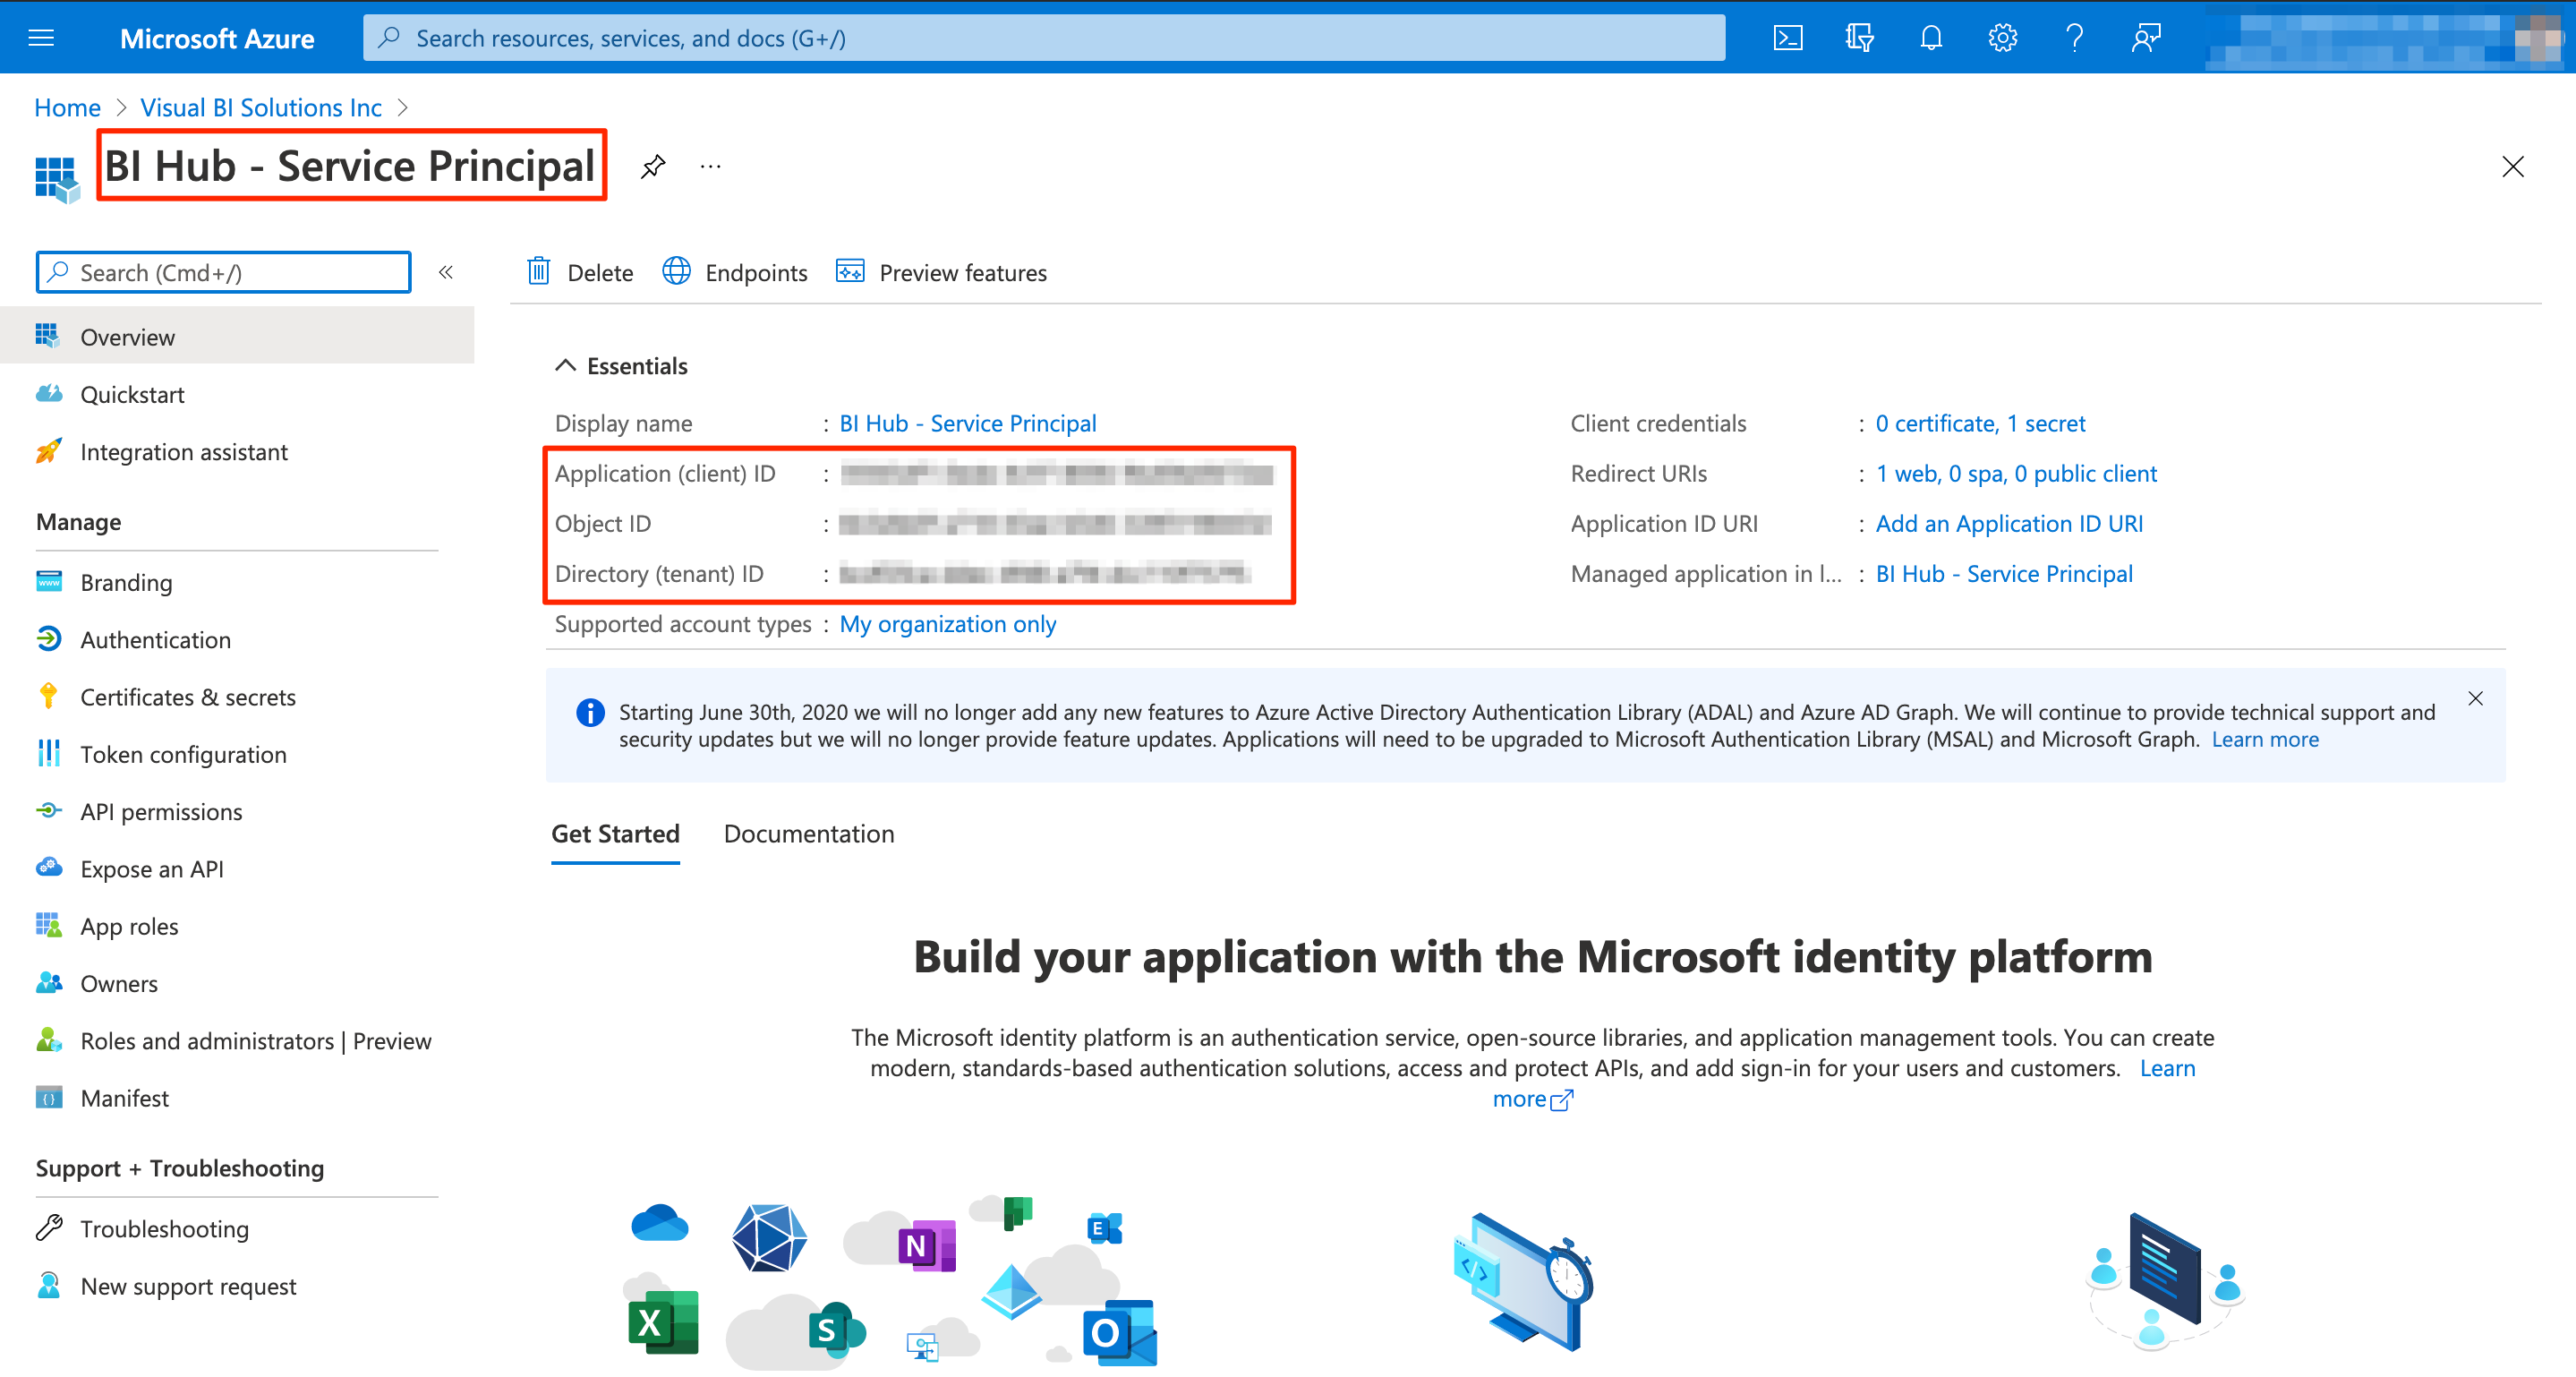
Application Registration
Make a note of the Application (client) ID, Object ID, and Directory (tenant) ID.
Step 2: Create the Application Secret#
Go to Azure Portal > Azure Active Directory > App registrations.
Select BI Hub - Service Principal.
From the left navigational panel, select Certificates & secrets.
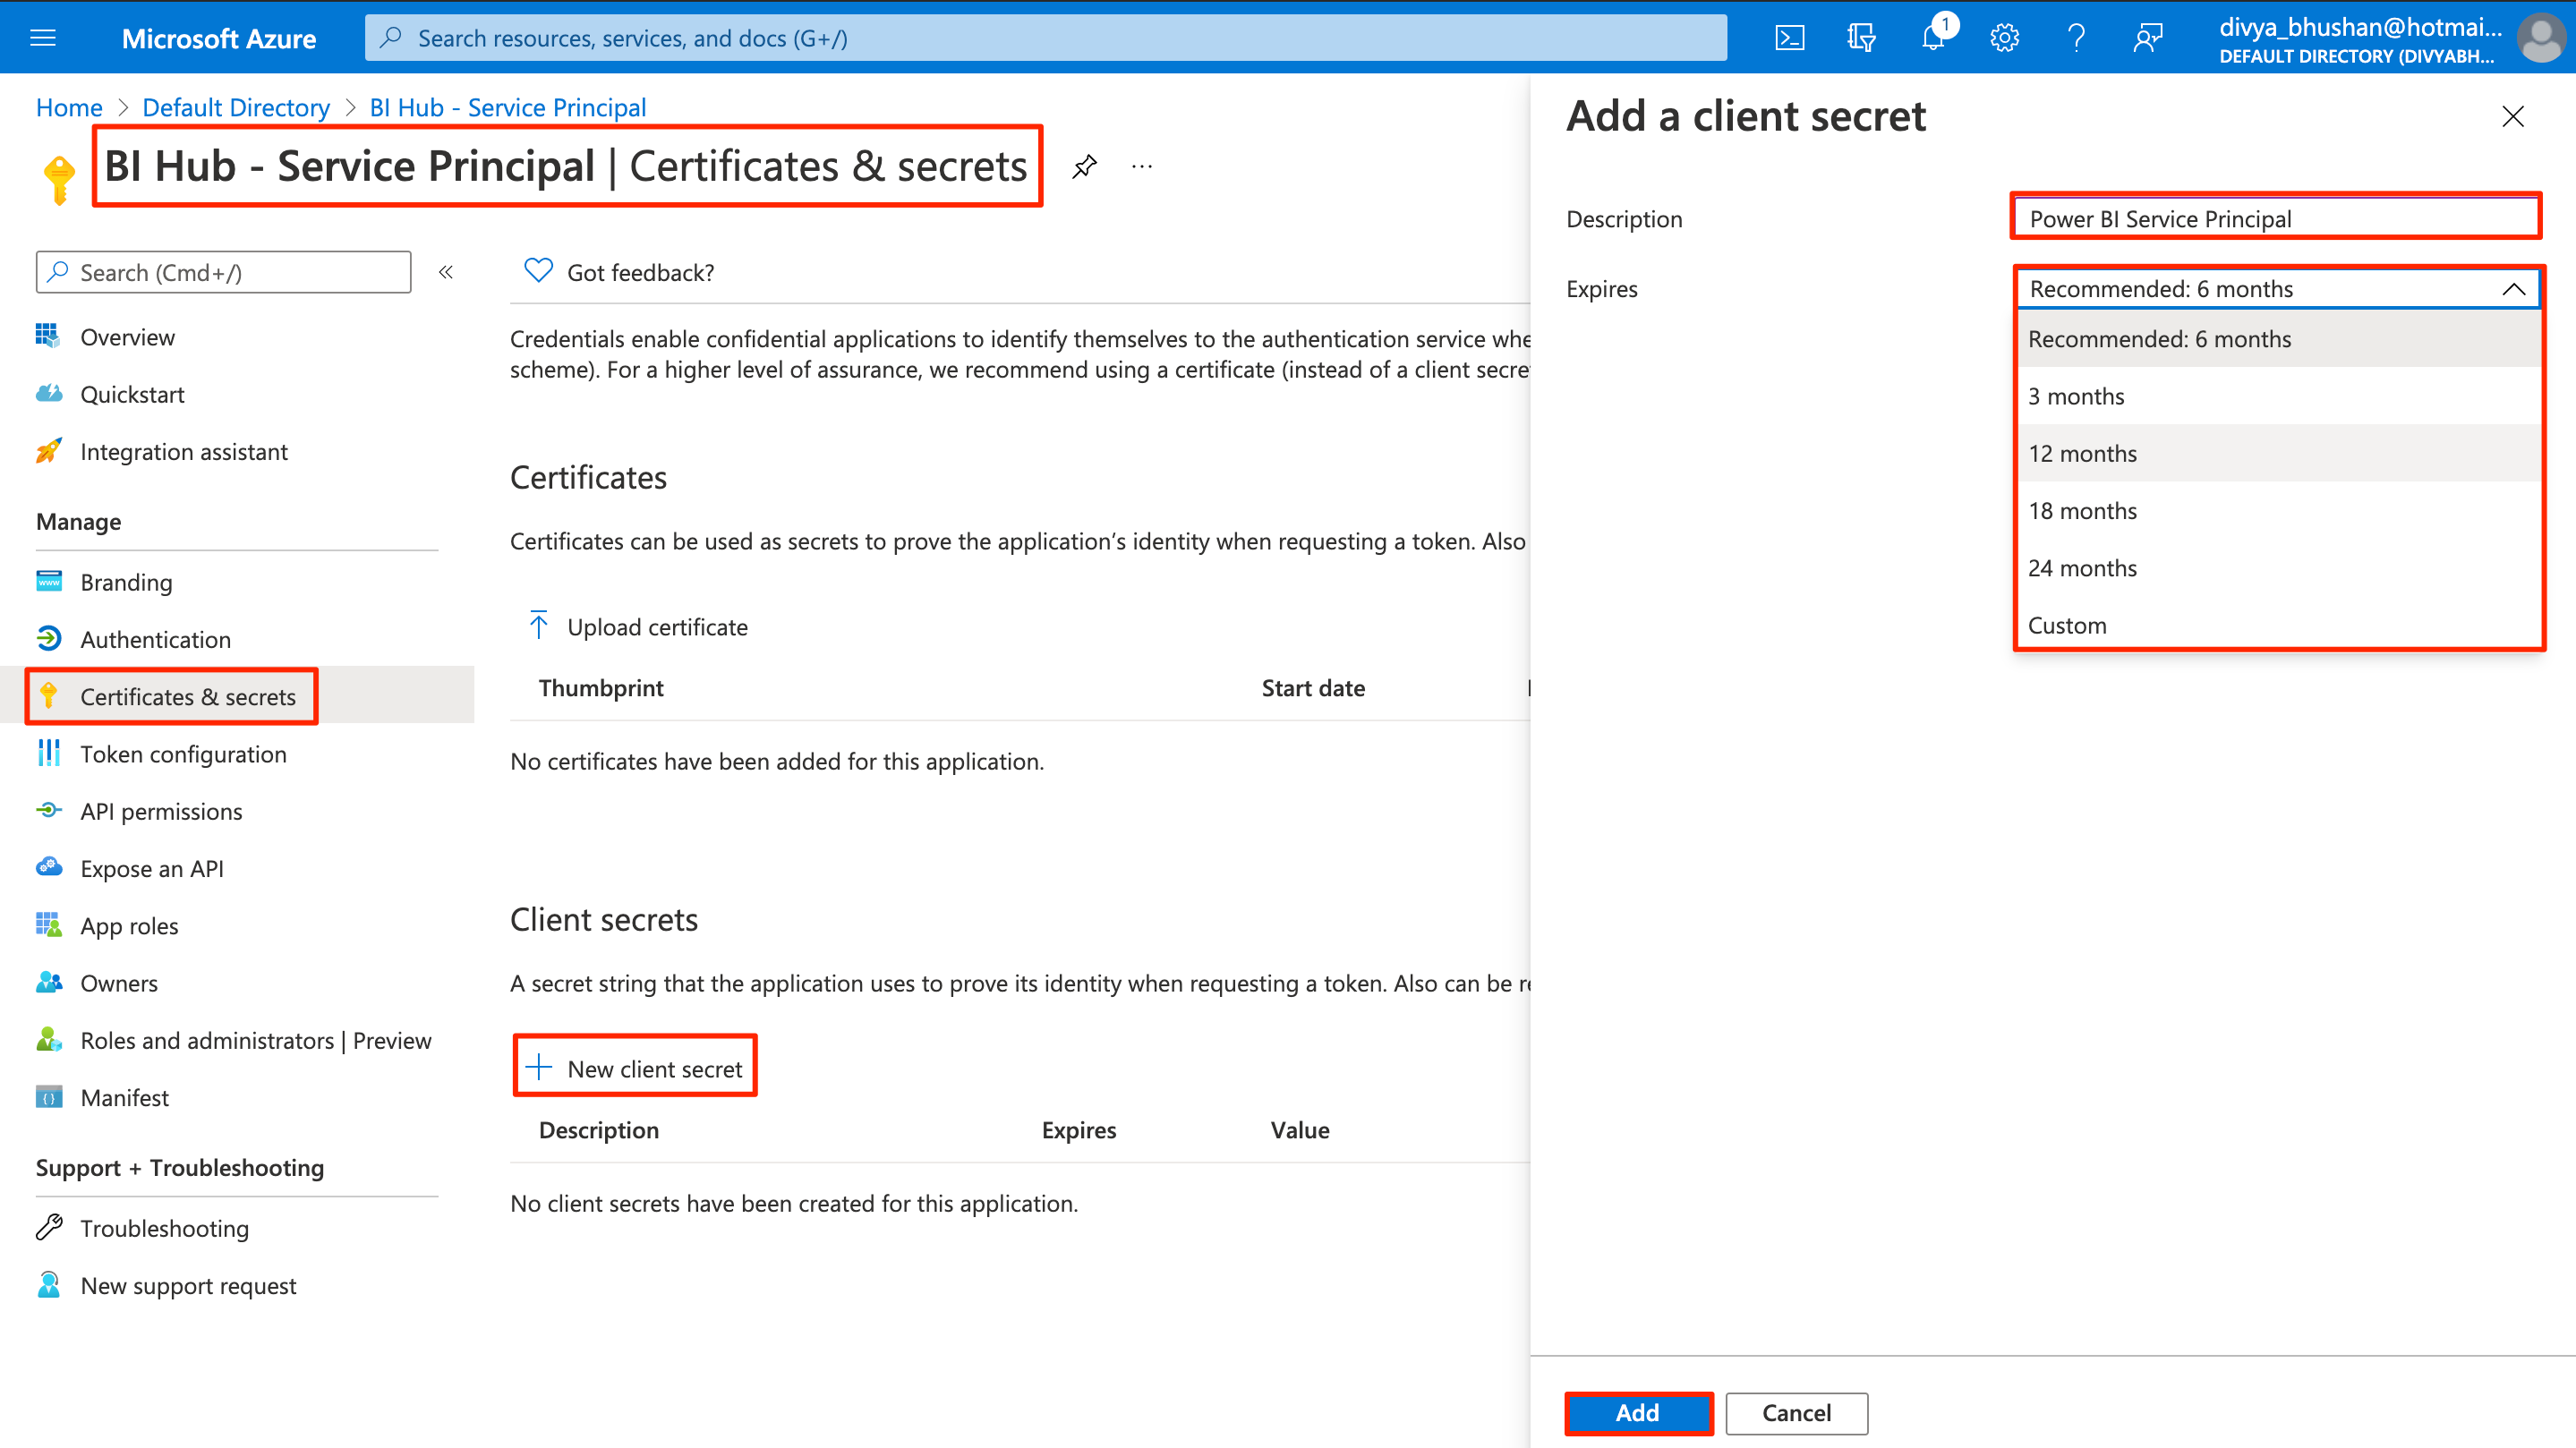
Generate Client Secret
Select New client secret.
Specify a Description and Expiry duration for client secret and select Add.
The Client secret is generated with a Value and a Secret ID.
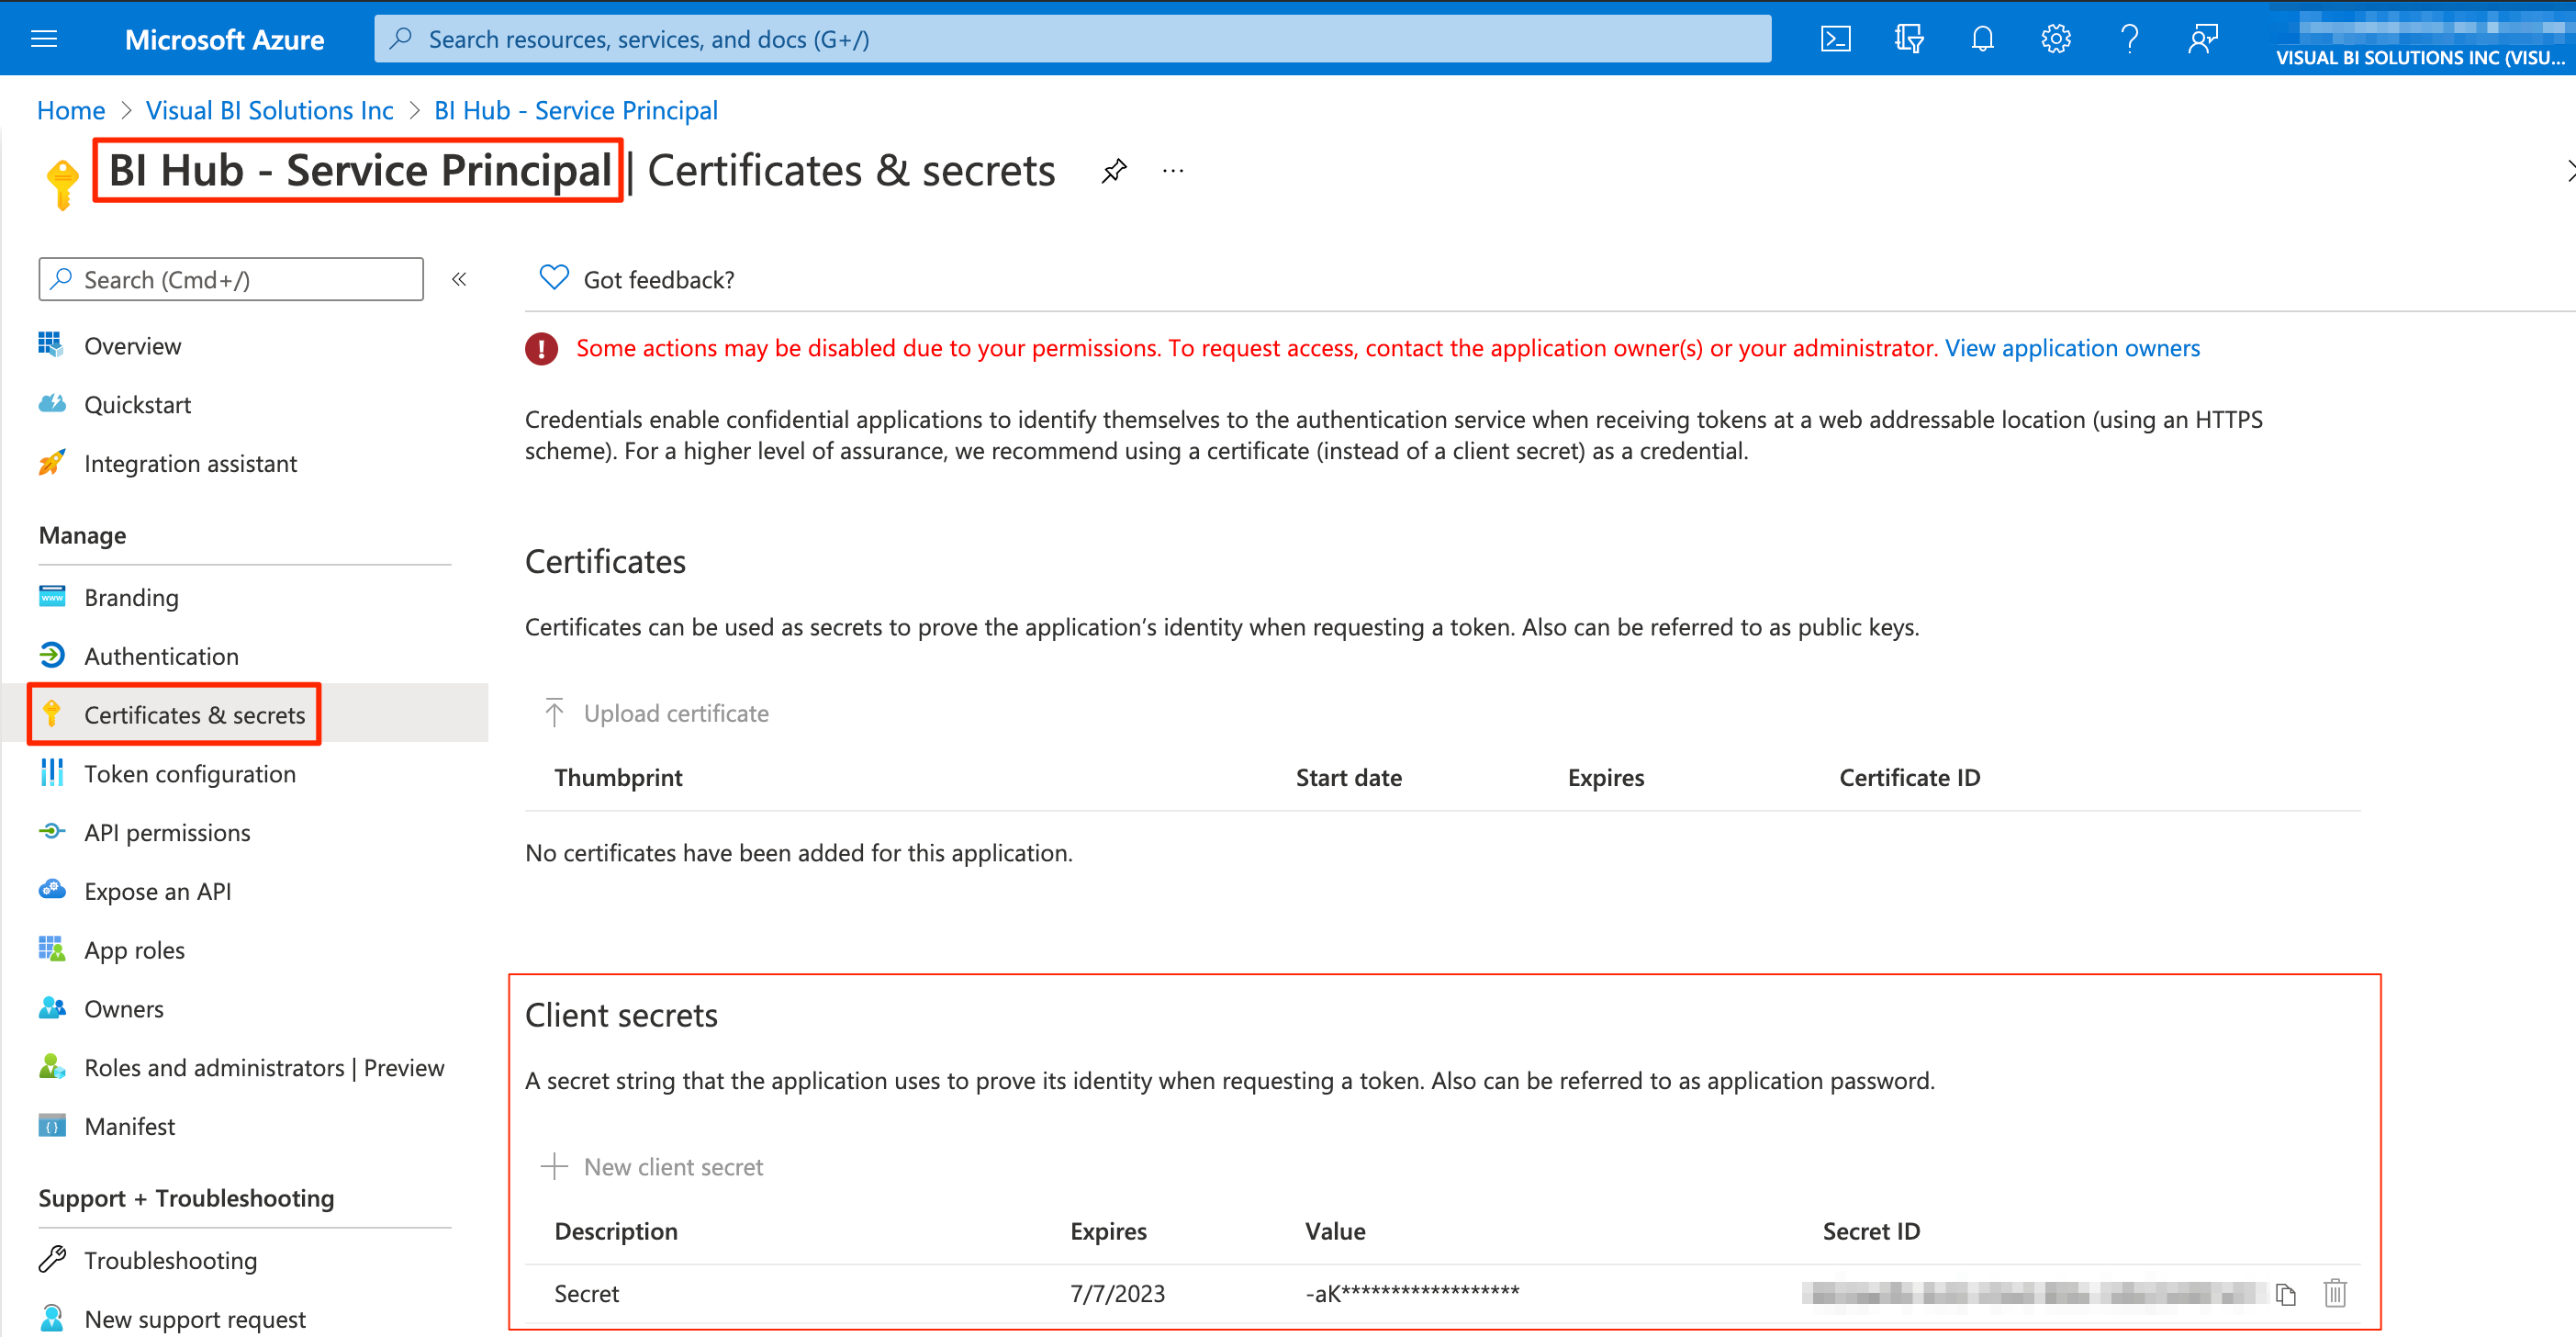
User Client Secret added
important
Save the client secret value. You will not be able to retrieve it after you perform another operation or leave this blade. If failed to note down the value, please repeat the step Set up the application in Azure to create a new key.
Step 3: Add Application to a Security Group#
- In the Azure AD admin center, select Azure Active Directory.
- Select Groups.
- To create a new security group, select New group. (Kindly ignore if you wish to use the existing security group).
- Add the service principal application that you created inside the security group obtained in the above step.
- Select Create.
Step 4: Enable service principal authentication in Power BI#
Administer the Power BI portal to configure the tenant settings for your application.
Tenant settings are used to restrict capabilities and features to a limited set of users/groups.
- Sign in to Power BI using your admin account credentials.
- From the page header, select ... > Settings > Admin portal.
- Select Tenant Settings.
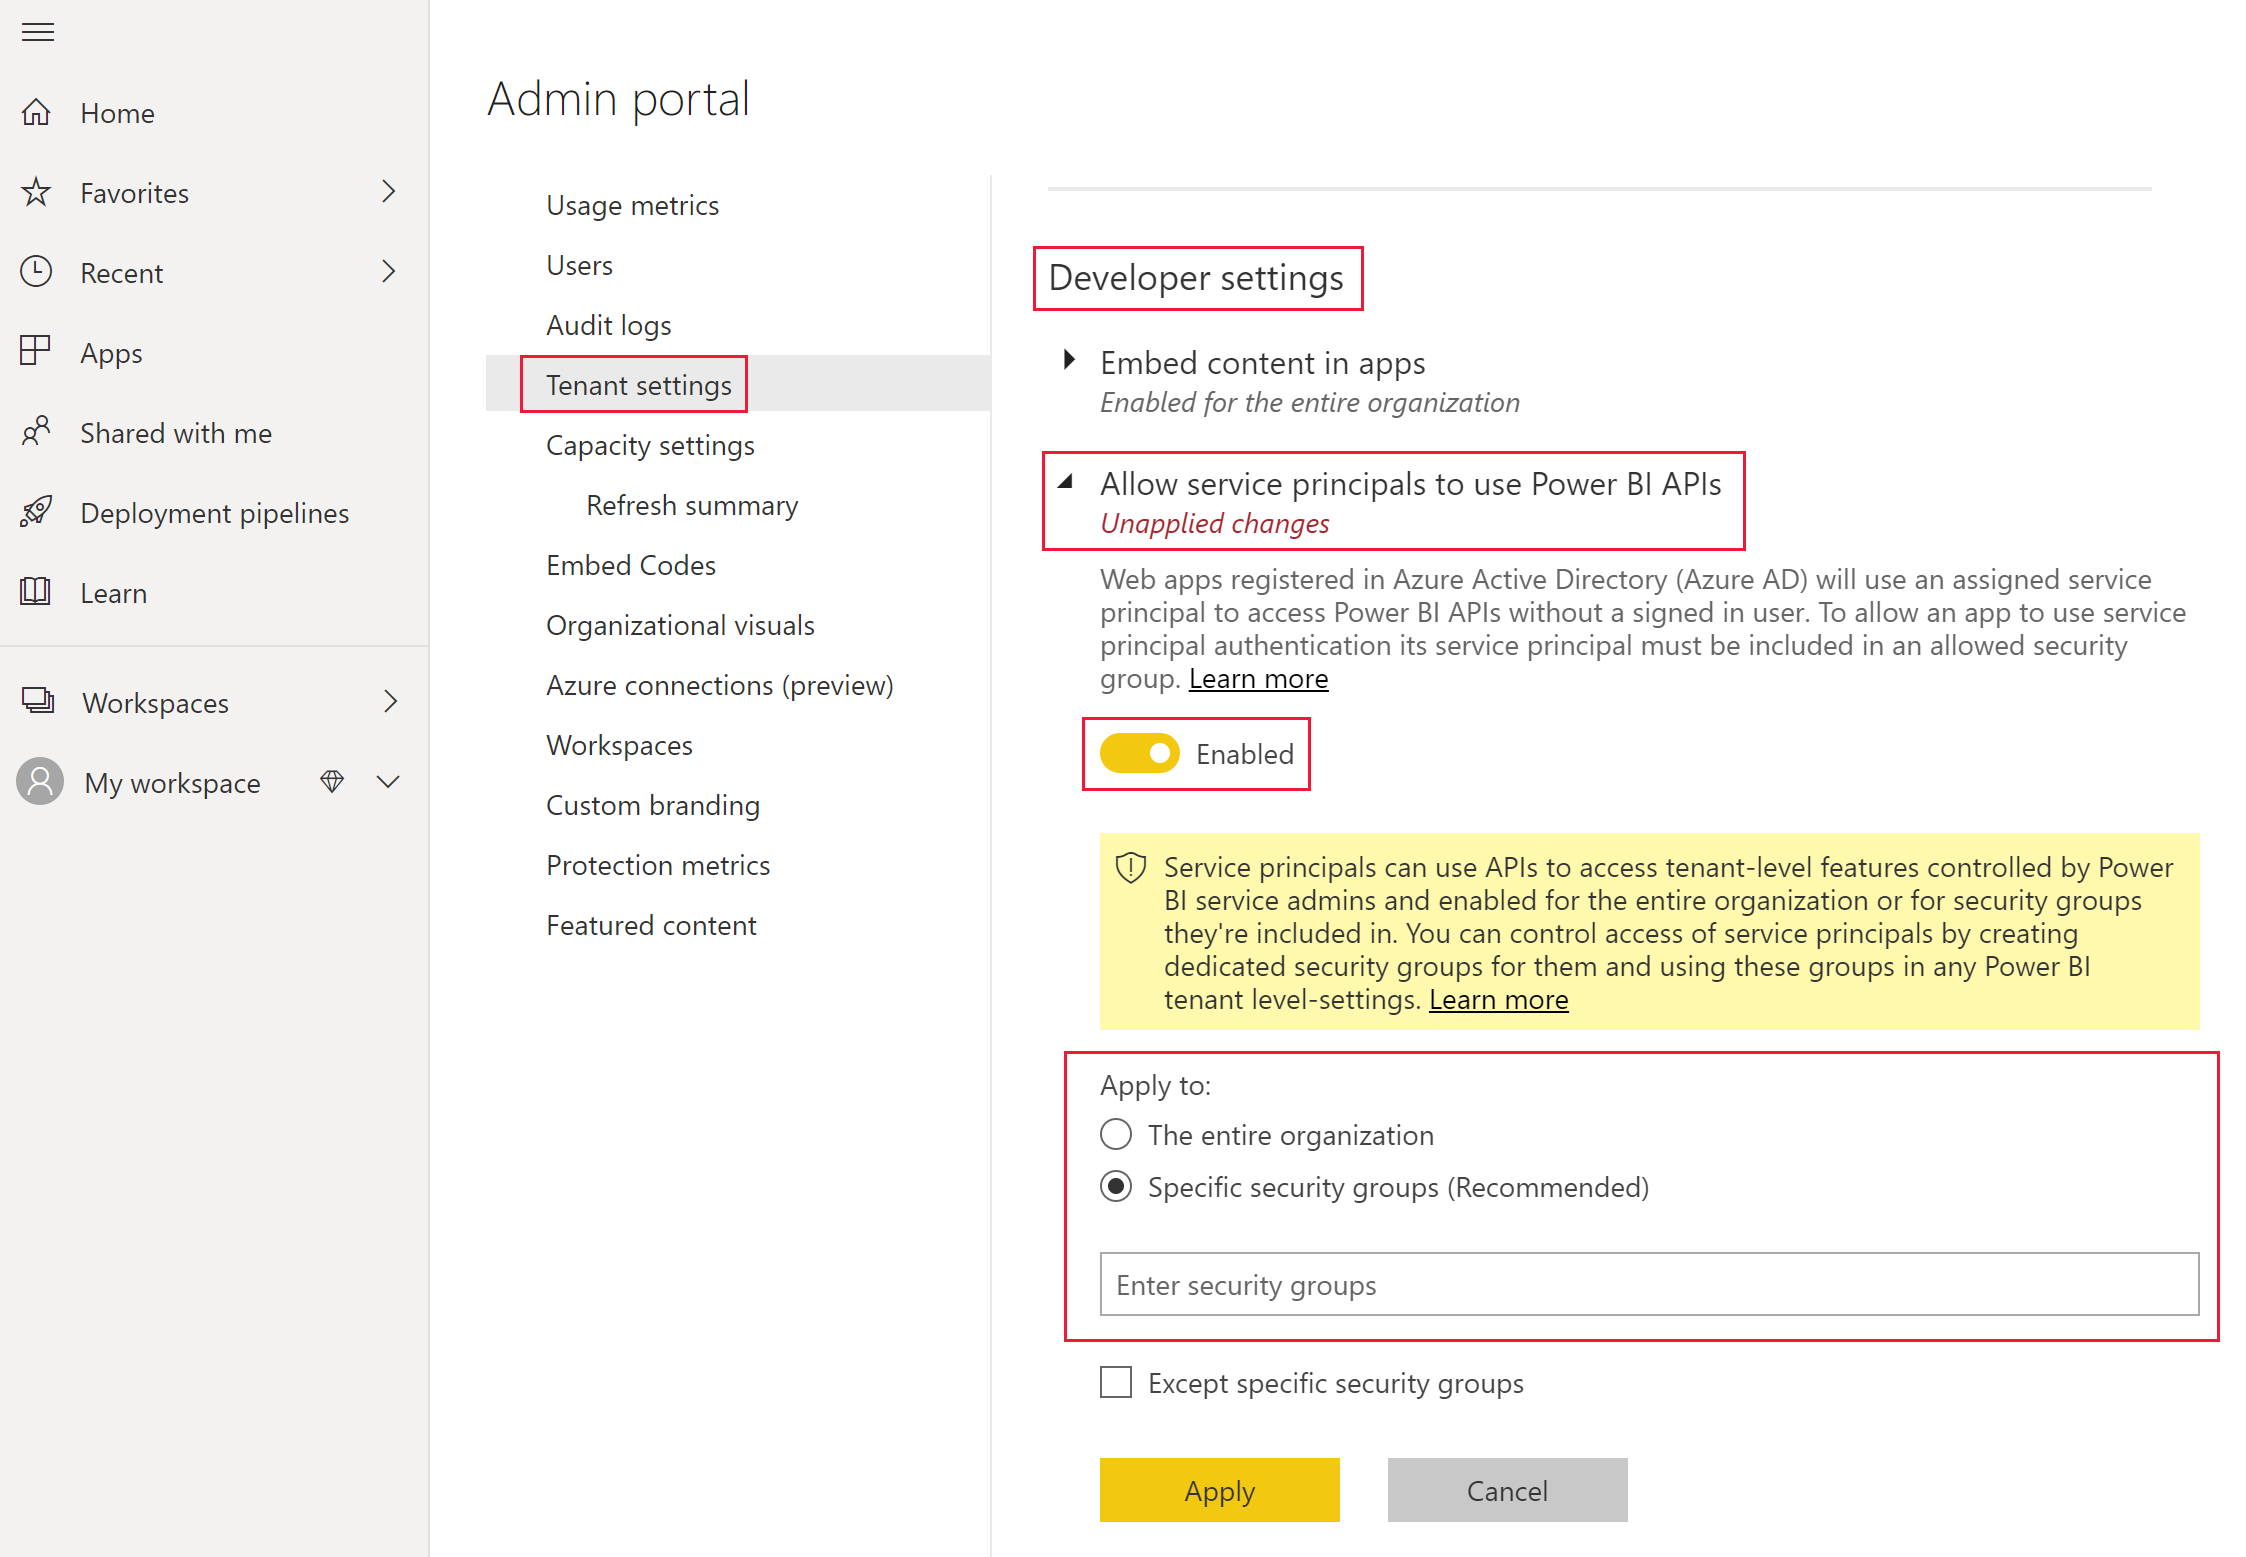
Power BI Admin portal Menu
- Under Developer settings, toggle on Enabled for Allow service principals to use Power BI APIs option.
- Under Apply to section, select Specific security groups.
- Add the security group where your Power BI Service Principal application is added. ( group of which principal is a member of)
- Under Admin API settings, toggle on Enabled for Allow service principals to use read-only Power BI admin APIs (Preview).
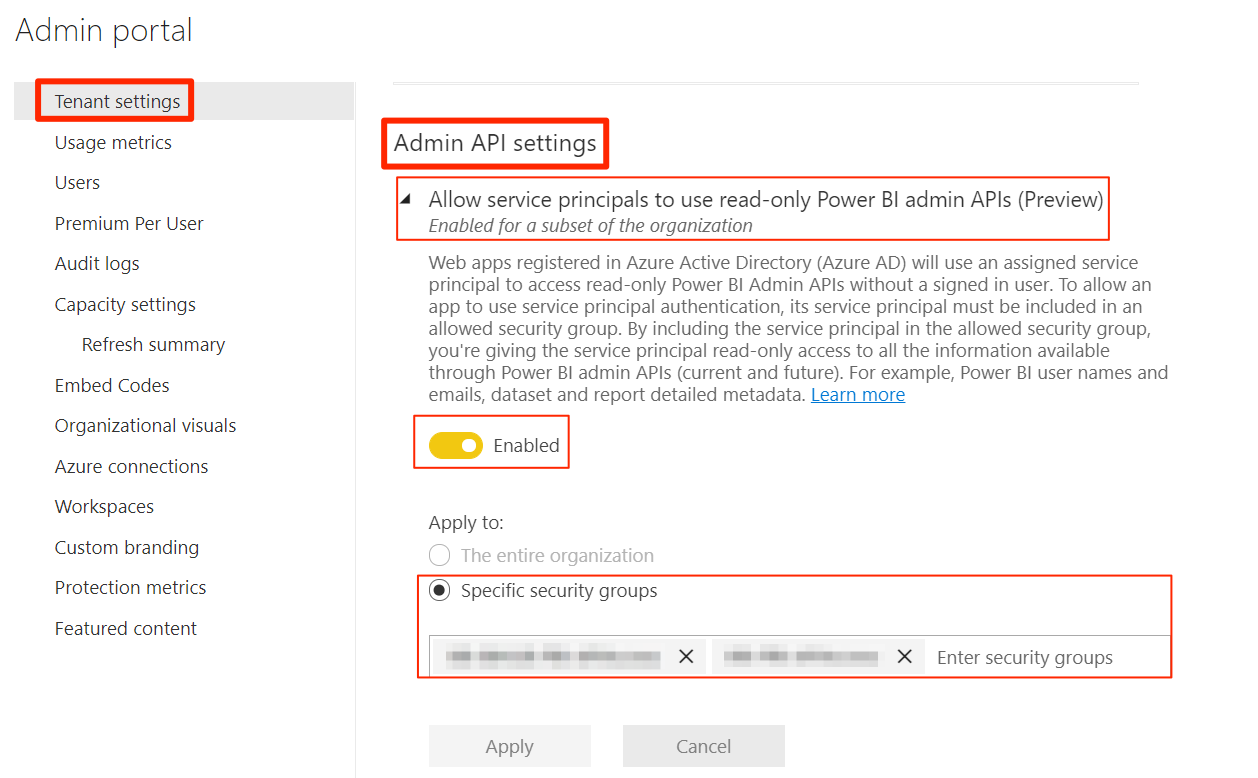
Power BI Admin portal Menu
- In the Apply to section, select Specific security groups and add the group where the application is a member of.
Step 5: Configure Permissions for the Application#
The application requires some permission-level actions on behalf of the user.
Go to Azure portal > Azure Active Directory > App registrations.
Click on your application and select API permissions.
Click Add a permission.
Map the permissions for service principal to work in BI Hub.
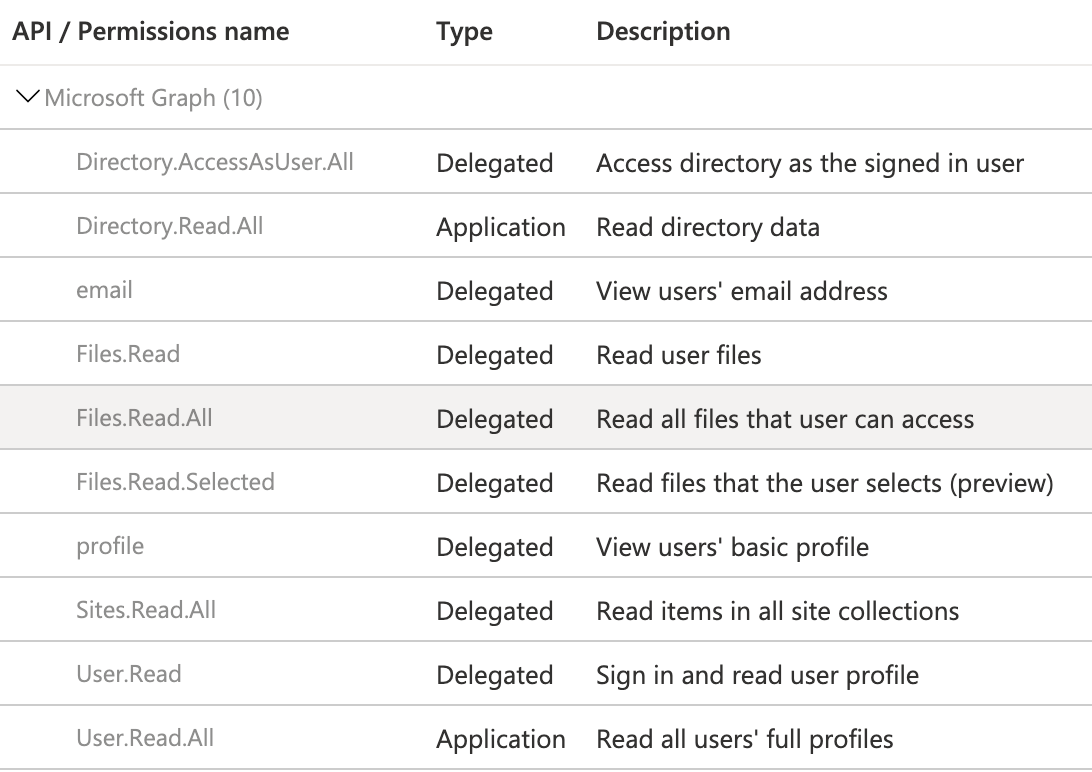
Microsoft Graph API permissions
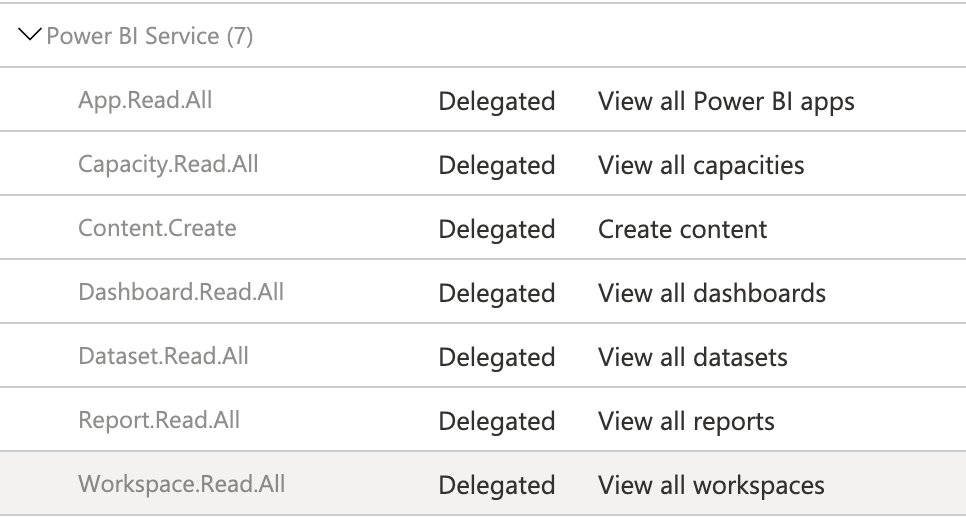
Power BI service API permissions
note
Do not give Tenant.Read.All and Tenant.ReadWrite.All permissions under Power BI Service permissions. That will prevent reports from coming into BIHUB.
Your Power BI Service Principal can now access Azure AD tenant resources.