SAC Platform Configuration
SAC allows third-party applications to access its web services by using the authorization protocol OAuth2.0. With OAuth 2.0, we can make web service calls without exchanging user credentials between applications.
To integrate the SAC Platform with BI Hub, you need to do some setup in your SAC tenant. There are 2 authorization methods available:
- Step 1: Register a new client with grant type as 'Authorization Code' - User
- Step 2: Register a new client with grant type as 'Client Credentials' – Resource Owner
The user needs to do OAuth to access the SAC resource.
To Register an OAuth client, follow the below steps:
Login to your SAC tenant as an admin.
Navigate to the administration page by clicking on ≡ (Main Menu) > System > Administration.
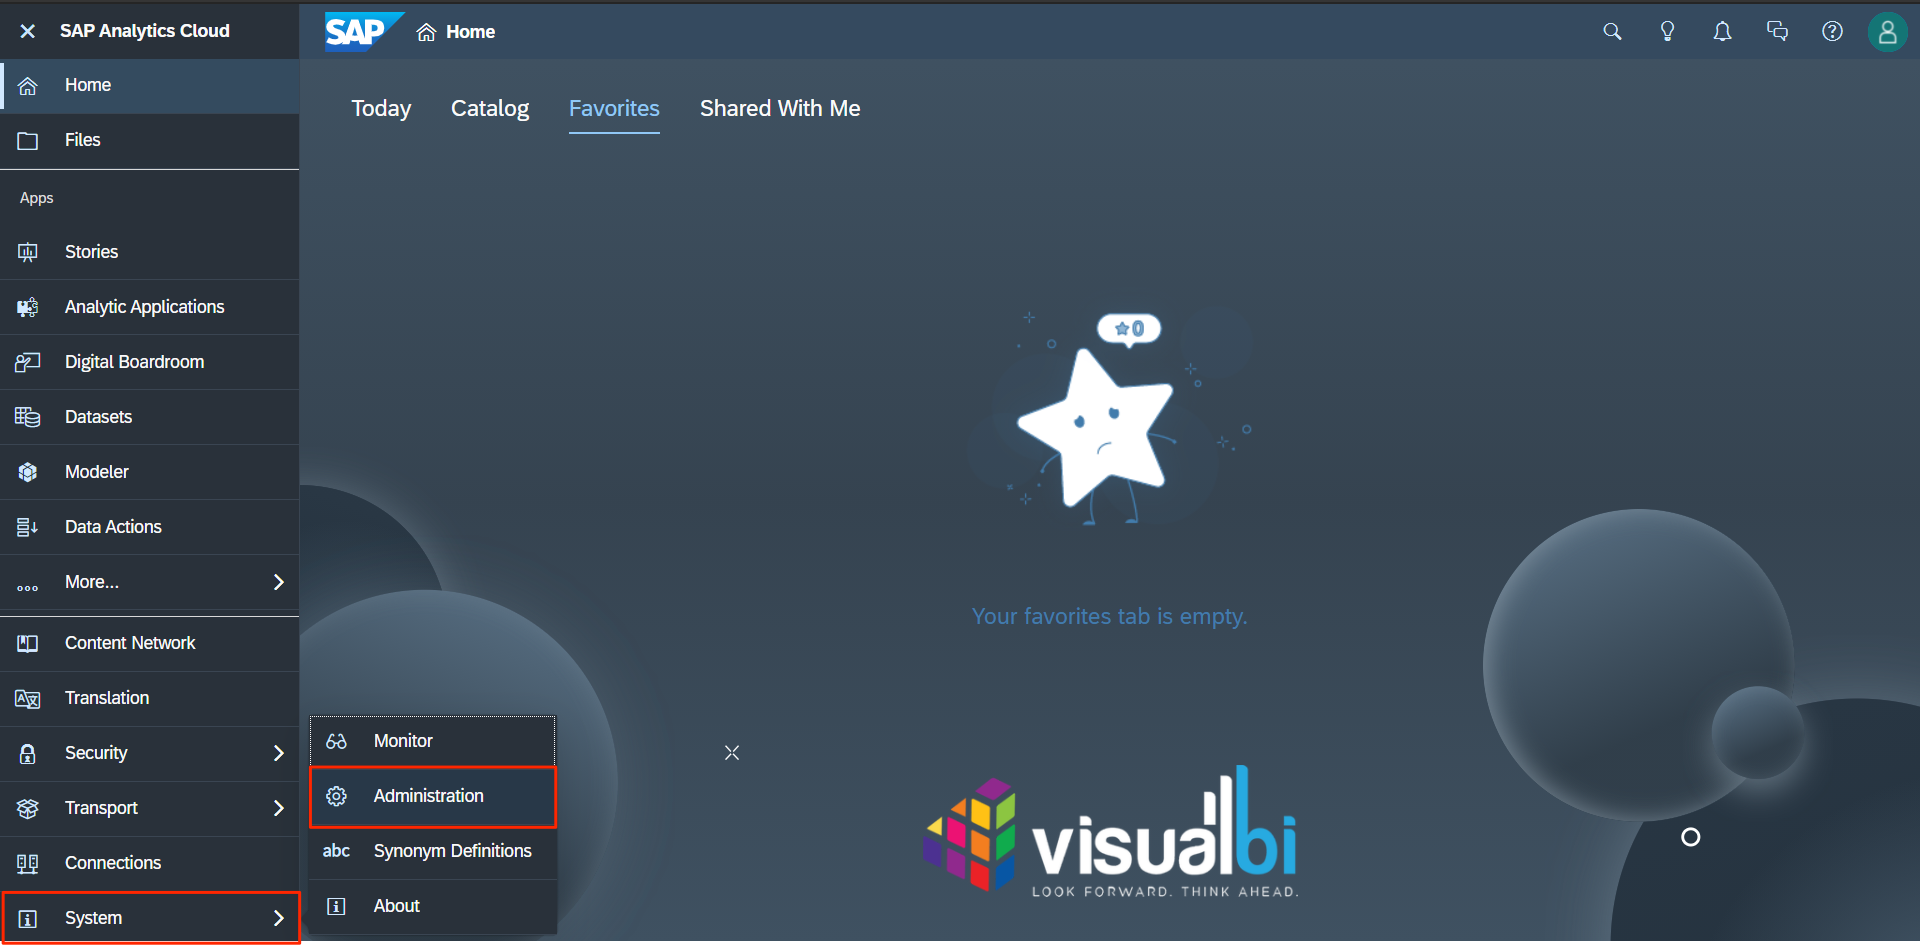
SAC Admin Page
Select the AppIntegration tab and click the button Add a New OAuth Client. Fill out the form fields to register a New OAuth Client.
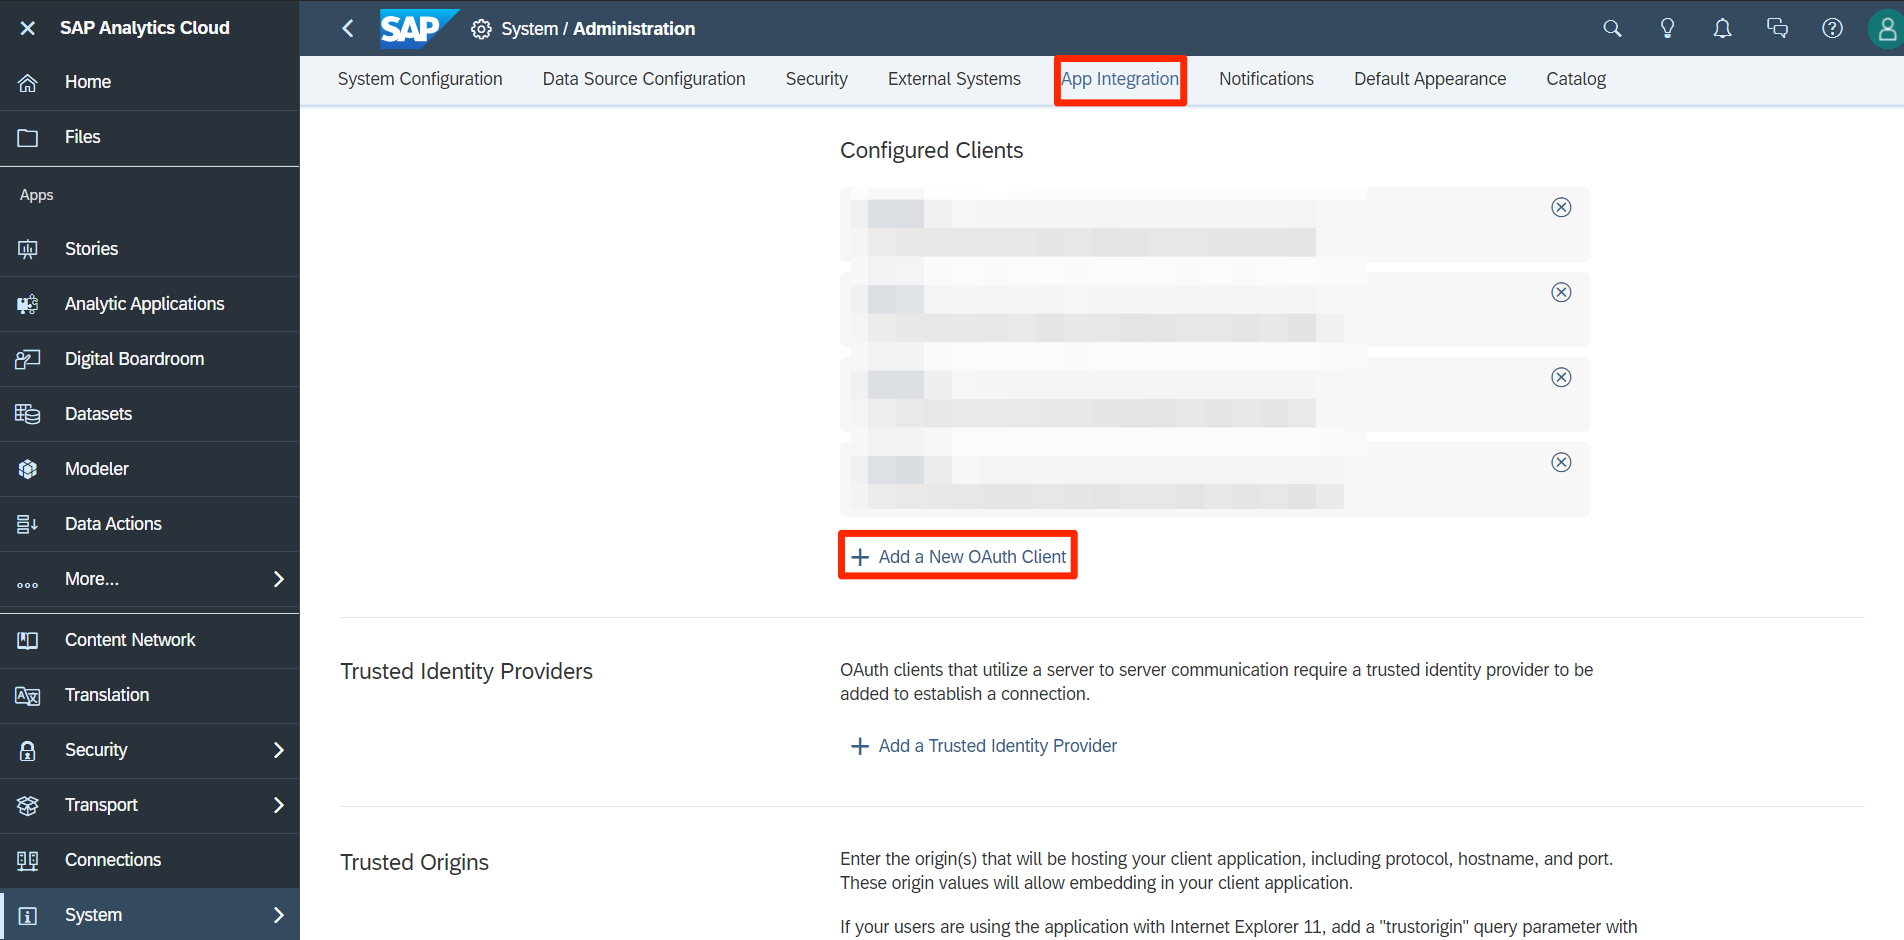
New OAuth Client
note
Authorization URL and Token URL shown in the form are required in your config.json file of the SAC Agent.
AuthorizationCodeGrant (three-legged) - User#
Register an OAuth Client Purpose Interactive Usage as shown in the image below.
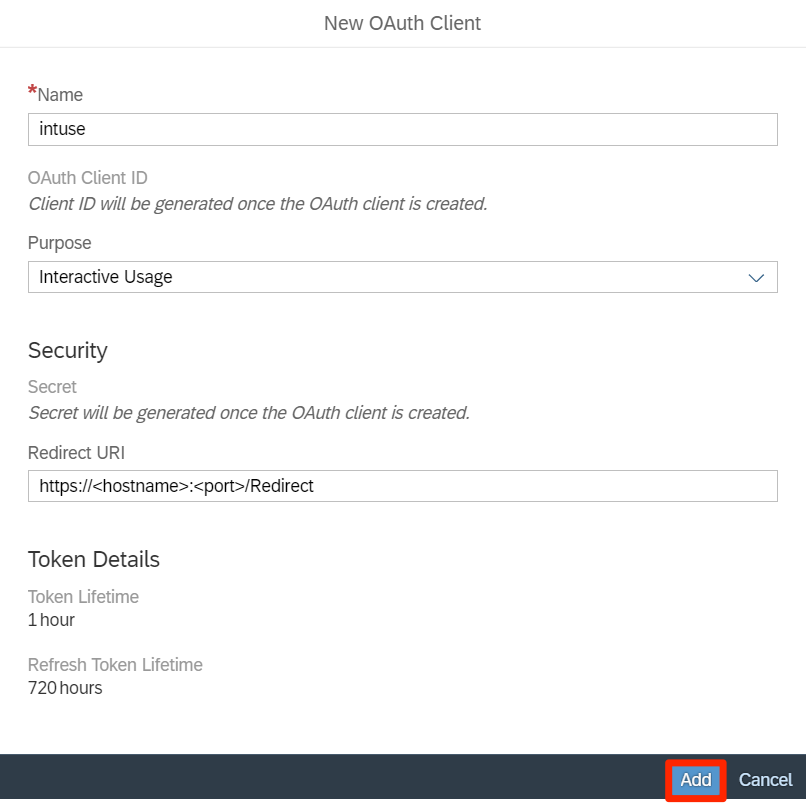
SAC - Add a New OAuth Client (Interactive Usage)
- Name – Enter any relevant name.
- OAuth Client ID – This will be the ThreeLegged Client ID in the
config.jsonfile of SAC Agent. - Purpose – Interactive Usage”
- Secret – This will be the ThreeLegged Client Secret in the
config.jsonfile of SAC Agent. - Redirect URL – Enter your BIHub’s backend app URL. Example:
https://host:8080/Redirect.- Token Details – Defining a lifetime for tokens is optional.
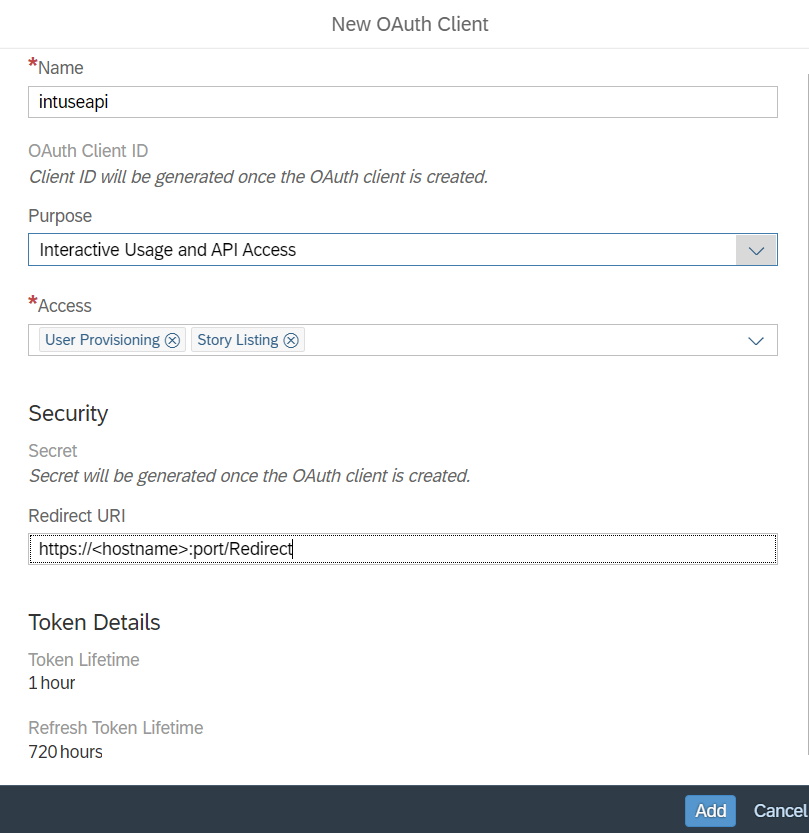
ClientCredentialsGrant (two-legged) – ResourceOwner#
note
This flow does not belong to a specific user. This configuration is for the resource owner.
You need to pass the resource owner(admin) credentials to access and get all users available on SAC. Register an OAuth Client as a Purpose Interactive Usage and API Access as shown in the image below.
- Name – Enter any relevant name.
- OAuth Client ID – This will be the Client ID in the
config.jsonfile of SAC Agent. - Purpose – set it as "Interactive Usage and API Access"
- Secret – This will be the Client Secret in the
config.jsonfile of the SAC Agent. - Redirect URL – Enter your BIHub’s backend app URL. Example:
https://host:8080/Redirect. - Token Details – Defining a lifetime for tokens is optional.
SAC - Add a New OAuth Client (Interactive Usage and API Access)
SAC - Trusted Origins#
By default embedding SAC stories in iframes is not allowed. Thus, we have to change our tenant’s settings to enable iframe embedding. This can be done on the tenant’s administration page ( ≡ -> System -> Administration ).
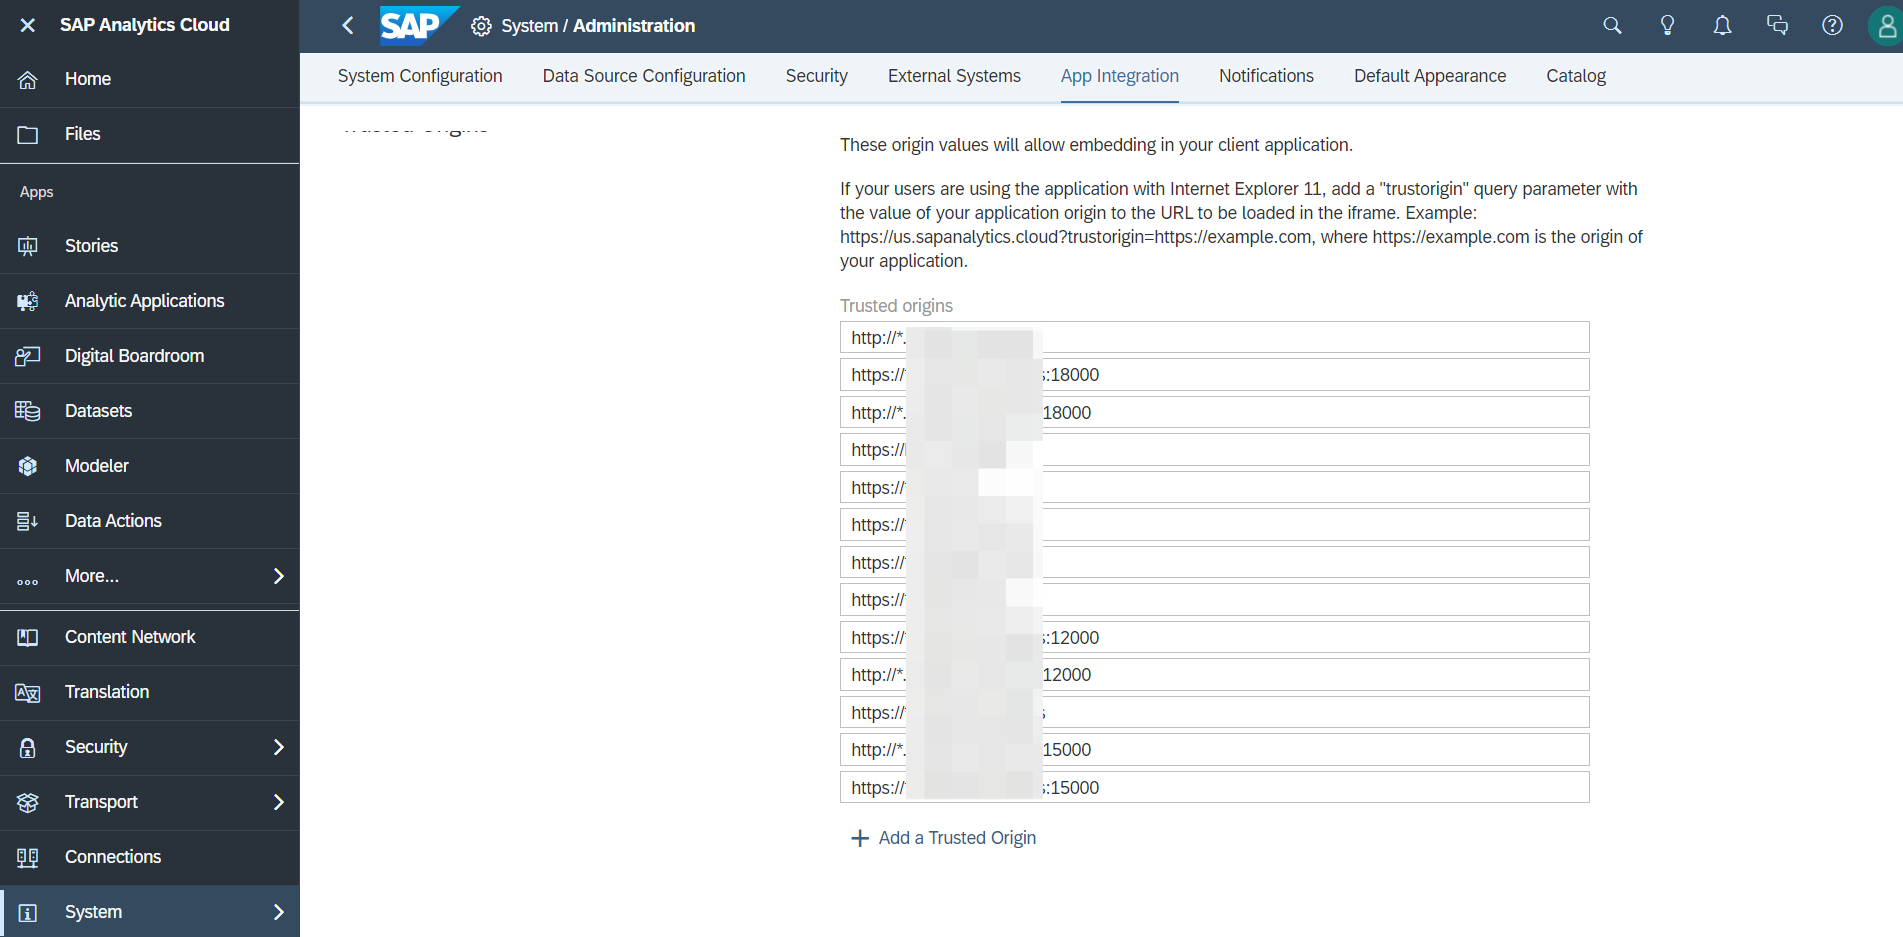
Trusted Origins
Select App Integration. In the section Trusted Origins, specify the origins for which you want to allow iframe embedding:
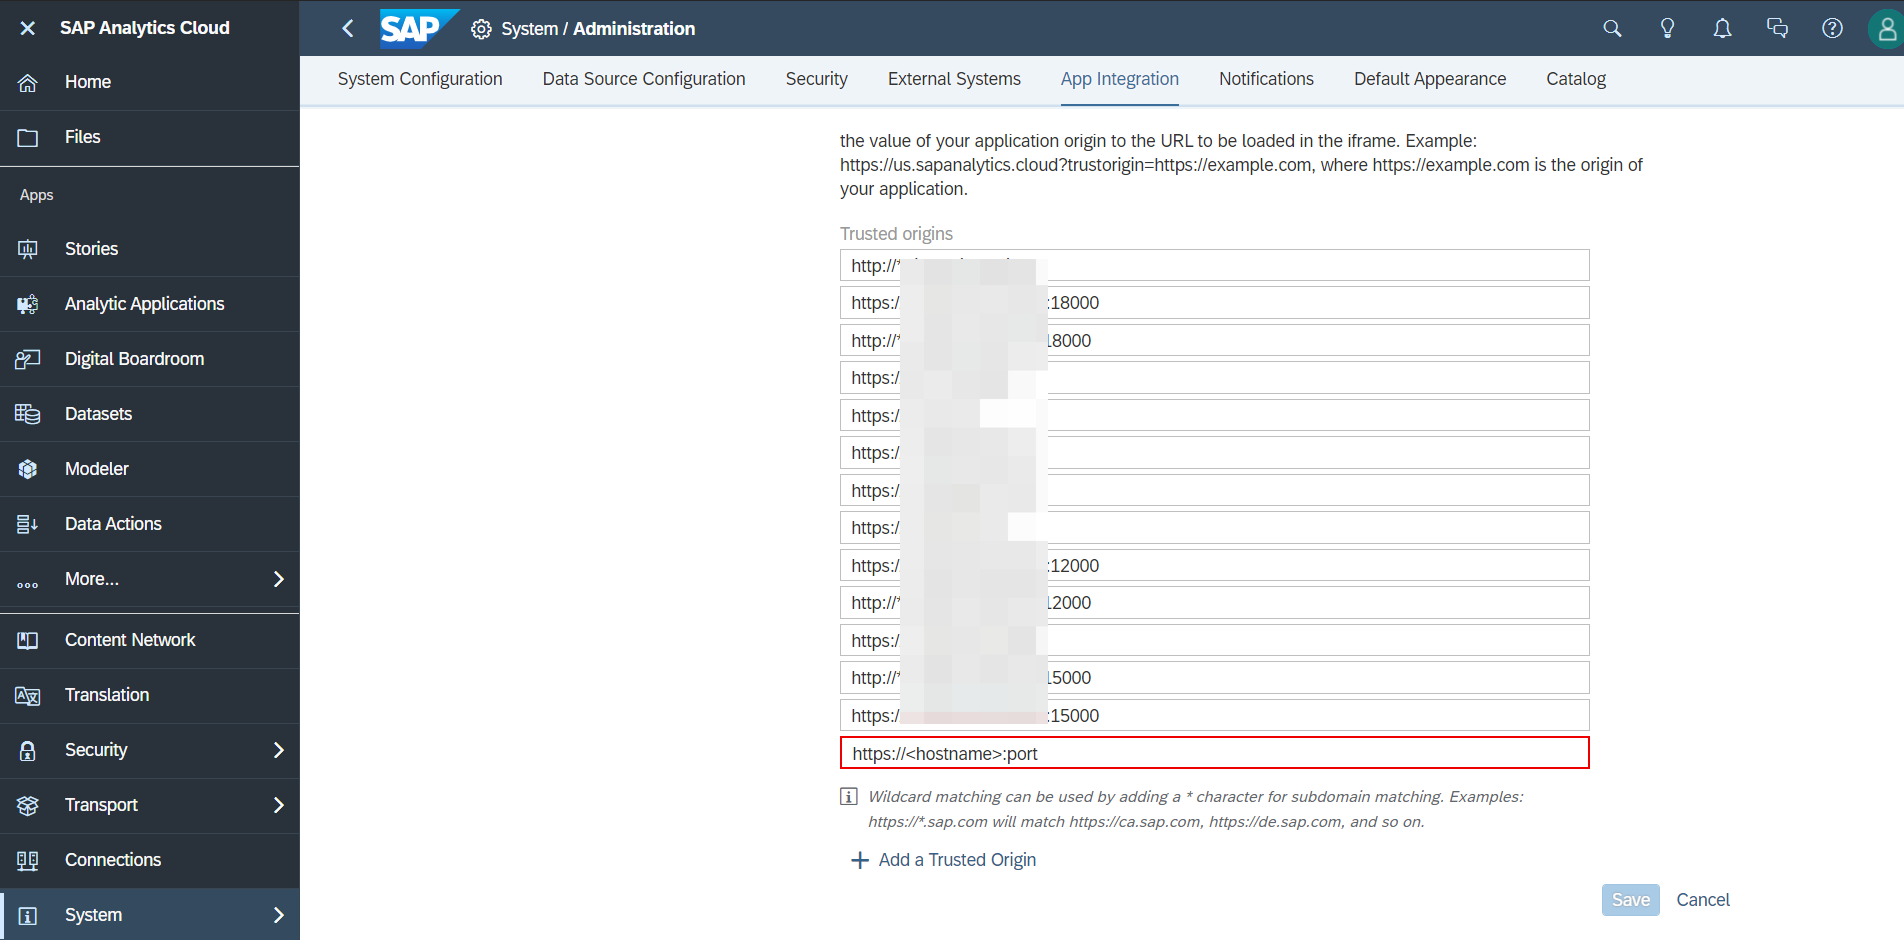
SAC - Add a Trusted Origin
Select Save.